Devil’s Food Cake with Marshmallow Frosting

You can’t have a birthday without a cake! Though no one knows for sure, there is some consensus among food historians about how our current tradition of celebrating birthdays with a candle topped cake evolved through the millennia.

It all began with the Ancient Egyptians who believed that a pharaoh’s coronation marked his “birth” as a god, and he should be honored as such. The Ancient Greeks continued the tradition of honoring gods and goddesses, offering moon shaped cakes glowing with candles to Artemis, the goddess of the moon. The burning candles symbolized the luminosity of both the moon and Artemis’ beauty. The Ancient Romans joined the party when they decided that mere mortals should also be honored, as long as the mortals were male. Friends’ and family members’ birthdays were acknowledged, while the government even created holidays to commemorate its most famous citizens’ birthdays. By the 18th century, Germans were celebrating Kinderfest, a birthday party for children. A cake would be topped with one candle for each year of life, plus one more for the next year. The candles were lit, a wish made and the candles blown out. Perhaps the smoke carried the guest of honor’s wish or prayer to Heaven? This German tradition of observing children’s birthdays made it to America by the late 1890s, with the “icing on the cake” arriving around 1910 in the form of a song still sung today, “Happy Birthday to You…”

A huge cake for a two year old!  And those flowers!
A huge cake for a two year old! And those flowers!

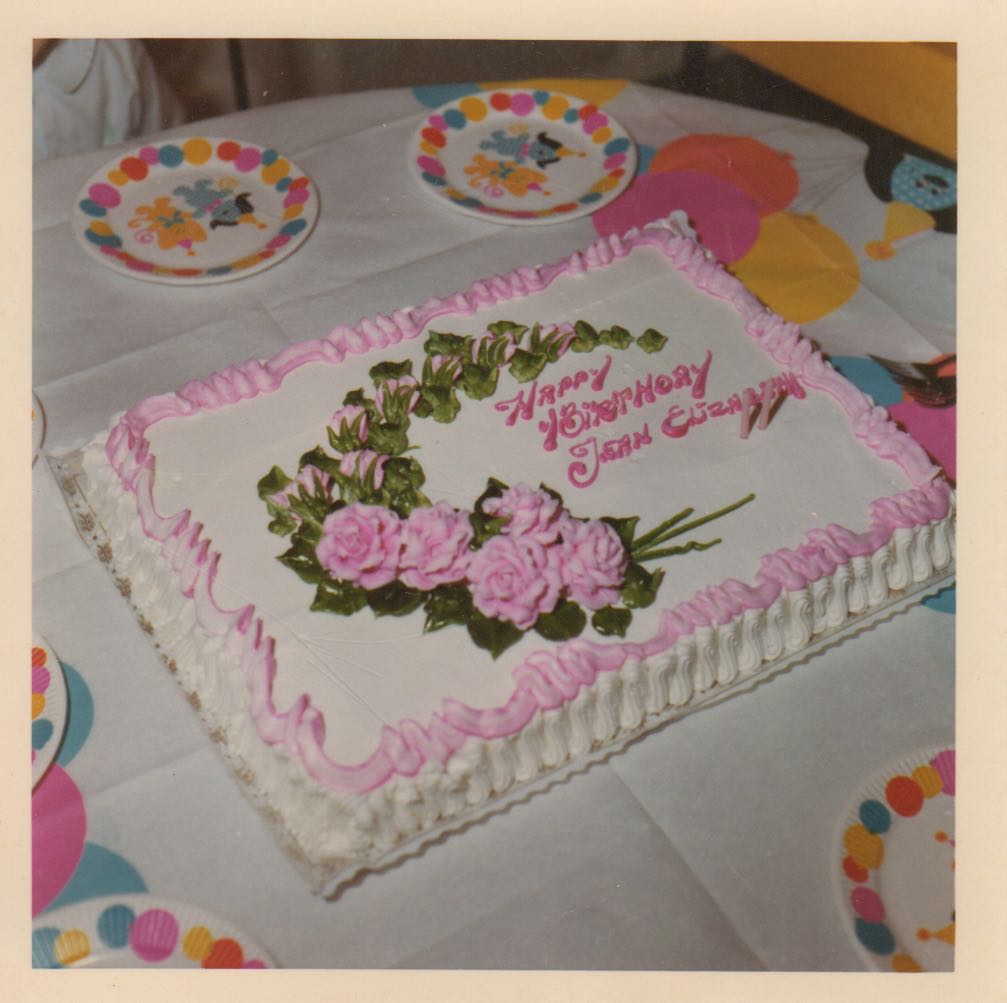
Flash forward to the 1970s and birthdays in my childhood home. The oldest of four, my youngest sibling was born when I was 6yrs old. My parents had 4 children in 6 years- needless to say, life was busy! Birthdays were always celebrated with parties. As an infant or toddler, it meant just family, but by nursery school it meant having friends to our house for cake and party games… think BINGO, Pin the Tail on the Donkey, and Hide and Seek. Mom did it all, but usually outsourced the cake. For my sister and me, a buttercream frosted confection covered with pink flowers was ordered from an Italian bakery. For my brothers, a Carvel ice cream cake was arranged. Carvel could turn Fudgie the Whale into anything, Santa, a leprechaun, or for my youngest brother, a very memorable “Jaws” cake.

Demonstrating knife skills at an early age.

One bakery cake that often graced our table was an absolute stunner! Its only downfall, the sides coated in sliced almonds. Not exactly standard party fare for the elementary school set that was more accustomed to Duncan Hines cake with coordinating Duncan Hines frosting. It wasn’t until well into adulthood that I confessed to my mom that I had never really liked the almond covered cake, and instead had dreamed of boxed cake mix and frosting from a tub. That is until one year when I actually did a not so scientific side-by-side comparison- boxed vs homemade and in a blind taste test, everyone (including me) chose homemade.

Ahh, the cake with the fancy almond coated sides.
Ahh, the cake with the fancy almond coated sides. My expression says it all.

Today, birthdays mean getting together with family and friends, as well as the honoree deciding the birthday dinner and dessert. Everyone has his or her favorites… ice cream pie to ice cream cake to traditional cake, even cheesecake. Whatever the birthday person wants, I will happily make. Recently in our house, we celebrated a 13th birthday. My son went back and forth planning the perfect menu for himself, finally deciding on take out from our favorite Mexican place followed by Chocolate Cake with Marshmallow Frosting for dessert. This chocolate cake has been a hit for years! Sometimes slathered in cream cheese frosting, but more often than not, swoopy fluffy Marshmallow Frosting is the request. The chocolate cake is moist, tender, and deep flavored. The frosting isn’t really made from marshmallows, it’s actually a Seven Minute Frosting, but the taste and look is so reminiscent of a marshmallow that’s what my kids have named it. And don’t just save this cake for birthdays- it is excellent any time!

Happy 13th Birthday!

Devil’s Food Cake

  • Servings: 12-16
  • Print

*adapted from Kathleen’s Bake Shop by Kathleen King

Ingredients:
2 ¼ cups all-purpose flour
2 teaspoons baking soda
½ teaspoon salt
1 cup unsalted butter, softened
2 ¼ cups firmly packed dark-brown sugar
3 eggs
3 squares (3 ounces) unsweetened chocolate, melted
½ cup buttermilk
1 cup boiling water
2 teaspoons vanilla extract

Instructions:
Preheat oven to 350°. Grease and flour two 9-inch pans or three 8-inch round pans.

In a large bowl, sift together flour, baking soda, and salt.

In another large bowl, cream butter and sugar with an electric mixer. Add eggs one at a time, mixing well after each addition. Stir in melted chocolate.

Beginning and ending with the dry ingredients, add flour mixture and buttermilk alternately to the butter mixture in three stages. Add boiling water and vanilla. Mix well, but don’t overmix. The batter will be very thin and soupy at this point; don’t be alarmed!

Pour batter into prepared pans and bake for 30 minutes, or until a cake tester (toothpick or bamboo skewer) inserted in center comes out clean. Remove pans to wire rack. Cool 5 to 10 minutes before removing cake from pans; finish cooling on rack.

Frost or dust with confectioners sugar and serve with ice-cream.

Makes one 9-inch, 2 layer cake or one 8-inch, 3-layer cake.

Happy Birthday!
Happy Birthday!

Marshmallow Frosting

  • Servings: enough to frost one 9-inch layer cake
  • Print

*adapted from The Martha Stewart Cookbook by Martha Stewart

Ingredients:
3 egg whites
1 ¾ cups of sugar
5 Tablespoons cold water
¼ teaspoon cream of tartar
1 teaspoon vanilla extract

Instructions:
Place egg whites, sugar, water, and cream of tartar in the top of a double boiler over but not touching rapidly boiling water.

Beat with an electric hand mixer for 7 minutes. Remove from heat, add the vanilla, and continue beating until fluffy and glossy.

Spread the frosting between the layers and over the exterior of the cake with an off set spatula or knife.

This frosting is best served the day it is made.

Simple Roast Chicken and Vegetables

Growing up, my mom’s mom often came for extended visits. A widow by the time I was born, Nanny grew up in Belfast, Ireland and moved to Brooklyn, New York in her 20s. She relied on walking and public transportation her entire life, and never felt the need to learn how to drive on her own. My dad would drive the hour or so to collect and bring her to us, and she would stay for a week or two at a time until dad drove her back home. My memories of those visits are very special. We walked everywhere… to our little town center where we’d sit at Woolworth’s counter sipping ice-cream sodas; to the beach, boardwalk, or park where she would find a spot in the shade (to protect her gorgeous Irish skin), content to watch her grandchildren romp around.

The memories of her visits that influenced me most are the taste memories. Nanny would take over the kitchen, giving my mom a well deserved break from feeding a family of six. Nanny’s dinners were simple, learned during her very humble childhood… shepherd’s pie, Irish stew, and roast chicken. The house would smell divine, luring all of us in… onions, carrots, celery, and potatoes roasting alongside a chicken; mingling with flavorful juices; crisping and browning on the outside, yet everything remaining tender inside. Family lore has it that Nanny’s parents kept chickens in Belfast- urban farmers a century ago! She didn’t continue the homesteading in Brooklyn, so I have no doubt she learned how to cook a chicken properly before she left Ireland.

Ready for the oven.
Ready for the oven.

Roast chicken and veggies are one of the best one dish dinners to have in your rotation. It only takes a little forethought- you must have a chicken on hand, but the other ingredients are probably already in your fridge and pantry. No need to stand in front of the stove stirring, or browning first, then transferring to another pan. Simply put the chicken in the oven, and walk away. An hour later, add the veggies to the same roasting pan, and again- walk away. Depending on the size of your bird, about 30 minutes later start checking the chicken. You’ll know the bird is done when the juices run clear when you cut between a leg and thigh. The rule of thumb is 20-30 minutes/pound. Please check for yourself as cooking times can vary depending on your oven, as well as the temperature of the chicken when it went into the oven. The veggies should be fork tender, and golden brown in spots.

Adding the vegetables.

Put everything on a platter and bring to the table to serve family style. You’ll be creating taste memories for your own family. It doesn’t get any easier!

Ready for the table.

One of the bonuses of a roast chicken and veggie dinner are the leftovers… think burritos, tacos, stir fry, chicken salad or throw some shredded chicken into marinara sauce destined for pasta, adding a bit of protein.

Simple Roast Chicken and Vegetables

  • Servings: 4-6
  • Print

Chicken:
1 3-4lb chicken
1 lemon
5 cloves of garlic, skin on
salt and freshly ground black pepper

Vegetables:
4 large carrots, chopped into 1½-2” pieces
4 celery stalks, chopped into 1½-2” pieces
5 small red or yellow (Yukon gold) potatoes, halved
1 large yellow onion, quartered
salt and freshly ground black pepper
1 T olive oil

Instructions:
Preheat oven to 375°.

Put chicken into a roasting pan. Sprinkle generously with salt and pepper all over chicken, inside and out.

Wash lemon in cold water and dry. Cut in half.

Put lemon in cavity, along with garlic cloves.

Place chicken in the middle of oven to roast for an hour.

In the meantime, toss the veggies with salt, pepper and olive oil. After chicken has roasted for an hour, remove from the oven and scatter vegetables all around, tucking some underneath the chicken if possible.

Place chicken and vegetables back in the oven. Continue roasting for at least 30 more minutes or until juices between leg and thigh run clear when cut.* Remove chicken to platter and tent with foil. If necessary continue roasting vegetables until tender when pierced with a knife.

*General rule when roasting chicken is 20-30 minutes/pound at 375°.

Fast and Crunchy Baked Cod with Horseradish, Garlic, and Breadcrumbs

Meatless Monday. What a terrific trend and one that we try to embrace at our  Crunchy Fish Sandwich house. For us it can mean “breakfast for dinner,” rice and beans, or fish. Mostly it means fish… a fillet sprinkled with salt and pepper, drizzled with olive oil, and tossed in the oven. Serve with veggies, a starch of some sort, and dinner is done. This was my Monday night formula- not bad, but the natives started getting restless, an eye roll here, a sigh there, “let me guess, salmon, again?” Clearly time for a change, but simplicity and speed rule on weeknights. Enter “Fast and Crunchy Baked Cod with Horseradish, Garlic, and Breadcrumbs” courtesy of one of my favorite resources, Cook’s Illustrated. This recipe is delicious, fast, has great flavor, and is adaptable. Though the original recipe calls for cod, I’ve found equal success with halibut and haddock; I haven’t tried grouper, but imagine that would work too. Follow the recipe and serve as is, but lately we’ve enjoyed a more casual take by serving the fillets as “Fish Sandwiches” on soft rolls with coleslaw on the side. Perfect as we head into warmer nights…

Do you do any favorite recipes for Meatless Monday?

Fast and Crunchy Baked Cod with Horseradish, Garlic, and Breadcrumbs

  • Servings: 4
  • Print

*from Cook’s Illustrated

Ingredients:
4 skinless cod fillets, 1 ¼ inches thick
salt and ground black pepper
1 cup fresh bread crumbs (panko will also work, as will crushed Ritz crackers)
2 Tablespoons minced fresh dill or parsley
¼ cup mayonnaise
1 Tablespoon Dijon mustard
2 Tablespoons drained prepared horseradish
1 small garlic clove, minced
1 Tablespoon fresh lemon juice
pinch cayenne
lemon wedges, for serving

Instructions:
Preheat oven to 450 degrees. Grease a 13×9-inch baking dish or line with foil.

Pat cod dry with paper towels and season with salt and pepper. Lay cod in baking dish, spacing fillets about ½ inch apart.

Toss bread crumbs with 1 tablespoon of dill. In separate bowl, combine remaining tablespoon of dill, mayonnaise, mustard, horseradish, garlic, lemon juice, and cayenne. Spread mayonnaise mixture over top and sides of fish. Press breadcrumbs into mayonnaise, making sure they adhere.

Bake on center rack until crumbs are golden brown and all but the very center of fish has turned from translucent to opaque, about 15 minutes. Serve with lemon wedges.

Combine horseradish, mayonnaise, mustard, garlic, lemon, dill, and cayenne
Combine horseradish, mayonnaise, mustard, garlic, lemon, dill, and cayenne.
Dilled Breadcrumbs
Combine chopped dill and breadcrumbs.
Coat tops and sides of fish with mayonnaise mixture.  Top with breadcrumbs and press to be sure they adhere.
Coat tops and sides of fish with mayonnaise mixture. Top with breadcrumbs and press to be sure they adhere. Bake at 450 degrees for 15 minutes or so.
Fish is out of the oven!
Crunchy Fish Sandwich with  Cole Slaw
Crunchy Fish Sandwich with Cole Slaw

Strawberry Mascarpone Tart with Balsamic Glaze

IMG_5168I adore fruit desserts. I like cake, cookies, and bars of all types too, but if given the choice between a slice of fruit filled pie or a slice of chocolate cake- the pie is always going to win. However, as much as I’m smitten with fruit filled confections, I become panic stricken at the thought of making pie. Well, not the whole pie; it’s the crust that produces anxiety, specifically getting that crumbly mass of flour, fat, and ice cold water to come together in such a way that I can roll it out and successfully transfer it to a pie plate. And then, even if I do get the crust in the tin, there is the decorative crimping, braiding, and/or latticing business that has to be worked out! More than one pre-Thanksgiving prep day has resulted in me cursing the pastry gods, followed by a run to the store to buy a premade pie crust that I magically unfurl into the pie tin of my choice.

Homemade pie crust just stumps me. With plenty of practice, patience and loads of flour, shortening or butter and ice water I know I’ll figure it out. But for now, when the fruit at the market or farm stand is begging to be brought home, I rely on desserts that do not have a roll out, transfer to a pie plate component. Think cobblers, crostadas (free form crust) and tarts. Yes, tarts! With a tart, you just dump your crumbly dough in the pan and press it into place- no rolling or transferring required. And tarts are gorgeous. Pans with a removable bottom allow you to see their beautifully formed golden sides. You’ll look like a pastry pro!

This particular tart recipe also has the benefit of a no bake filling, a quick whisk of mascarpone cheese, powdered sugar, lemon juice, zest, vanilla and salt. Topping the tart are perfectly juicy strawberries, the result of a short and sweet mingle with granulated sugar. The tart is absolutely delicious left at that. However, a drizzle of balsamic glaze that has been enhanced with a bit of strawberry juice (product of the previously mentioned mingle) really pushes this dessert over the top.  If your eaters are slightly skeptical of mixing balsamic vinegar with their sweets, serve it in a pretty pitcher on the side. Encourage a try, just a drop or two. I promise they will be converted.

Enjoy!

Strawberry Mascarpone Tart with Balsamic Glaze


*adapted from Gourmet
April 2009IMG_5169

For Tart Shell:

1 ¼ cups all-purpose flour
3 Tbsp granulated sugar
rounded ¼ tsp salt
7 Tbsp unsalted butter, cut into ½” pieces
1 large egg yolk
½ tsp pure vanilla extract
½ tsp fresh lemon juice
1 tsp lemon zest
3 Tbsp cold water

For Filling:

1 ½ lb strawberries, trimmed and halved lengthwise
1/3 cup granulated sugar
½ cup balsamic vinegar
1 lb mascarpone (about 2 cups)
¼ cup powdered sugar
1 tsp fresh lemon juice
½ tsp lemon zest
¾ tsp pure vanilla extract

Equipment: 9-inch fluted tart pan with removable bottom; pie weights, dried beans or raw rice

Make tart shell:

Blend together flour, sugar, salt and butter in a bowl with a pastry blender (or pulse in a food processor) just until mixture resembles coarse meal with some roughly pea-sized butter lumps. Beat together yolk, vanilla, lemon juice, lemon zest and water with a fork, then drizzle over flour mixture and stir with fork (or pulse) until mixture begins to come together.

Knead with floured hands on a lightly floured surface until a dough forms, then gently knead 4 or 5 times. Press into a 5-inch disk. Place in center of tart pan and cover with plastic wrap. Using your fingers and bottom of a flat-bottomed measuring cup, spread and push dough to evenly cover bottom and side of pan. Prick bottom of tart shell all over with a fork and freeze until firm, at least 10 minutes. Preheat oven to 375° with rack in middle. Line tart shell with foil and fill with pie weights, dried beans or raw rice. Bake until side is set and edge is pale golden, about 20 minutes. Carefully remove foil and weights and continue to bake until shell is deep golden all over, about 20 minutes. Cool in pan, about 45 minutes.

Make Filling While Tart Shell Cools:

Stir together strawberries and granulated sugar in a bowl and let stand, stirring occasionally, 30 minutes. Strain in a sieve set over a small saucepan, reserving berries. Add balsamic vinegar to liquid in saucepan and boil until reduced to about ¼ cup, 10-15 minutes. Transfer to a small bowl to cool slightly.

Meanwhile, whisk together mascarpone, confectioners sugar, lemon juice, zest, vanilla, and a pinch of salt until stiff. Cover and keep chilled in refrigerator until ready to use.

Assemble Tart:

Spread mascarpone mixture evenly in cooled tart shell, then top with strawberries. Drizzle balsamic glaze all over tart. Alternatively, drizzle on individual slices as desired.

Here we go!

Using a pastry blender cut butter into the flour mixture.  You can also use a food processor for this step.
Using a pastry blender cut butter into the flour mixture. You can also use a food processor for this step.
The butter has been cut in, leaving the flour mixture crumbly with a few pea sized pieces of butter.
Whisk the egg yolk, lemon juice, zest, vanilla, and water together.
Using a fork, mix the egg yolk mixture into the flour.
Take a small handful of dough and squeeze. If it holds together, the dough is ready to form.
Ready to go!
Ready to go!
Place the dough on a lightly floured surface.
With lightly floured hands, knead the dough 4 or 5 times until it comes together.  Form into a 5 inch disk.
With lightly floured hands, knead the dough 4 or 5 times until it comes together.  Form into a 5 inch disk
Place the disk in tart pan.  Cover with wax paper or plastic wrap.
Place the disk in tart pan. Cover with wax paper or plastic wrap.
Using your fingers and the bottom of a flat bottomed measuring cup, press the dough evenly to cover bottom and sides of tart pan.
Using a fork, prick all over the bottom of the tart.
Using a fork, prick all over the bottom of the tart. Place in freezer to chill for at least 10 minutes.
After an hour in the freezer...
After an hour in the freezer…
Line frozen tart shell with foil and fill with pie weights, dried beans or raw rice.
Line frozen tart shell with foil and fill with pie weights, dried beans or raw rice. Bake in preheated oven for 20 minutes.
After 20 minutes, remove the foil and weights and continue to bake until golden- approximately 20 more minutes.
20 minutes later.  A little too brown, but it will be ok.  Lesson- keep an eye on the tart shell while it's baking!
20 minutes later. A little too brown, but it will be ok. Lesson- keep an eye on the tart shell while it’s baking!
Toss the strawberries and sugar together.  Leave for 30 minutes, stirring occasionally.
Toss the strawberries and sugar together. Leave for 30 minutes, stirring occasionally.
Whisk together mascarpone, powdered sugar, lemon juice, zest, and vanilla.
Whisk together mascarpone, powdered sugar, lemon juice, zest,  vanilla, and pinch of salt.
Using a sieve, strain the strawberries over a small saucepan to catch any juice they've released.
Using a sieve, strain the strawberries over a small saucepan to catch any juice they’ve released.
Add balsamic vinegar to strawberry liquid.  Boil until reduced in half (about 15 minutes).  Set aside to cool.
Add balsamic vinegar to strawberry liquid. Boil until reduced in half (about 15 minutes). Set aside to cool.
Tart shell has cooled for at least 30 minutes.  Ready to assemble
Tart shell has cooled for at least 30 minutes. Ready to assemble!
Spread mascarpone evenly across bottom of tart shell.
Place strawberries on top of filling.
Serve with balsamic glaze on the side.