Butternut Squash Soup with Cider Cream

Butternut Squash Soup with Cider Cream

Butternut SquashButternut squash has a long shelf life- which works well for me when I receive large quantities of it as part of my CSA! As you can imagine the growing season in New England is short, though our local farm does an amazing job of squeezing every last bit of sunshine and warmth out of earth and sky to make the harvest last as long as possible. In fact, they do such a good job, that the farm offers an “Extended Harvest” share, with pick ups well into November.

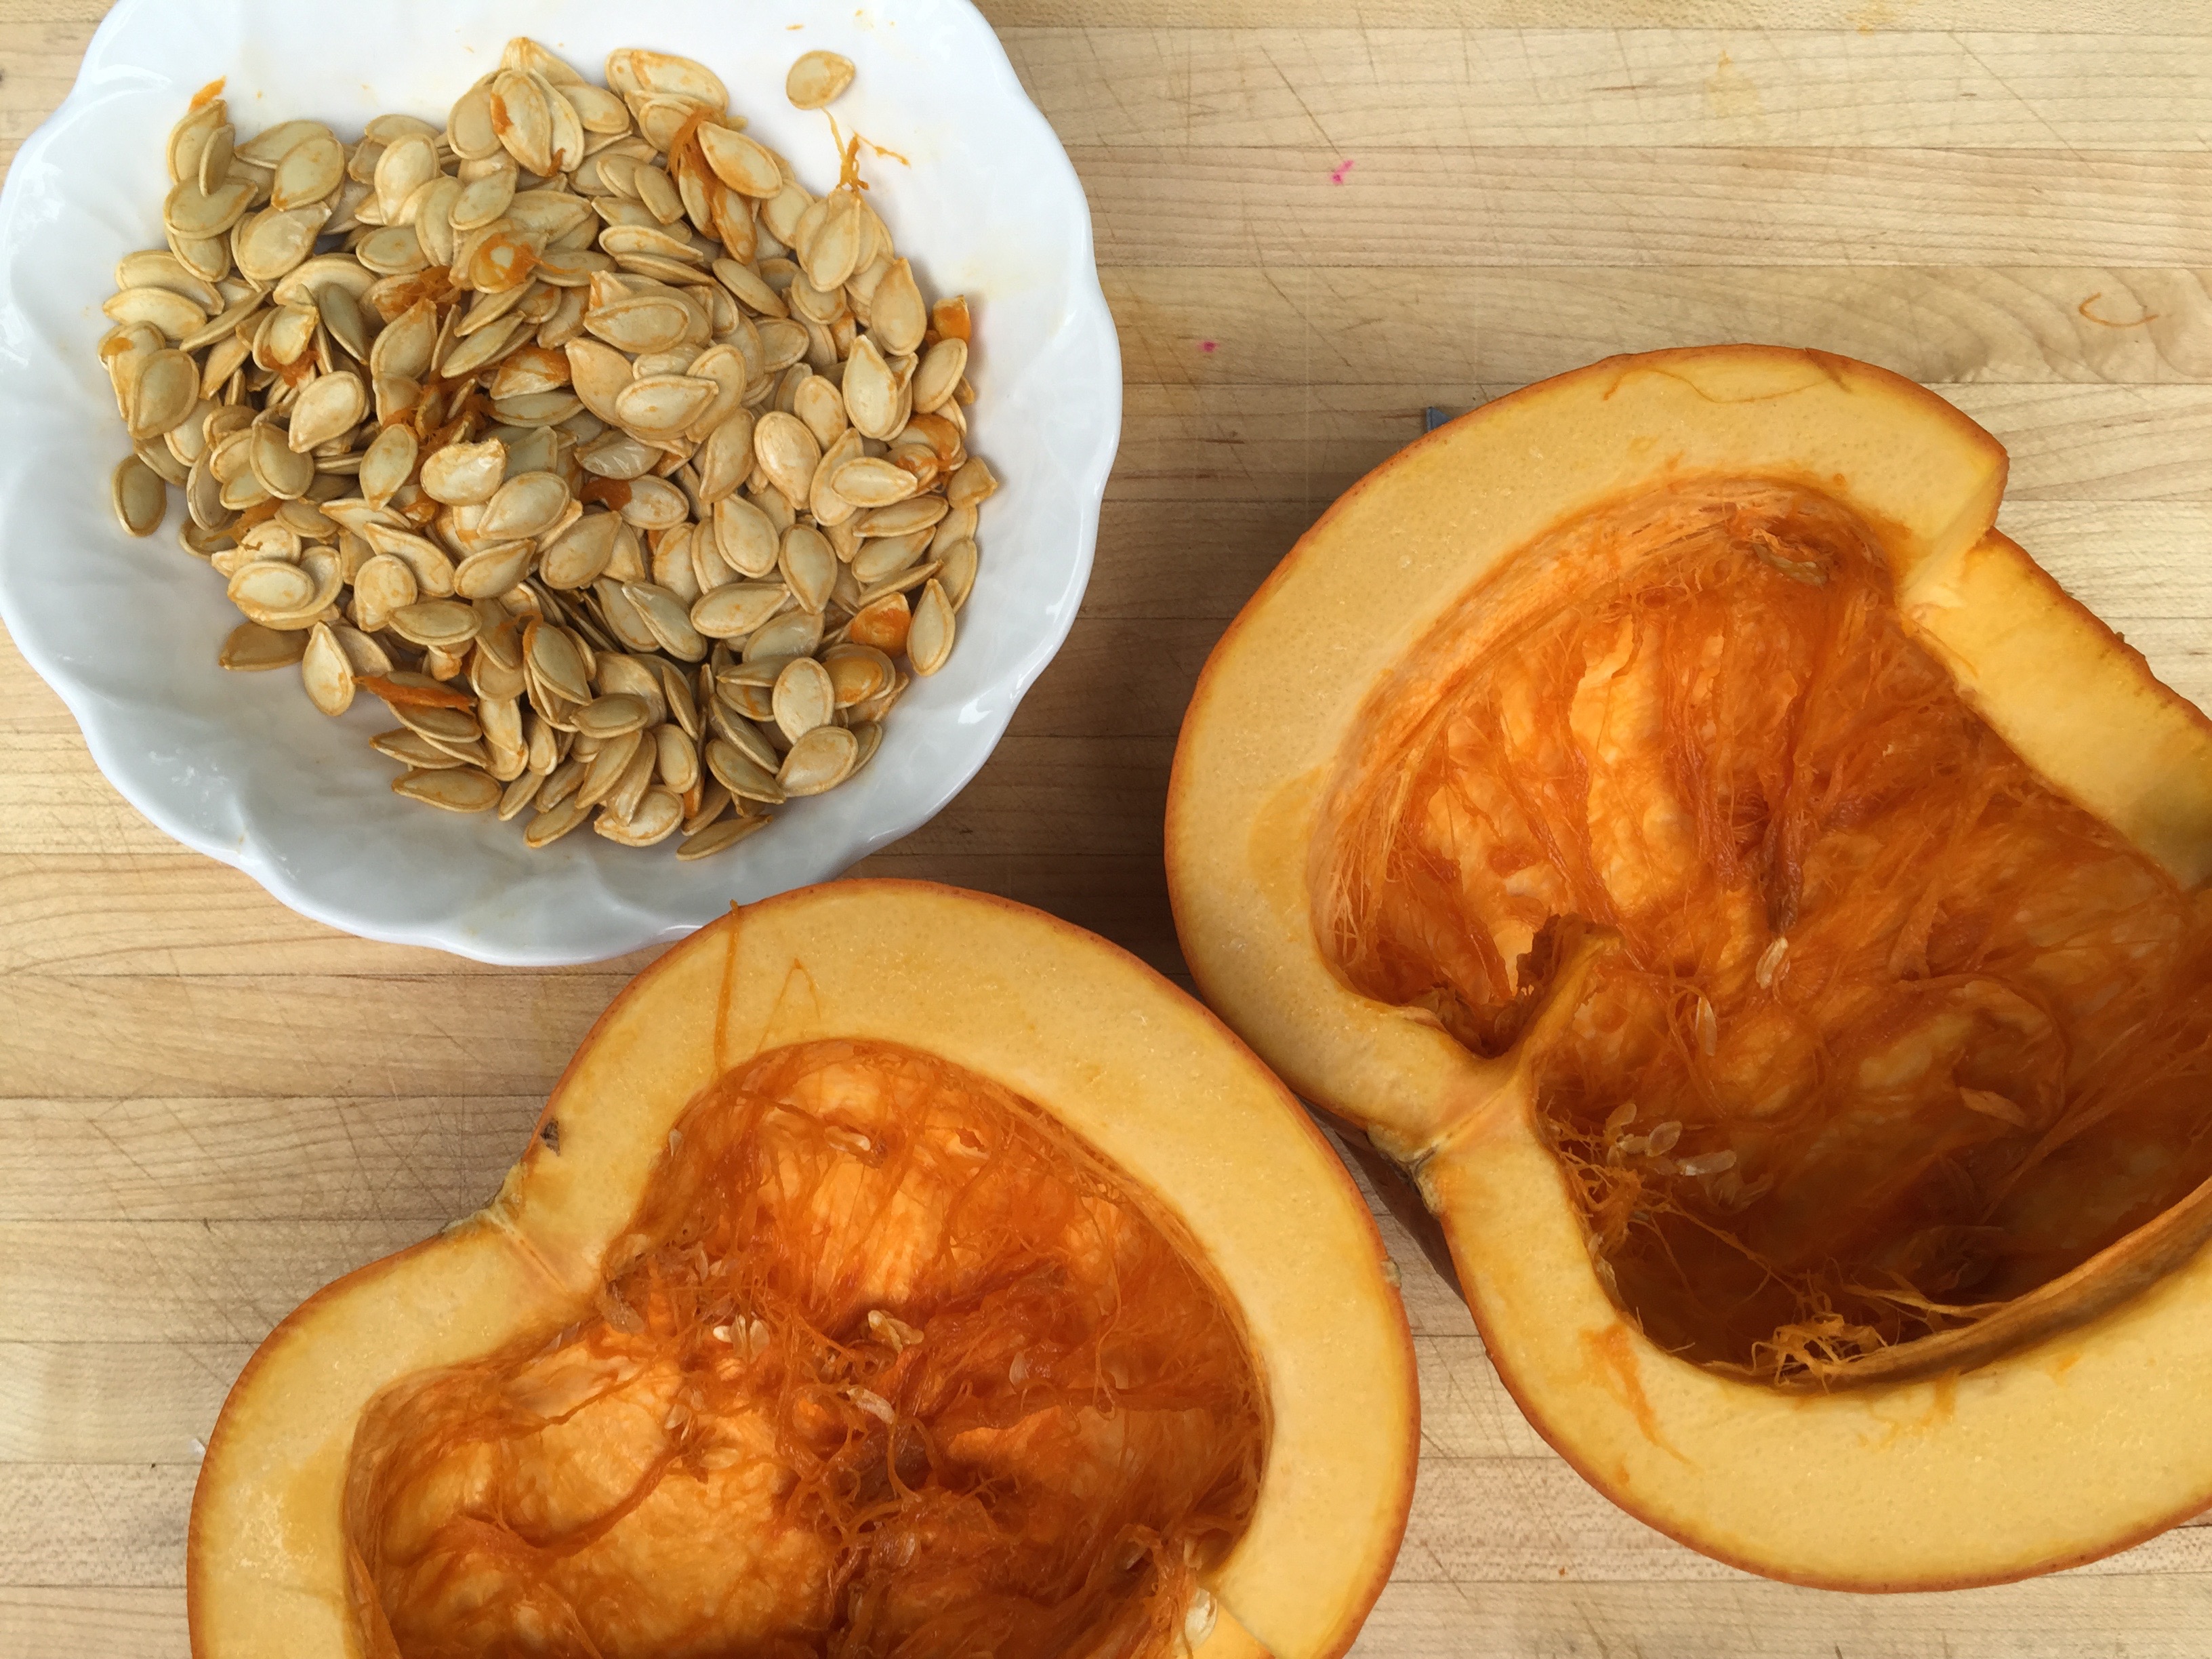
Each week from June through November I am the happy recipient of culinary treasures… fruits and veggies of all sorts. The spring and summer pick ups Cabbagesgenerally contain perishable produce that has to be dealt with immediately… eaten, frozen, or canned for future meals. The November shares are far more forgiving in terms of shelf life; onions, garlic, potatoes, and winter squash can live on my kitchen counter or in a cool spot in the basement for a long while before I turn my attention to them. Cabbages, radishes, and carrots will survive almost the entire winter in the produce drawers of my fridge.

Butternut squash is one of my favorite winter veggies and incredibly versatile. It can be baked, roasted, or turned into soup, pairing well with many different types of flavors. According to The Flavor Bible, the wide range of combinations include (but is definitely not limited to):
Butternut squash + bacon + maple syrup + sage
Butternut squash + cilantro + coconut + ginger
Butternut squash + ricotta cheese + sage

Below is my take on Butternut Squash Soup with Cider Cream. The tart apples are beautiful with the rich nutty squash, while the cider’s sweetness rounds everything out. I usually use chicken stock, but vegetable stock will work equally well if you’d like to keep this strictly vegetarian.

Do you have a favorite winter vegetable that you like to use? What do you with it?

Butternut Squash Soup with Cider Cream

Butternut Squash Soup with Cider Cream

  • Servings: 10
  • Print

*adapted from Bon Appetit

Ingredients:
5 Tablespoons unsalted butter
2 ½ lbs butternut squash, peeled, seeded, cut into ½-inch pieces (about 6 cups)
2 cups chopped leeks (white and pale green parts only)
½ cup chopped peeled carrot
½ cup chopped celery
2 small granny smith apples, peeled, cored, chopped
1 ½ teaspoons dried thyme
½ teaspoon crumbled dried sage leaves
5 cups chicken or vegetable stock
1 ½ cups apple cider, divided
2/3 cup plain greek yogurt or crème fraiche

Instructions:
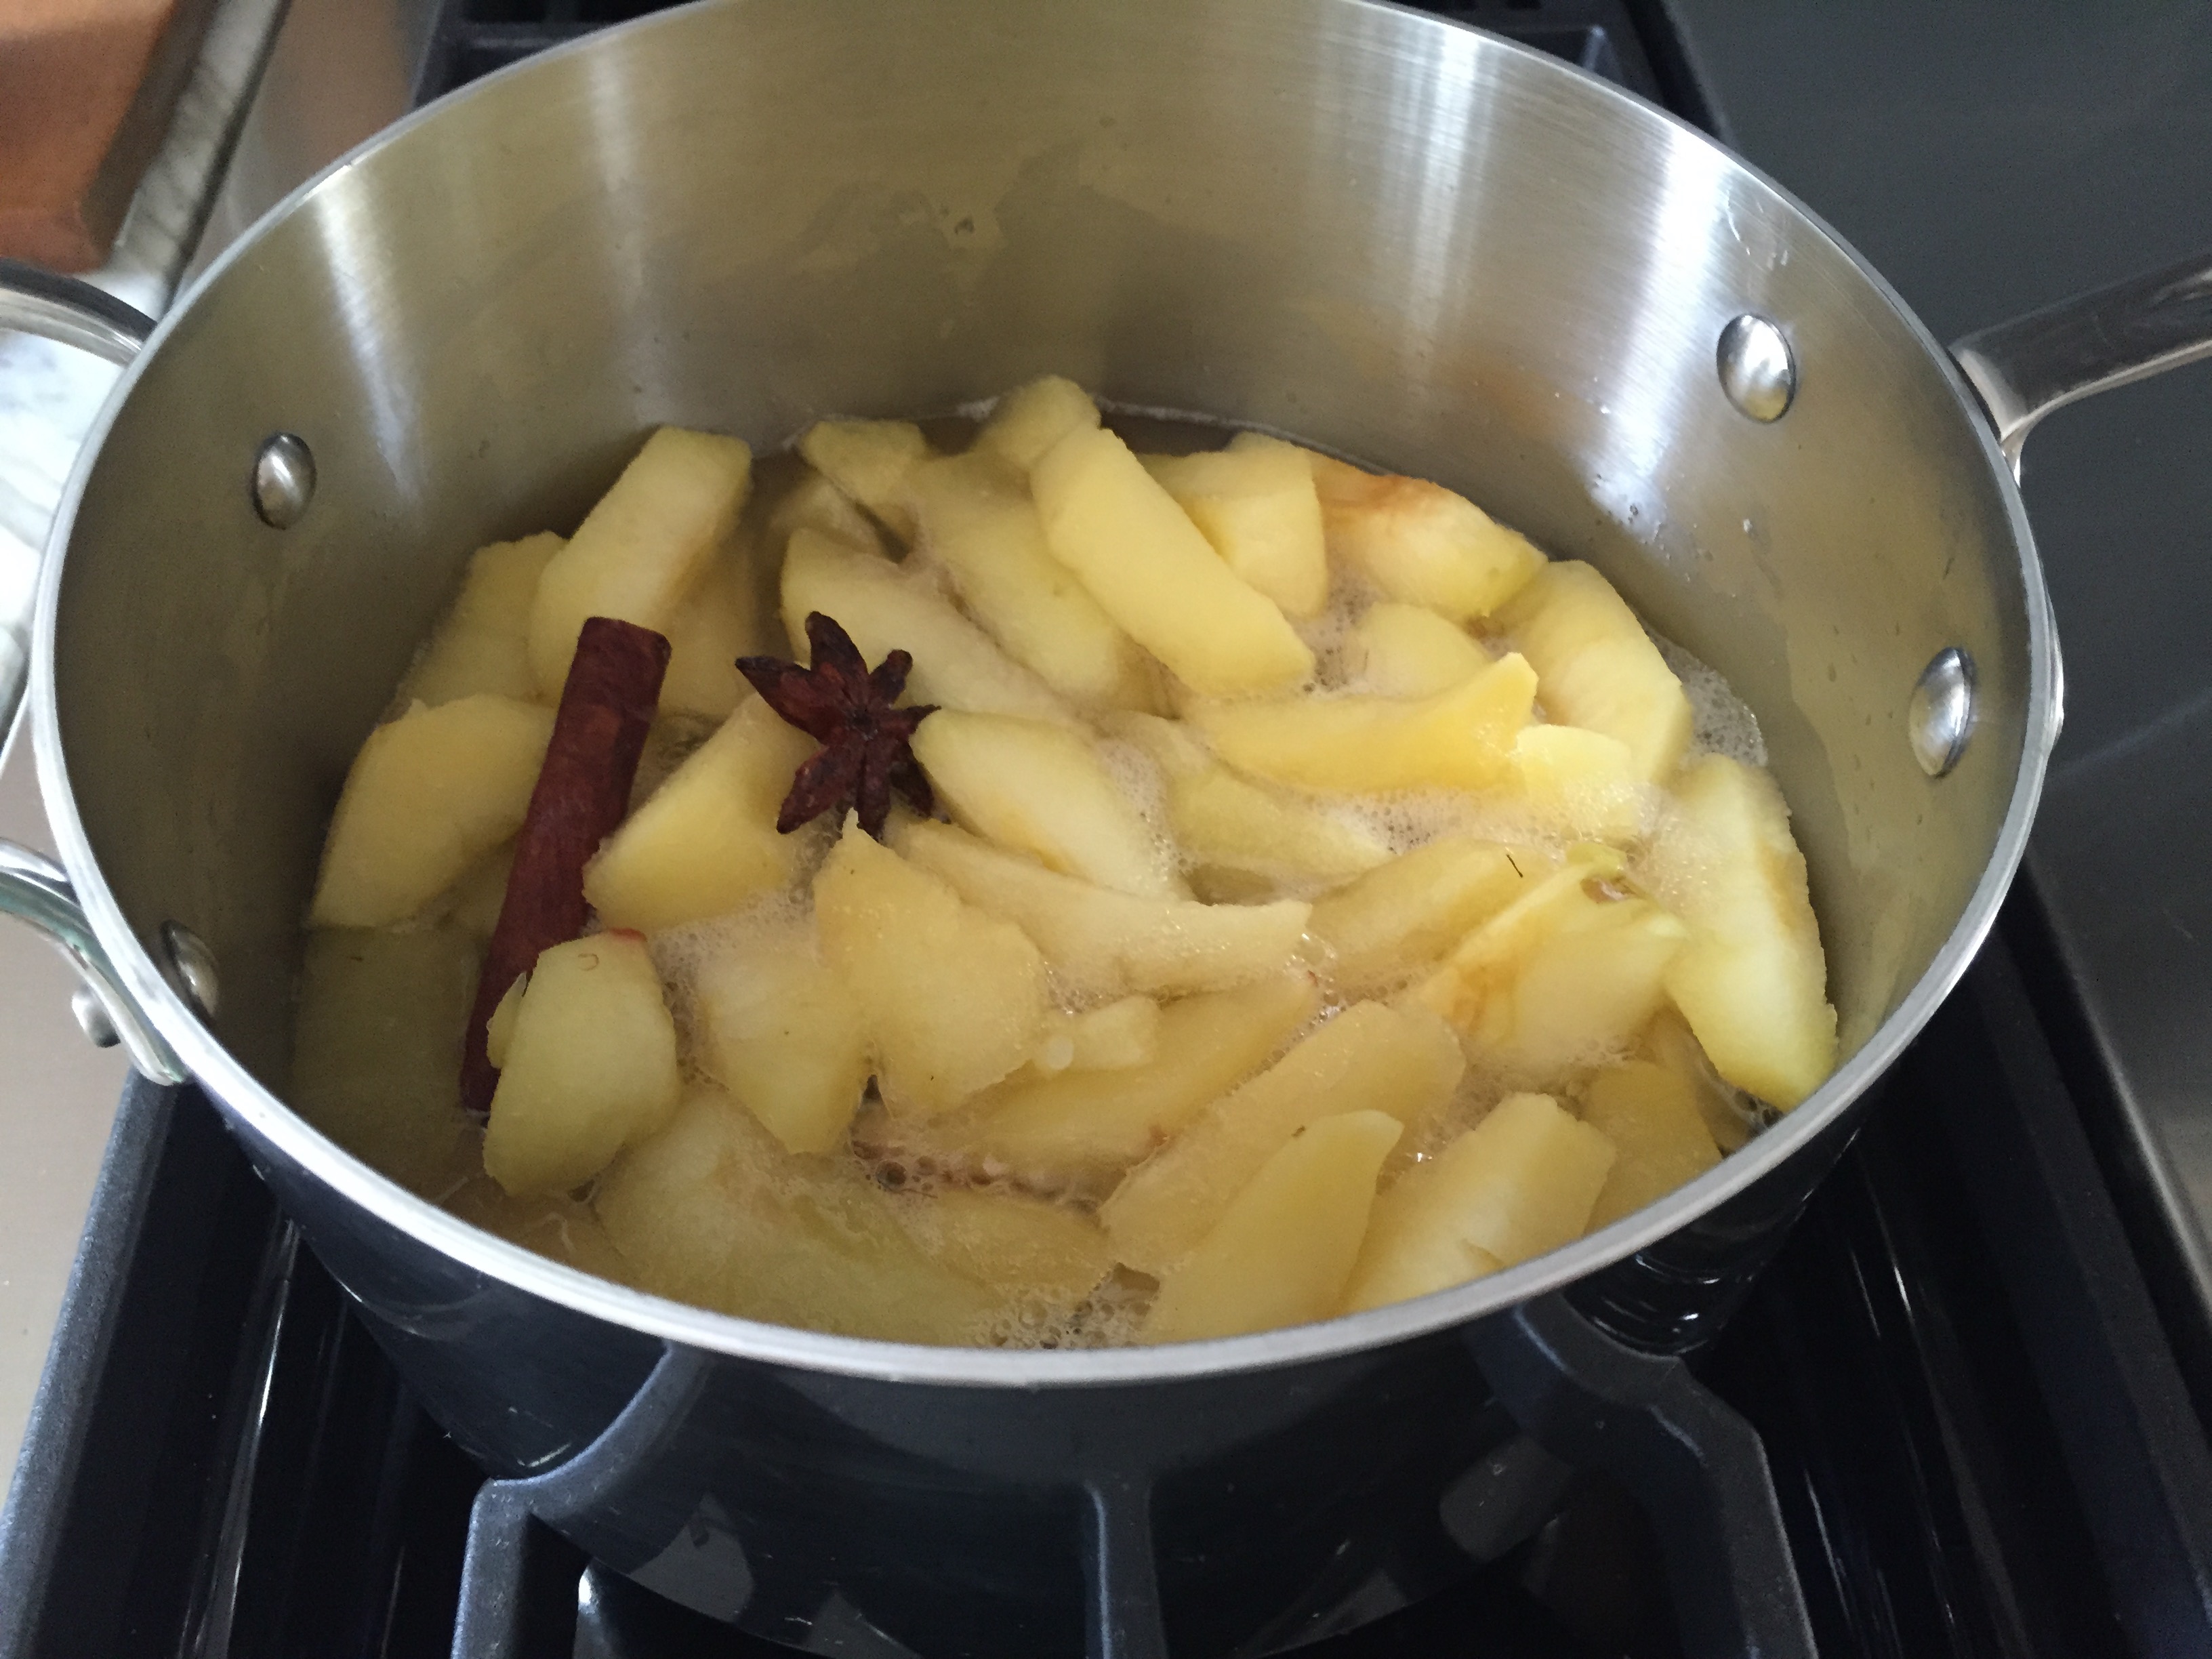
Melt butter in a heavy large saucepan over medium high heat. Add squash, leeks, carrots, and celery; sauté until slightly softened, about 15 minutes. Mix in apples, thyme, and sage. Add stock and 1 cup cider. Bring to a boil; reduce heat to medium low. Cover and simmer until apples are tender, stirring occasionally, about 30 minutes. Cool slightly.

Using an immersion blender, puree soup. Alternatively, soup can be pureed, in batches, in a blender.

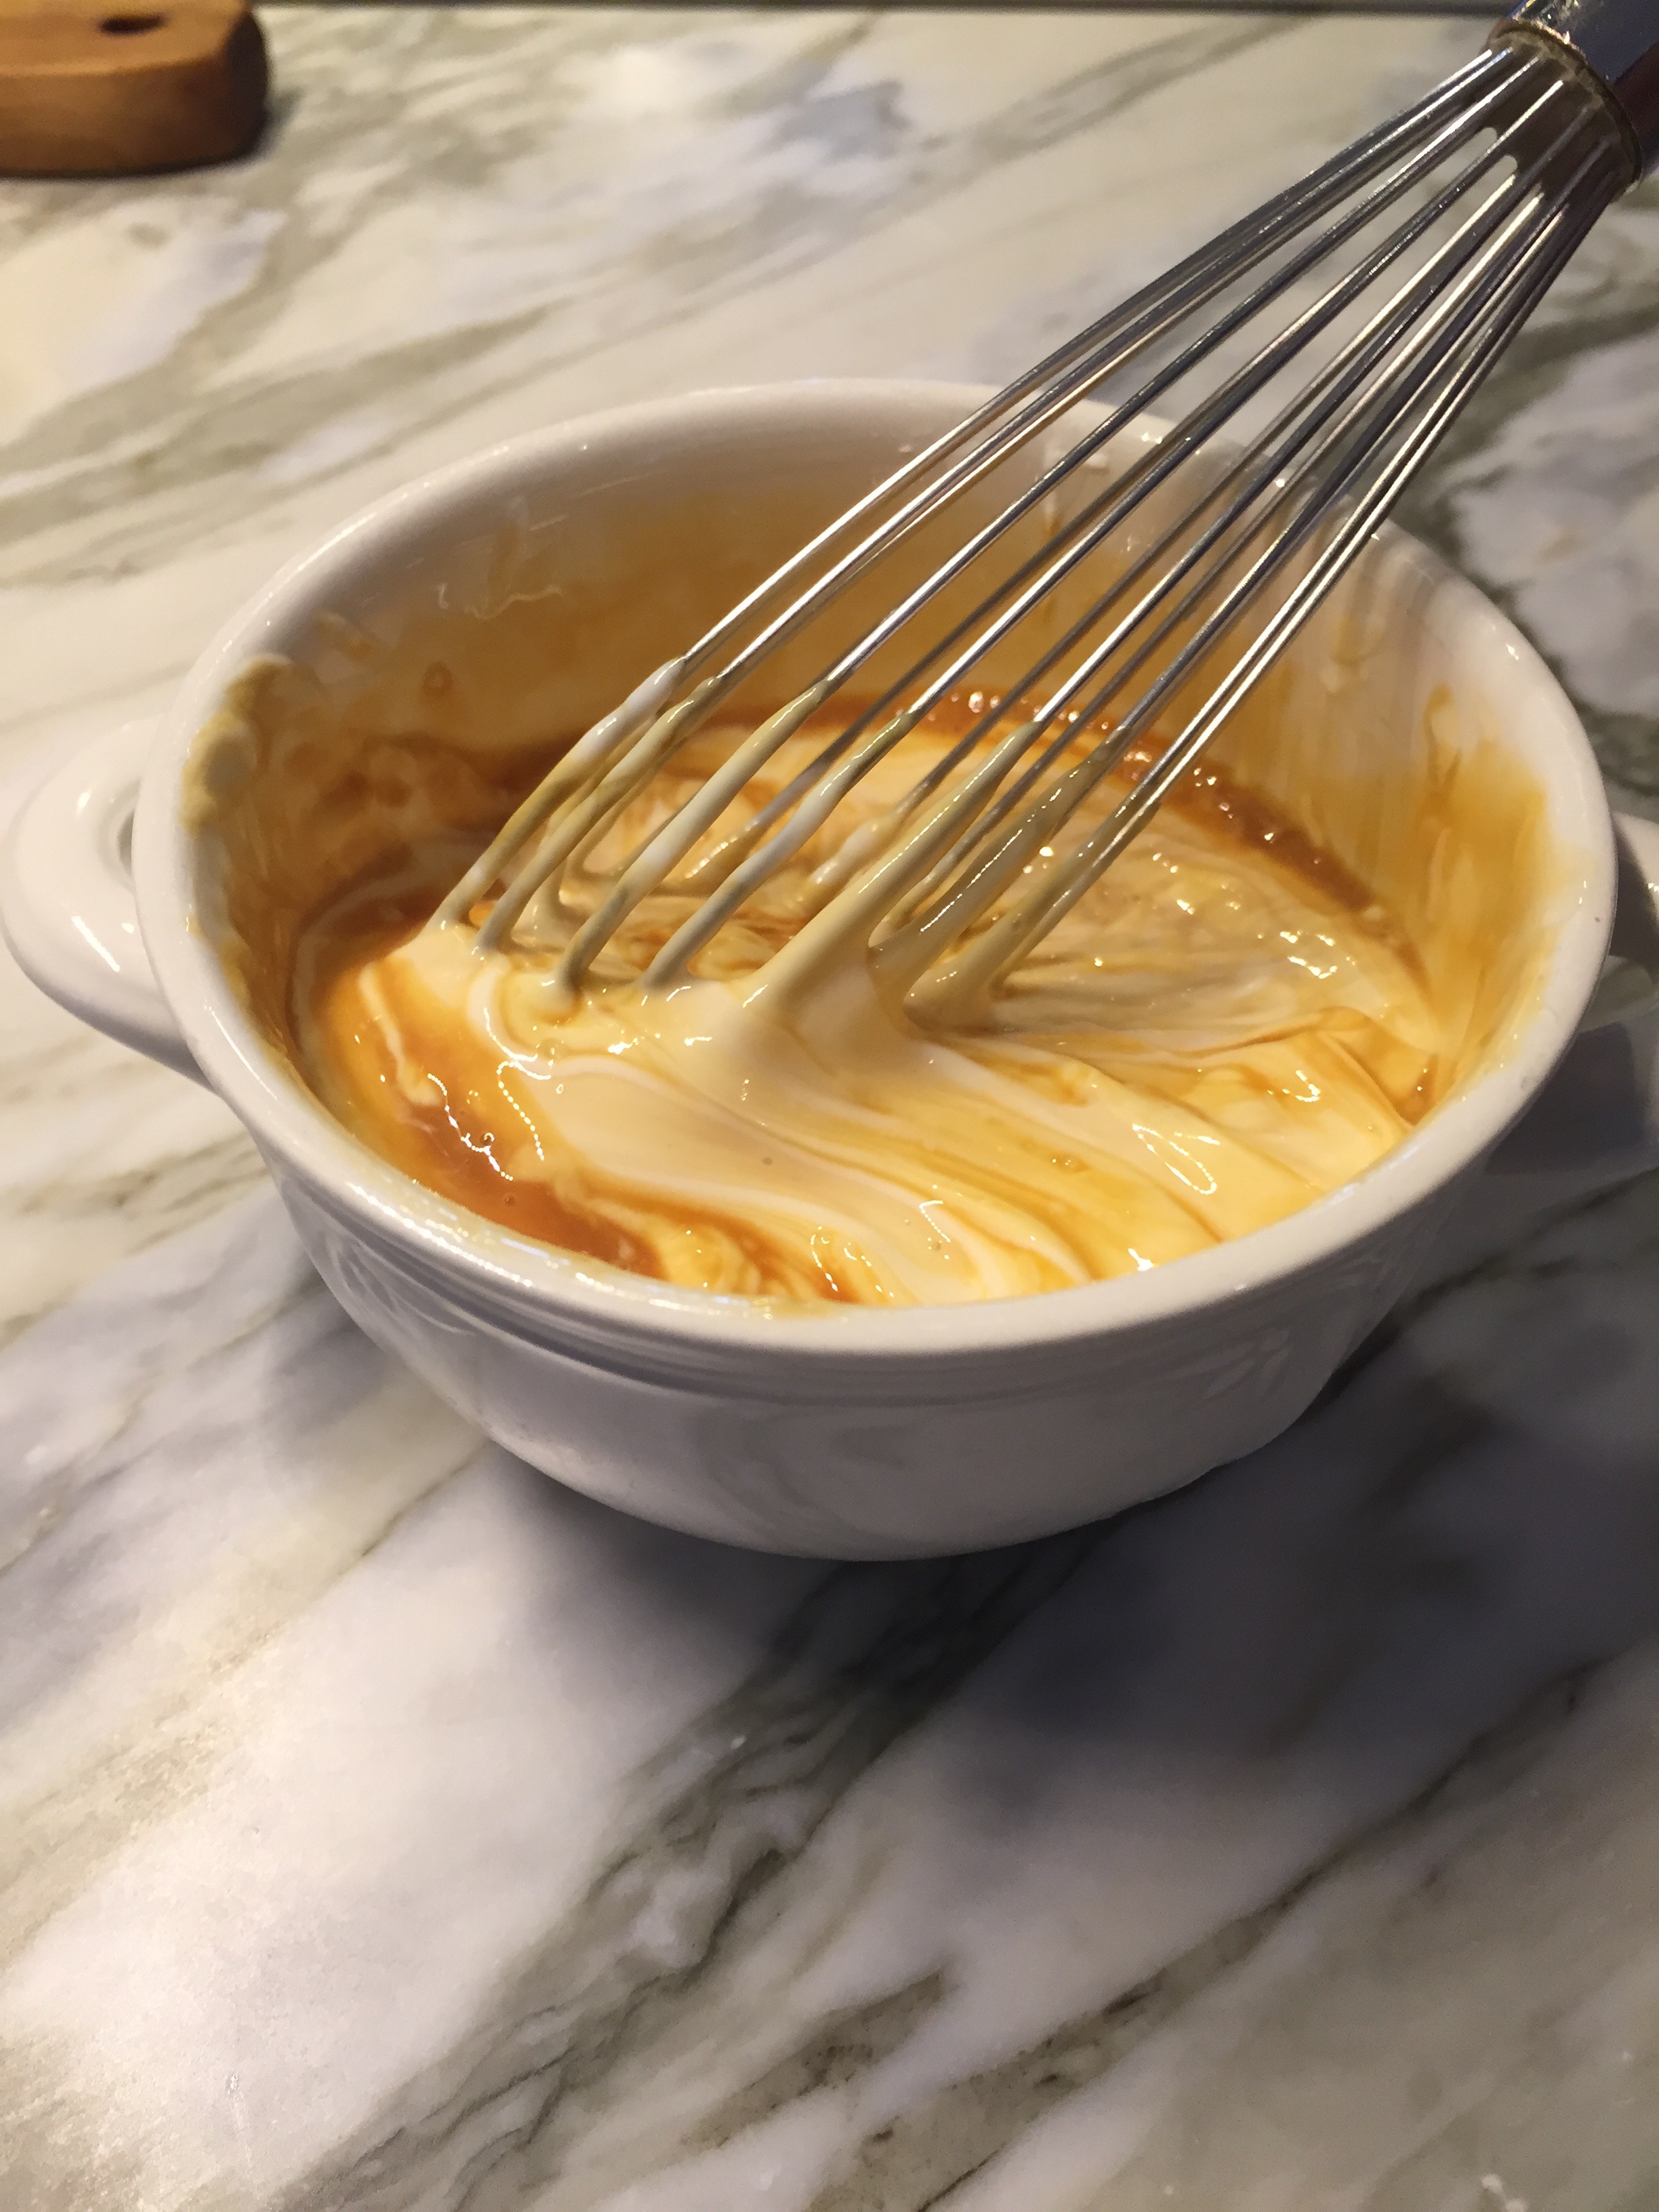
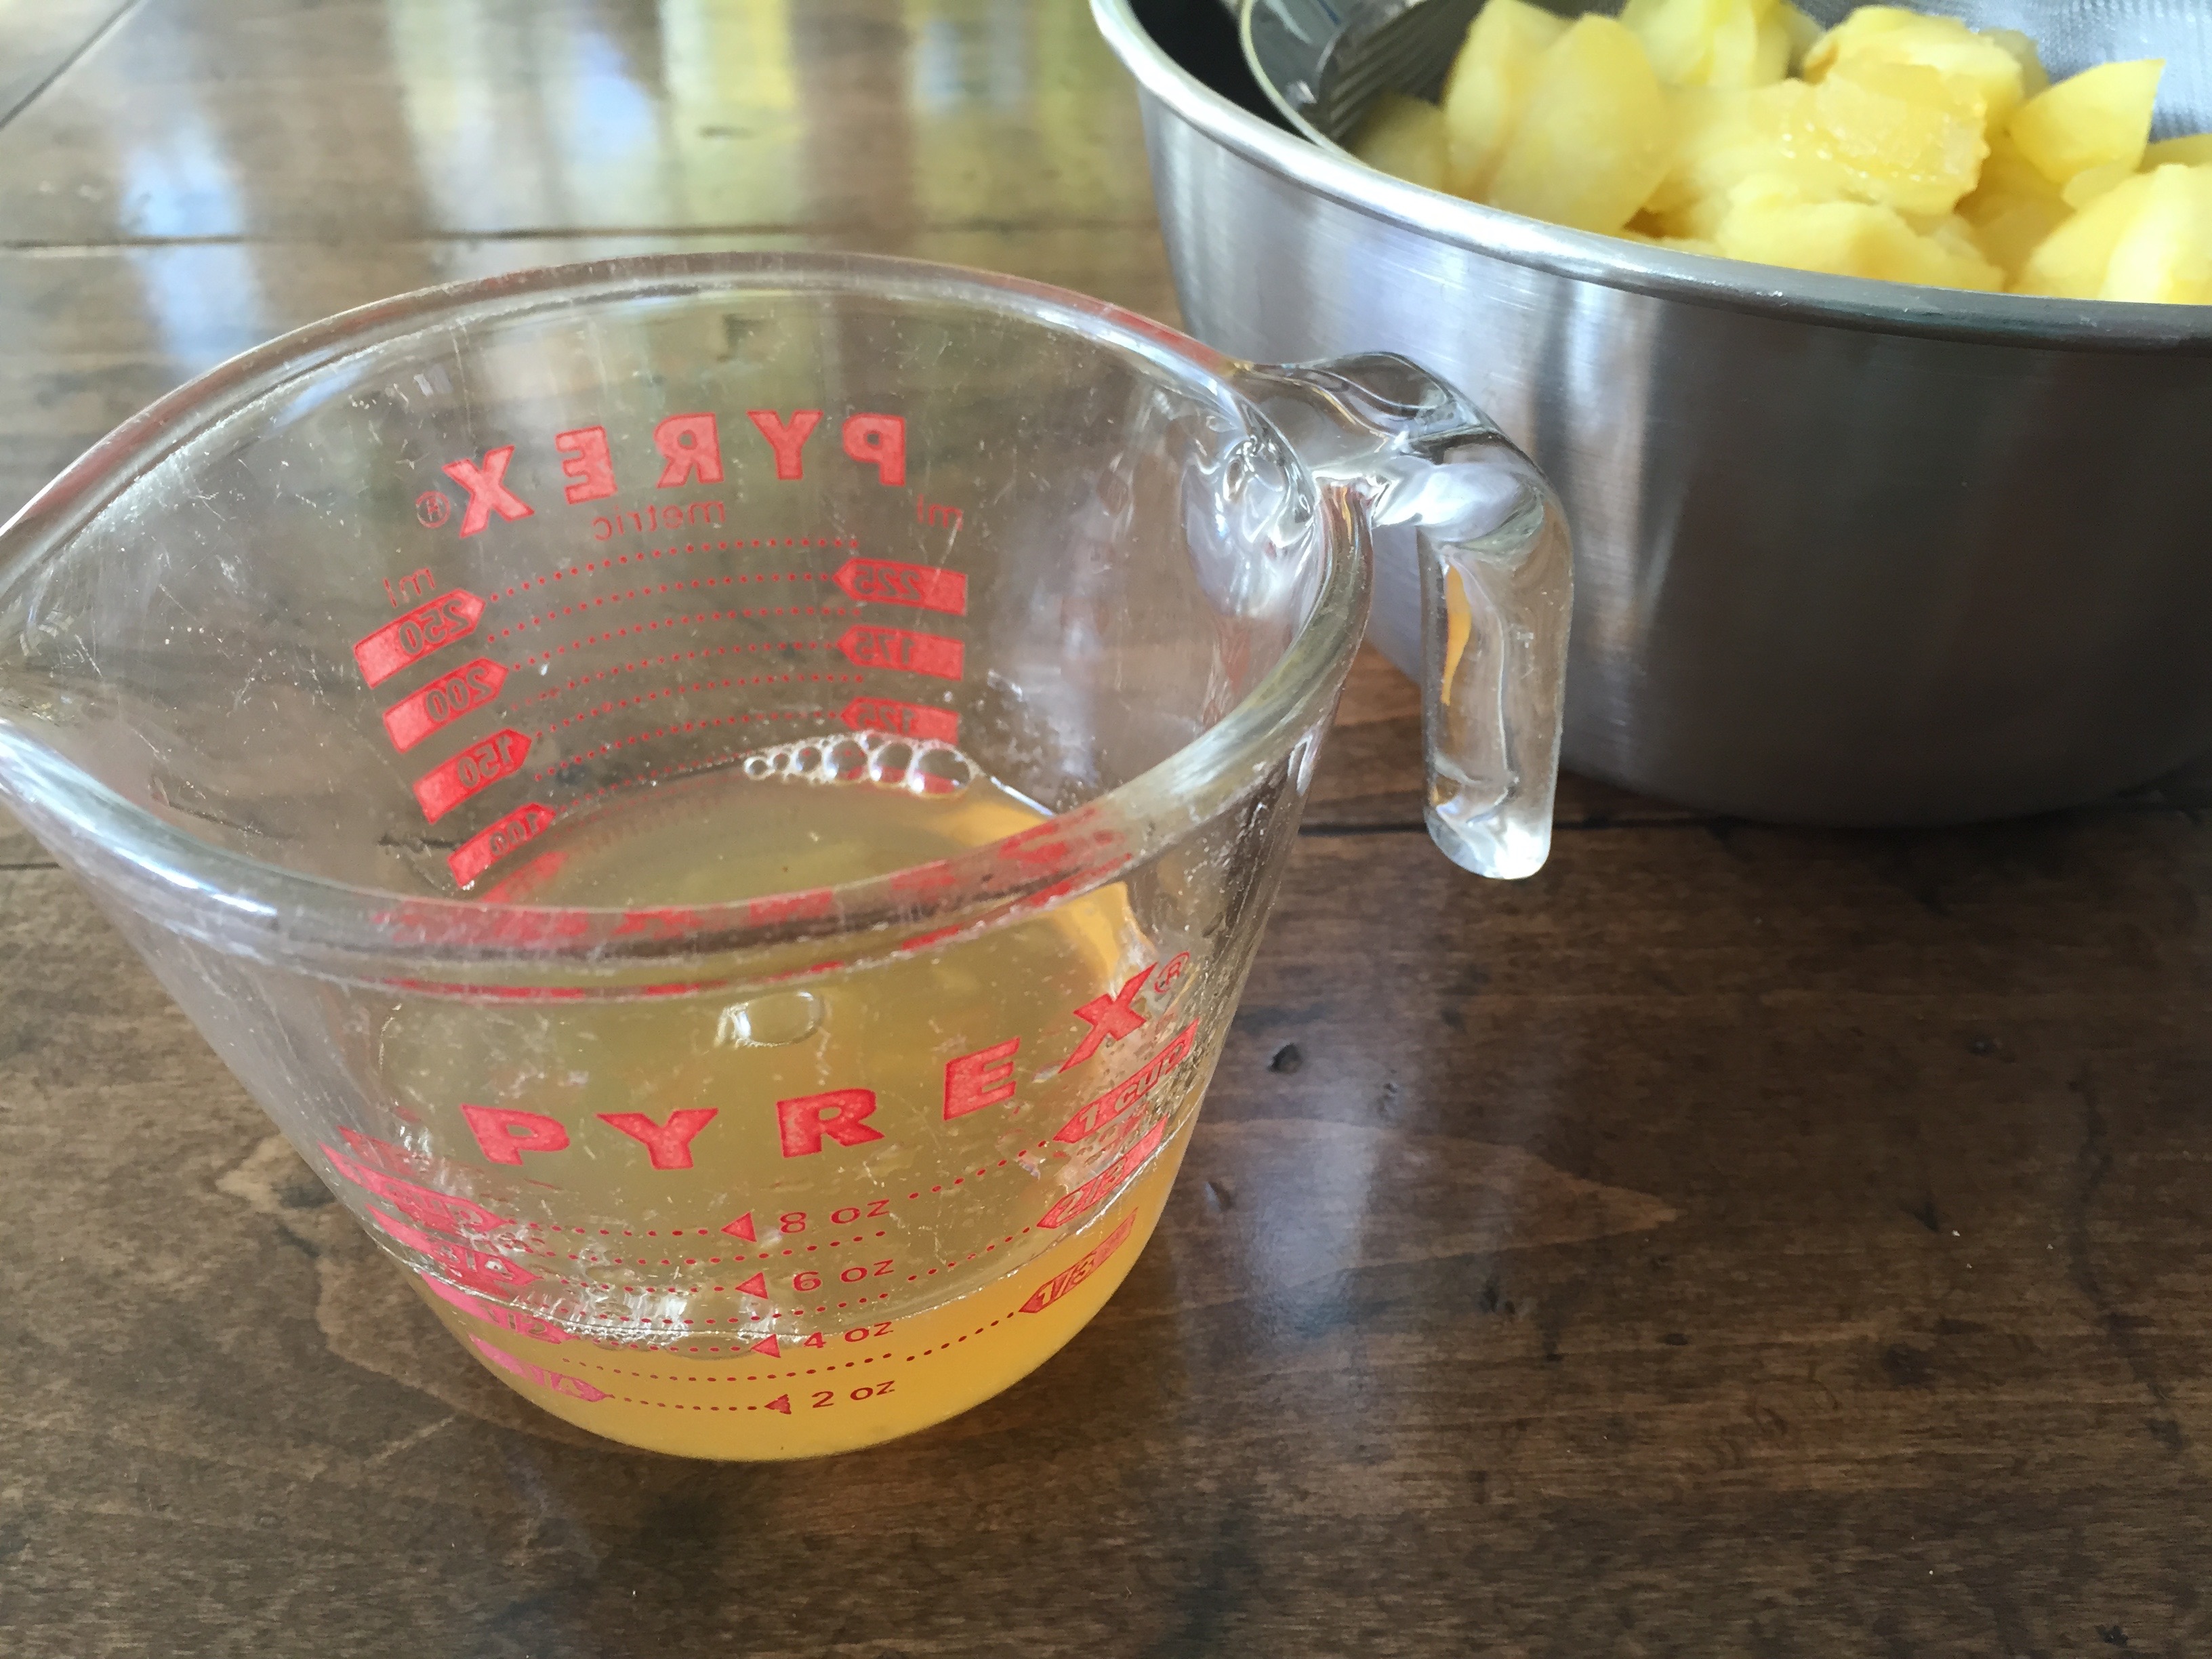
Make cider cream. Boil remaining ½ cup cider in heavy small saucepan until reduced to ¼ cup, about 5 minutes. Cool. Place yogurt or crème fraiche in small bowl. Whisk in reduced cider. (Soup and cider cream can be made 1 day ahead. Cover separately and refrigerate.)

Bring soup to simmer. Ladle soup into bowls. Dollop with cider cream and serve.

Squash, leeks, carrot, and celery in dutch oven.
Melt butter in heavy large saucepan. Add squash, leeks, carrot, and celery.
Adding apples and herbs to sautéed vegetables in dutch oven.
Sauté until veggies are softened, 15 minutes or so, then add apples, thyme, and sage.
Adding stock and cider to sautéed veggies and apples.
Add stock and 1 cup of cider. Bring to a boil.
Simmering veggies, apples, and herbs in stock and cider.
Reduce heat to medium-low, cover and simmer for 30 minutes or until apples are tender.
Pureed Butternut Squash Soup
Through the magic of the blogosphere, the soup has been pureed. Actually, I used an immersion blender, but couldn’t get an action pick- not enough hands! If you don’t have an immersion blender, puree the soup in batches in a regular blender.
Cider syrup, plain yogurt, and whisk
Boil remaining 1/2 cup cider until reduced to 1/4 cup, about 5 minutes.

Cider Cream

Butternut Squash Soup with Cider Cream
Bring soup to a simmer, laden into bowls and dollop with cider cream.


Cranberry Pineapple Sauce

Cranberry Pineapple Sauce

As a child, my only frame of reference for cranberries was cranberry bread at Christmastime and cranberry sauce on Thanksgiving. The smooth jellied sauce emerged quivering and jiggling from the can with a satisfying pop as the seal broke, sliding onto the plate whole, retaining its cylindrical shape and conveniently molded rings marking individual servings. A regular butter knife easily cut the cranberry sauce into perfectly round discs waiting to be plated alongside the turkey and stuffing.

For years this was the only cranberry sauce I knew, until one Thanksgiving when my aunt decided to bring something different. Change is never easy, and there was resistance. What was this lumpy whole berry blob? Where wereCranberry pineapple sauce in a crystal serving dish the smooth, neat slices of cranberry sauce? Eyebrows were raised, whispers hushed as tentative spoonfuls were dropped onto plates in the spirit of being polite. Aunt Rosaleen held her head high and reassured us with confidence; the cranberry sauce was still from a can, though it was whole berry not jellied, to that she added a can of chopped pineapple and handful of walnuts. Initially skeptical, we were quickly won over by the contrast in texture between the whole berries and pineapple and the crunch of the walnuts. The sweetness of the pineapple also complemented and rounded out the dish.

Cranberries, pineapple, walnuts, satsumas, cinnamon, cloves, allspice berries and ginger on a cutting board.Aunt Rosaleen’s cranberry sauce has been on the table ever since, though it has evolved. Today I use fresh cranberries and pineapple, and turn to some of my favorite fall spices- cloves, cinnamon, allspice berries, and ginger to infuse the cranberry cooking liquid, along with oranges (satsumas and clementines work very well, too). The result is a delicious mix of texture, tartness, sweetness, and spice. The sauce is a wonderful addition to your Thanksgiving plate and excellent on your leftover turkey sandwiches.

Do you or your family have a favorite cranberry sauce? Jellied or whole berry?

Cranberry Pineapple Sauce

Cranberry Pineapple Sauce

  • Servings: makes approximately 4 cups
  • Print

Ingredients:
1 12-ounce bag fresh cranberries, rinsed and picked over
¾ cup granulated sugar
½ cup water
5 whole cloves
2 allspice berries
1 cinnamon stick
1” piece ginger, peeled
1 orange, cut in half
1 cup chopped pineapple
1 cup toasted and chopped walnuts

Instructions:
Bring cranberries, sugar, water, cloves, allspice berries, cinnamon stick, ginger and orange to a boil in a medium sized sauce pan, stirring often to dissolve sugar. Reduce heat and simmer, stirring occasionally and pressing on the oranges (or satsumas/clementines) to release their juices, until the cranberries have popped, about 10 minutes.

Remove from heat and cool slightly. The sauce will continue to thicken as it cools. Remove cloves, allspice berries, cinnamon stick, ginger, and orange. Stir in pineapple and walnuts. Cover tightly and refrigerate until ready to serve. Sauce can be made up to a 1 week ahead. Serve chilled or at room temperature.

Cranberry pineapple Sauce ingredients in a saucepan.
Put the cloves and allspice berries in an infuser or small cheesecloth sachet. Place the spices, ginger, cinnamon stick, cranberries, orange halves, sugar, and water in a saucepan and bring to a boil, stirring to dissolve the sugar.
Simmering cranberry pineapple sauce ingredients
Reduce the heat to low and simmer until the cranberries have popped, approximately 10 minutes.
Add chopped walnuts and pineapple to cranberries.
Remove spices, ginger, cinnamon stick and orange halves. Allow cranberries to cool slightly before adding chopped pineapple and chopped walnuts. The sauce can be made ahead and will keep in the refrigerator for a week.
Cranberry pineapple sauce in a crystal serving dish
Serve Cranberry Pineapple Sauce chilled or at room temperature.


Sweet Potato Pie with Maple Meringue

Sweet Potato Meringue Pie

Sweet Potato Meringue Pie begins with one of my favorite types of crust… the press in crust. I’ll be honest, making and rolling out traditional pie dough IMG_7999induces anxiety and nightmares of ruined desserts; so logically, I try to avoid them when I can. This crust is the result of toasted pecans, graham crackers, fresh ginger, dark brown sugar, cinnamon, a pinch of salt and melted butter taking a spin in a food processor before being pressed into a pie plate. After baking in the oven for 25 minutes you’ve got yourself a delicious pie crust without any tears, curses, or tell tale signs of patchwork.

The filling is very similar to pumpkin pie, but made with roasted sweet potatoes, along with eggs, cream, brown sugar, and a splash of bourbon to round everything out. After baking in the oven, then cooling, the pie could very easily (and tastily) be served with a dollop of whipped cream. However, I highly recommend you spend an extra 10 minutes to push this pie over the top. Blanket it with a heaping cloud of maple syrup meringue and pop it under the broiler for mere seconds to achieve a golden blush. Your family and friends will thank you. You will thank you.

Another plus for this recipe, especially when entertaining, is that it can be broken down into tasks over the course of a couple of days. For example, on day 1 make the crust, roast the sweet potatoes and puree the flesh. Cover tightly and refrigerate. On day 2, prepare the filling and bake. Allow the pie to cool, then whip up the meringue, top the pie and brown. The pie can be served immediately, or covered and tucked in the fridge overnight before making its big debut on your table.

IMG_8062There are a number of ways you could have fun with this recipe if you’re up for experimenting. Simply swap:

walnuts for pecans
rum for bourbon
pumpkin for sweet potato
gluten free graham crackers for regular graham crackers

The original meringue recipe from Food & Wine calls for quite a bit of simple syrup and tastes cloyingly sweet to me, without doing much to enhance the seasonal tastes of the pie. Instead of simple syrup, I use maple syrup (less than half the amount of syrup called for in the original) to make the meringue which pairs beautifully with the fall flavors of the sweet potatoes, cinnamon, and ginger. I also reduce the amount of sugar in the crust, as the graham crackers already have plenty of sugar in them.

Sweet Potato Meringue Pie and Apple Cream Pie will be on our dessert table this Thanksgiving and possibly even Christmas… what will be on yours?

Sweet Potato Pie with Maple Meringue

Sweet Potato Meringue Pie

  • Servings: 8-10
  • Print

*adapted from a recipe Chef Andrew Carmellini contributed to Food & Wine

Ingredients:
For the crust:
1 cup (4 ounces) pecan halves
11 whole graham crackers, broken (gluten free, if needed)
4 teaspoons minced ginger
1 Tablespoons dark brown sugar
½ teaspoon salt
½ teaspoon ground cinnamon
6 Tablespoons unsalted butter, melted

For the filling:
32 ounces of sweet potatoes (about 3 large sweet potatoes)
½ cup dark brown sugar
3 large eggs
2 Tablespoons bourbon
½ cup heavy cream

For the meringue:
1/3 cup pure maple syrup
3 large egg whites
pinch of salt

Instructions:
Preheat oven to 325°F. In a pie plate, toast the pecans for about 10 minutes or until fragrant and browned. Let the nuts cool completely.

In a food processor, combine the pecans, graham crackers, ginger, brown sugar, salt, and cinnamon; pulse until crumbs form. Add melted butter and process until incorporated. Press the crumbs evenly into a 9-inch deep dish pie plate. Bake the crust for 25 minutes, or until lightly browned and fragrant. Set aside to cool. Keep the oven on.

Prick sweet potatoes all over with a fork and cook in a microwave oven for 10 minutes. Transfer the potatoes to the 325°F oven and roast for 10 minutes longer, or until soft. Let cool, then scrape out the flesh; you should have about 2¼ cups.

Transfer the sweet potato to the food processor and puree until smooth. Add the brown sugar, eggs, and bourbon and process until blended. Add the heavy cream and process until incorporated. Pour the filling into the crust and bake for 50 minutes, or until set; cover the crust edges with foil if they darken. Let the pie cool completely.

In a small saucepan, bring maple syrup to a boil. Cook over high heat until a candy thermometer inserted in the syrup registers 240°F, about 5 minutes. Meanwhile, in the bowl of a standing mixer fitted with the whisk, beat the egg whites with the salt until soft peaks form. With the machine running, carefully and slowly drizzle in the hot syrup and beat at high speed until the whites are stiff, glossy, and warm to the touch, about 3 minutes.

Preheat the broiler. Mound the meringue over the sweet potato filling, swirling it decoratively. Broil the pie 4-6 inches from the heat for 30 seconds, or until lightly browned- do NOT look away(!), it can burn very quickly.

Cut into wedges and enjoy!

*Pie can be made a day ahead and refrigerated overnight.

Pie crust ingredients ready to go into the food processor: pecans, graham crackers, ginger, sugar, cinnamon, salt, and melted butter.
In a food processor, combine pecans, graham crackers, ginger, sugar, cinnamon, salt, and melted butter.
Pecan and graham cracker crust
Press processed ingredients into deep dish pie plate. Bake at 325°F for 25 minutes.
Pecan and Graham Cracker Crust
Let the pie crust cool while you make the filling.
Roasted sweet potatoes cooling.
Microwave the sweet potatoes for 10 minutes, then finish roasting in the oven for an additional 10 minutes, or until soft. Allow to rest until cool enough to handle, then scoop out flesh and puree in the food processor. You should have 2 1/4 cups puree.
Sweet potato puree, brown sugar, eggs, bourbon, and heavy cream on cutting board.
Sweet potato puree, brown sugar, eggs, bourbon, and heavy cream are ready to combine in the processor.
Sweet potato pie filling in the processor
The sweet potato pie filling is ready to go into the pie crust.
Unbaked sweet potato pie
Bake at 325°F for 50 minutes or until set.
Baked sweet potato pie is cooling.
Filling is set and pie is cooling.
Maple syrup in saucepan.
Let’s make the meringue! Boil maple syrup until thermometer reads 240°F.
Soft peak egg whites on whisk.
At medium speed, beat the egg whites and salt to soft peak stage.
Pouring hot syrup into beaten egg whites.
With mixer going at high speed, pour the syrup in a slow steady stream.
Stiff peak egg whites on whisk
Continue beating egg white/syrup mixture until eggs are glossy and stiff peaks form, about 2-3 minutes.
Mound of maple syrup meringue in center of pie.
Mound maple syrup meringue in center of the pie and swirl decoratively.
Sweet Potato Meringue Pie
Place pie under broiler for 30 seconds or until lightly brown. Do NOT walk away from oven… it will quickly go from brown to burned. Watch it carefully!
Sweet Potato Meringue Pie
Sweet Potato Meringue Pie with Pecan Graham Cracker Crust

Chestnut and Sausage Stuffing

Chestnut and Sausage Stuffing

Heirloom recipes, tattered and splattered notes scrawled in cookbooks, on index cards, and handwritten on scraps of paper are gifts from our individual pasts as well as time capsules for us collectively. Holiday dinners celebrated around the world, of all traditions and faiths, are windows into our kitchens, our mothers’ and grandmothers’ kitchens, and all the cooks who went before them.

My family’s chestnut and sausage stuffing recipe has been on our Thanksgiving table since before I was born. My grandfather was the head tennis pro at a club for over 30 years. The chef at the Club made this dressing for their Thanksgiving dinners and at some point shared the recipe with my mother. As a child I remember going to the Club and visiting “Chef” in the hot humid kitchen, delicious smells enveloping me while the sounds of banging pots and pans filled the air. My little girl self recalls the Chef as a big man with a Scandinavian accent, always gifting me with an ice-cream cone- my choice of any flavor, before heading back to the tennis courts with Pop-Pop.

This is Chef’s own recipe; I am forever grateful that he shared it with my mother, Jean at the Thanksgiving table 1972and though he couldn’t have known it at the time, he now shares it with me. My childhood is full of taste memories, and every Thanksgiving, as I step into the kitchen with my own children to help, this delicious stuffing serves as a direct connection to not only my past, but theirs, the fourth generation to have it on their table each November.

The stuffing is so much easier to make these days. I can recall many Wednesdays before Thanksgiving filled with burnt fingers as my mom spent what seemed like hours cutting x’s into fresh chestnuts, boiling and peeling them, only to discover they were rotten. Happily that has not happened to me, as cooked and shelled chestnuts are now readily available in jars! The stuffing is made the day before Thanksgiving, which frees up some oven space on Thursday, and makes you feel like you’ve got a head start on your preparations. It also smells incredible! As soon as the sausage, followed by the onions and celery hit the sauté pan, you are clearly announcing to the world- or at least your household, that delicious things are in store.

*Fun Fact: Dressing vs Stuffing? Dressing and stuffing are one in the same, Thanksgiving Tableonly dressing does NOT get stuffed into the bird. It is cooked separately in a casserole, while stuffing does go into the bird. However, in the American South, most everyone calls it dressing whether it is cooked inside or outside the bird.  This recipe allows for both. The dressing is cooked the day before, and on Thursday you can take a portion of it and stuff the bird. Or, you can do as I do, and use drippings from the turkey or stock to moisten the dressing and then reheat it in the oven before serving.

Chestnut and Sausage Dressing

Chestnut and Sausage Stuffing

  • Servings: 12-16
  • Print

Ingredients:
4 stalks celery, cut fine
3 medium onions, diced
2 lbs sausage
1½ lbs chestnuts (cooked and shelled)
2 lbs day old bread, cubed
2 cups milk
2 eggs, slightly beaten
1 stick unsalted butter, melted
salt, pepper, and poultry seasoning* to taste

Instructions:
Preheat oven to 350°F.

Fry sausage until golden brown. Add celery and onion and cook 5 minutes. Soak bread in milk until moist, then squeeze out any excess. Add to the sausage mixture. Add 2 slightly beaten eggs, melted butter, and season to taste with poultry seasoning, salt and pepper.

Transfer to a deep casserole dish and bake for 1 hour. Let cool and refrigerate until next day.

Before reheating or stuffing the turkey, stir in 1½ lbs fresh chestnuts, roughly chopped.

*To make homemade poultry seasoning: combine 1 teaspoon each crumbled dried rosemary, crumbled dried sage, dried thyme, dried marjoram, and celery salt, with 1/4 teaspoon freshly ground black pepper.  Crush together in mortar and pestle, mini food processor, or spice grinder (poultry seasoning recipe from Thanksgiving 101 by Rick Rodgers).

**Another variation would be to use chopped fresh herbs like parsley, sage, and thyme in place of the dried poultry seasoning blend.

Drying bread cubes on sheet pan.
Trim crusts from bread and cube. Leave to dry overnight.
Diced onion, thinly sliced celery, and sausage on cutting board.
Dice onion and thinly slice celery.
Browned Sausage
The sausage is brown and ready for celery and onions.
Celery, onions, and sausage in skillet.
Add the celery and onions to the browned sausage. Cook for 5 minutes.
Adding milk to cubes of bread.
Add milk to bread cubes. Let sit and squeeze out any excess… (I rarely have to squeeze out any excess).
Bread cubes, melted butter, egg, and sausage mixture ready to combine.
Add sausage mixture to bread cubes and stir to combine. Add slightly beaten egg and melted butter.
Stuffing mixture in bowl, ready to season with salt and pepper.
Season to taste with salt, pepper, and poultry seasoning.
Stuffing mixture in casserole, ready for the oven.
Transfer stuffing mixture to casserole and bake at 350°F for 1 hour.
Cooked stuffing in casserole.
Stuffing is nicely browned after an hour in the oven.  We still need to add the chestnuts, though!
Roughly chopped chestnuts on cutting board.
Roughly chop chestnuts and add to cooked stuffing.
Chestnut and Sausage Stuffing
The stuffing is ready to go into your bird OR serve it as dressing. Just moisten with turkey drippings or stock and reheat.

Apple Cream Pie

Apple Cream Pie

I love this time of year! The weather, color, gatherings with friends and family,Braeburn and golden delicious apples in a bowl. and the food! Thanksgiving in the US is just a few weeks out and menu planning at White House Red Door is well underway. Truth be told, the planning is not too difficult, as the menu has pretty much remained unchanged since my childhood. It’s not that my parents, siblings, or my own family don’t like to try new foods, or experiment; Christmas dinners, Easter brunches, and other traditional meals vary from year to year, but Thanksgiving has always remained the same, well at least the main dish and sides. There would be a “coup de cuisine” if candied yams weren’t on the table. That said, desserts are an entirely different story. We are far more flexible in our after dinner fare thinking. Friends often join us for dessert, bringing their favorite treats, creating a beautiful cornucopia of desserts.

One pie that has made appearances off and on through the years is my mom’s Apple Cream Pie. Quite unlike a traditional double crust apple pie, Tarte Tatin, or apple crisp, which have all shown up to the party over the years, this pie features tender slices of apples nestled in a bed of creamy custard. Traditional enough for the purists but outside the box enough for those wanting something new or different. For reasons unknown, this pie has not been in attendance for some time, and I’ve never made it myself. Curious to give it a go, I wanted to see if it was as good as I remembered and should be included on the menu this year. Without a doubt, it was and will be.

Women's Day Encyclopedia of CookeryConversations with mom revealed that the original recipe came from a long out of print encyclopedia like set of cookbooks from Women’s Day, actually called Encyclopedia of Cookery. My mom still has her set and found an identical set at a tag sale years ago that she gave to me as a gift. It turns out the recipe for this wonderful pie has been sitting in the vintage set of cookbooks, in my own house, for years.

The pie is simply elegant, with few ingredients, quite light and perfect after a heavy meal. I’ve taken the original recipe and updated it somewhat by adding a cinnamon stick, star anise, and cardamom pod to the stewing liquid. These additions infuse the simple syrup, and eventually the cream, with classic flavors and aromas that pair well with the apples. After making the cream pie for dessert this week and receiving all round approval, it will now regularly appear not only on our holiday tables, but throughout the fall and winter.

What desserts will show up on your table this year? Are you a traditionalist serving the same menu each year, or do you like to mix it up?

Apple Cream Pie

Apple Cream Pie

  • Servings: 8
  • Print

Ingredients:
5 cooking apples, peeled and sliced into eighths
½ cup granulated sugar
½ cup water
1 cinnamon stick
1 anise star
1 cardamom pod
Pastry for one 9” pie crust, unbaked
1 egg
½ cup heavy cream

Instructions:
Preheat oven to 350°F.

Put apples in a saucepan with sugar, water, cinnamon stick, anise star, and cardamom pod. Bring to a boil, cover, and simmer until apples are tender, about 10 minutes. While apples are simmering, line a 9” pie plate with crust, decoratively crimping edges and place in freezer until needed.

When apples are tender, remove and place them in a strainer set over a bowl to catch any juices. Continue to simmer syrup left in saucepan until reduced to approximately ½ cup. To that add any syrup caught from draining apples.

After apples have cooled slightly, place in the pie pan lined with pastry. Beat egg and cream together and stir in reserved syrup. Pour over apples. Transfer to oven and bake for 30-40 minutes, or until custard is set- the center will be slightly jiggly, but will continue to firm up as it cools. Allow to cool completely before serving.

Peeled apples, cut into eighths.
Peel the apples and cut them into eighths.
Apples with sugar, water, cinnamon stick, anise star, and cardamom pod in a saucepan.
Add sugar, water, cinnamon stick, anise star, and cardamom pod.
Simmering apples in sugar syrup with cinnamon stick, anise star, and cardamom pod.
Simmer apples until tender, about 10 minutes.
Apple syrup in measuring cup, with apples draining in sieve.
Drain apples, reserving any syrup, you should have about 1/2 cup of apple syrup.
Apples placed in the bottom of a pie plate lined with pastry.
After apples have cooled slightly, place them in the bottom of a pie plate line with pastry.
Egg, cream and syrup mixture poured over the apples.
Egg, cream, and syrup mixture is poured over the apples. Bake for 30-45 minutes in a 350°F oven until custard is set.
Apple Cream Pie cooling on a wire rack.
When the custard is set, remove the pie and place on a wire rack for cooling.
Apple Cream Pie dusted with powdered sugar.
If desired, dust the Apple Cream Pie with powdered sugar before serving.

Chili con Carne and Buttermilk Cornbread

Chili con carne with tortilla chips, cheese, and sour cream.

Fall and winter suppers beg for chili.  Hearty, warming, and versatile, chili is a one pot wonder perfect for brisk nights that begin to get dark as early as 4:30pm, casual get togethers with friends and family to watch a game in front of a roaring fire, or coming in from the cold after time spent raking leaves or shoveling snow.  Of all evenings, Halloween is the ideal night for chili, shoring up your stamina (as well as that of any goblins or ghouls spooking you) for a night of trick or treating. Whether you are out in the neighborhood or manning the candy bowl at home, a warm bowl of chili before or after a night of haunts will keep you going and be an excellent antidote to all the sugar consumed.

Depending on your preferences chili can suit a wide variety of eaters… vegetarians or vegans at your table? Skip the meat and add more vegetables or beans. Offer an interesting assortment of toppings and sides like cheeses, cornbread, tortilla chips, avocado, and sour cream (I use greek yogurt) and let your family and friends build a complete meal around your chili base.  And, like most stews and soups, making chili ahead of time allows it to become even more delicious.  Chili only gets tastier as it “ages.”

Chili powder, cumin, coriander, cayenne, cinnamon, chipotle, and dijon mustardThis recipe is my own. Most of the ingredients are typical, but there are a few surprises. Dijon mustard adds a wonderful brightness and tang; the chipotle peppers in adobe sauce add a subtle smokiness, while the cinnamon delivers a hint of sweet warmth. It is also very easy to play with this recipe. Please experiment to suit your taste. Love bell peppers? Add more. Need more spice? Add a chopped jalapeño. Can’t stand onions? Eliminate or reduce the amount. Don’t like beans in your chili (I’m talking to you, dear husband!), then don’t add them. Play with your food and have fun!

The buttermilk cornbread is adapted from Kathleen’s Bake Shop Cookbook. Kathleen King owned Kathleen’s Bake Shop in Southhampton, NY in the 80s and 90s. One summer, I was fortunate enough to visit the bakery and in addition to the cookies I bought (which were quickly consumed), I also purchased a copy of her cookbook, a lasting souvenir. It was a wise purchase. My copy of the small spiral bound book is splattered, tattered, and torn- all signs of an excellent cookbook. The book practically opens itself to certain recipes, like the Devil’s Food Cake I use for birthdays, in addition to the recipe that inspired this cornbread.

CornbreadIn Kathleen’s intro to the original recipe, which was for corn muffins, she explains how the recipe has changed since she first received it. Her baker altered the formula by adding half-and-half instead of milk; I’ve tweaked it again by using buttermilk, instead of half-and-half or milk. In any case, the choice is yours… buttermilk, half-and-half, and regular milk all work just fine. The buttermilk lends a wonderful tanginess that seems a natural counterpart to the sweetness of the bread; the half-and-half produces a really rich cornbread, while using regular milk leaves you with a lovely straightforward cornbread. Another occasional adjustment I make is to add frozen corn kernels to the batter, maybe a handful or two. The kernels contribute a wonderful texture to the cornbread and add pops of sweetness too.

What are your favorite sides and toppings for chili?  Do you have a go to dinner for Halloween night?

Chili con carne with tortilla chips, cheese, and sour cream.

Chili con Carne

  • Servings: 6-8
  • Print

Ingredients:
1lb ground beef or turkey
2 medium onions, coarsely chopped
2 bell peppers, coarsely chopped
3 cloves of garlic, finely chopped
1 Tablespoon of extra virgin olive oil
1 Tablespoon chili powder
1 chipotle chili in adobe sauce, finely chopped
1 ½ teaspoons Dijon mustard
1 teaspoon cumin
½ teaspoon coriander
¼ teaspoon cayenne
1/8 teaspoon cinnamon
1 28oz can of whole tomatoes, with juice
1 16 oz can kidney beans or black beans, rinsed and drained
salt and pepper to taste

Instructions:
In a large pot or dutch oven, heat olive over medium heat. Add onions and sauté until beginning to turn golden brown, approximately 5 minutes. Add bell peppers and sauté an additional 5 minutes. Add finely chopped garlic and cook for 30 seconds or until fragrant. Add ground meat, and cook over medium high heat, stirring often, until cooked through.

Reduce the heat to medium low and stir in chili powder, chipotle chili, mustard, cumin, coriander, cayenne, and cinnamon and cook for 30 seconds or so.

Add beans and tomatoes with juice, breaking up the tomatoes with a spoon. Stir well, and simmer for 15 minutes. Add salt and pepper to taste. Serve hot with accompaniments such as rice, tortilla chips, cornbread, shredded cheddar or Monterey jack, sour cream and chopped avocado.

*This is the perfect dish to make ahead. Like most soups and stew, the longer it sits the better it gets. Just reheat when needed.

Cornbread

Cornbread

  • Servings: 16 squares
  • Print

*adapted from Kathleen’s Bake Shop Cookbook

Ingredients:
1 cup all-purpose flour
1 cup cornmeal or corn flour
½ cup granulated sugar
1 Tablespoon baking powder
½ teaspoon salt
½ cup unsalted butter, softened
1 cup buttermilk
1 egg, lightly beaten

Instructions:
Preheat oven to 400°F. Grease a 9×9 inch baking pan.

In a large bowl, stir together flour, cornmeal, sugar, baking powder, and salt. Using a pastry blender, cut in butter and mix until crumbly. If you don’t have a pastry blender, use two knives, a fork, or even your fingers.

In a separate bowl, mix buttermilk and egg. Fold liquid ingredients into flour mixture, folding just until combined. Transfer batter to prepared baking pan.

Bake for 25 minutes, or until a toothpick inserted in the center comes out clean.

Whisking flours, sugar, baking powder, and salt together.
Whisk dry ingredients together.
Pastry blender cuts butter into flour.
Cut softened butter into flour mixture.
Rubber spatula folds buttermilk and egg mixture into dry ingredients.
Fold buttermilk and egg mixture into dry ingredients until just combined.
Cornbread batter in greased baking dish
Pour batter into prepared baking dish and bake at 400°F for 25 minutes or until cake tester inserted in center comes out clean.
Cornbread just out of the oven.
Enjoy!

Pretzel Rolls

Homemade pretzel roll

Oktoberfest has officially passed… I actually just discovered that. For years I thought Oktoberfest was celebrated all month long, but a quick google search revealed that Munich has already moved on and begun planning Oktoberfest 2016.

IMG_7709Well, I’m not telling. Either way, it’s still October and my culinary wanderlust is craving soft pretzels, bratwurst, sauerkraut, and mustard to go with it all. Every fall, brats and sauerkraut enter the dinner rotation at White House Red Door. One year around this time, probably for Halloween, I made “witches fingers” with homemade pretzel dough. The fingers- or pretzels seemed a natural accompaniment to the brats, so I thought instead of a “finger” or traditionally shaped pretzel, why not a roll?

Have you ever had a pretzel rolls? They turn humble fillings into something special. From burgers to cold cuts to peanut butter and jelly (which my middle guy makes himself for lunch everyday), they all taste better on a pretzel rolls.  They arePretzel bun with mustard terrific for a snack on their own or with some spicy brown mustard for dipping. White flakes of crunchy sea salt contrast beautifully with the deep golden brown chewy texture.

This recipe makes pretzel dough and while I’ve made rolls, the final form is entirely up to you.  This same dough can easily be transformed into traditional pretzels, “witches fingers,” or even letters for the pre-school set.  It’s entirely up to you.  Remember, have fun and play with your food!Homemade pretzel bun

  • Servings: ”8-10
  • Print

*adapted from Alton Brown

Ingredients:
1 ½ cups warm (110°-115° F) water
1 Tablespoon sugar
2 teaspoons kosher salt
1 package (2 ¼ teaspoons) active dry yeast
22 ounces all-purpose flour, approximately 4 ½ cups
2 ounces unsalted butter, melted
vegetable oil, for pan
10 cups water
2/3 cup baking soda
1 large egg yolk beaten with 1 Tablespoon water
coarse or flaked sea salt

Instructions:
Combine water, sugar, and salt in the bowl of a standing mixer fitted with a dough hook and sprinkle the yeast on top. Allow to sit for 5 minutes or until the mixture begins to foam.

Add the flour and butter and, using the dough hook, mix on low speed until well combined. Change to medium speed and knead until the dough is smooth and pulls away from the side of the bowl, approximately 4-5 minutes. Remove the dough from the bowl, clean the bowl and oil it well with vegetable oil. Return the dough to the bowl, rolling it around so it is lightly coated in the oil used to grease the bowl. Cover with a slightly damp dish towel or plastic wrap and place in a warm spot for 50-55 minutes, or until the dough has doubled in size.

After the dough has risen, preheat the oven to 450°F. Line 2 half sheet pans with silicone mats, or parchment paper lightly brushed with vegetable oil. Set aside.

Bring 10 cups of water and the baking soda to a rolling boil in a large saucepan or stockpot.

Turn the dough out onto a lightly oiled surface (I did not do this, just a regular wooden cutting board worked for me- not oiled). Divide the dough into 8-10 equal pieces. Form dough into balls- by rolling and shaping with your hands. Using a very sharp knife or pair of scissors cut an X in the top of each roll. Place each roll onto a lined sheet pan.

Place the pretzel rolls into the boiling water, one by one, for 60 seconds, flipping them at the 30 second mark. Remove them from the water using a slotted spoon or similar tool. Return to the half sheet pan, 4-5 rolls per pan. Repeat until remaining rolls are done.

Brush the top of each pretzel roll with the beaten egg yolk and water mixture and sprinkle with coarse or flaked sea salt. Bake one batch at a time until deep golden brown in color, approximately 15 minutes, or the bottom of the bun sounds hollow when rapped with your knuckles. Transfer to a cooling rack for at least 5 minutes before serving.

Yeast is foaming.
It’s alive! The yeast is working when it starts to foam.
Adding flour and melted butter to yeast mixture
Add the flour and melted butter to yeast mixture.
Using a dough hook attachment to knead the dough.
Using the dough hook attachment, knead the dough until it pulls away from the sides of the bowl.
Pretzel dough in a well oiled bowl.
Put the dough into a well oiled bowl, turning to coat several times. Cover and place in a warm draft free spot until doubled in bulk.
Risen Pretzel Dough
After 50-55 minutes the pretzel dough has doubled in bulk.
Pretzel dough on a cutting board.
Turn the dough out onto a cutting board or parchment paper.
Pretzel dough divided into 8 equal pieces.
Divide the dough into 8-10 equal pieces.
Raw pretzel buns on silicone lined sheet pan.
Roll and shape dough into rolls and place on silicone or parchment lined sheet pan.
Use a sharp knife to cut an 'x' on the top of each bun.
Using a sharp knife or pair of scissors, cut an ‘x’ on the top of each roll.
Dropping the pretzel bun into boiling water/baking soda mixture
One by one, use a slotted spoon or similar utensil to drop each roll into boiling water/baking soda mixture for 1 minute. Flip after 30 seconds so that top and bottom are evenly cooked.  Transfer to lined sheet pan. Repeat process with each roll.
Egg washed buns sprinkled with flaked sea salt.
Brush the rolls with egg wash and sprinkle with coarse or flaked sea salt. Bake 15 minutes in a 450°F oven or until deep golden brown.
Deep golden brown homemade pretzel buns.
Rolls are done when they are a deep golden brown and sound hollow when rapped on the bottom with your knuckles. Allow to cool at least 5 minutes before digging in.

Pumpkin Bread

Pumpkin bread sliced on cutting board.

Fall Container The sounds and smells of fall are predictably familiar and comforting. I’ve known them all my life, hearing the chorus of geese honking to one another as they head south, smelling the smoke from a pile of leaves drifting from a backyard, and feeling the crispness in the air as a child trick or treating or walking to school. Even as an adult the pattern continues, the leaves still crunch underfoot, rustling and swirling in the breeze stirred up as I walk my own children to the bus stop each morning. We often talk about taste memories, but it is the echoes, scents, and displays of fall that bring me right back to childhood each year.

That is not to say that the tastes of autumn go by the wayside. Flavors are warmer, spicier, and richer, adding life to both sweet and savory dishes. On these cool days I crave baking- wanting to fill the kitchen with the colors, flavors, and aromas of fall.

This pumpkin bread recipe fits the bill. Many pumpkin bread recipes call for oil as the fat of choice while this recipe uses butter, which I prefer. The original calls for water or orange juice as the liquid, but I swap in cider, as it seems a better complement to the pumpkin. Another addition is nutmeg, to partner with the cinnamon and cloves. I’ve reduced the sugar, which hasn’t done any harm (and no one notices). Finally, the raisins are completely eliminated instead I occasionally add walnuts.

This makes two large loaves of pumpkin bread, one to enjoy now, one to freeze for another day down the road as we march towards winter.

Pumpkin bread slices on cutting board

Pumpkin Bread

  • Servings: 2 large loaves
  • Print

*adapted from The Martha Stewart Cookbook, Collected Recipes for Everyday

Ingredients:
12 Tablespoons unsalted butter (1 ½ sticks), at room temperature
3 Tablespoons molasses
1 ½ cups sugar
4 eggs
2/3 cup cider
2 cups pumpkin puree, homemade or canned
3 1/3 cups all-purpose flour
2 teaspoons baking soda
1 teaspoon salt
½ teaspoon baking powder
1 teaspoon cinnamon
1 teaspoon ground cloves
1 teaspoon ginger
1 cup coarsely chopped walnuts (optional)

Instructions:
Preheat oven to 350° F. Butter two 9 x 5 x 3-inch loaf pans.

With an electric mixer, cream butter, molasses, and sugar until light and fluffy. Beat in the eggs, one at a time. Beat until light. Add cider and pumpkin purée and mix well.

Sift dry ingredients together into a large bowl, and add the pumpkin mixture, stirring well with a wooden spoon to thoroughly combine. If using the nuts, add them now, folding them carefully into the batter.

Divide evenly into prepared pans. Bake for 1 hour, or until a toothpick inserted comes out clean. Cool in pans for 10 minutes, then turn out onto racks to cool.

*This recipe is easily multiplied and freezes well.

Creaming butter, molasses, and sugar until light and fluffy.
Cream butter, molasses, and sugar until light and fluffy.
Add the eggs one at time to the creamed butter and sugar, beating well before adding the next.
Add the eggs one at time, beating well before adding the next.
Butter, sugar, molasses, and egg mixture is light.
Butter, sugar, molasses, and egg mixture is light and creamy.
Adding the pumpkin purée and cider to butter, sugar, and egg mixture.
Add the pumpkin purée and cider and mix well.
Curdled looking mixture... not to worry.
Don’t worry! It looks terrible, but it will be ok!
Combining the wet and dry ingredients well with a wooden spoon.
Add the sifted dry ingredients, combining well with a wooden spoon.
Batter in greased loaf pan.
Divide batter evenly into greased loaf pans.
Pumpkin bread in loaf pan
Pumpkin bread is done when a toothpick inserted comes out clean.

IMG_7458


Pumpkin Pancakes

Pumpkin pancakes served with warm maple syrup and toasted walnuts.

Pumpkin PancakeI was going to post about Pumpkin Bread, and tie it together with the Roasted Pumpkin Puree (and I will) but I was seriously sidetracked by some Pumpkin Pancakes. And it was all quite by chance.

My husband is a wonderful cook. Weekend mornings he can be found whipping up the fluffiest pancakes; his chicken parmigiana is unbelievable and he can smoke a Boston butt or deep fry a turkey with the best of them.

This weekend the kids requested pancakes. While dear husband gathered the ingredients, I made the coffee. As I poked my head in the fridge for some half and half, my eyes landed on the last of the pumpkin purée. Eureka moment. “Hey, why don’t you throw this pumpkin in the batter?” Silence. Dead silence. I could hear crickets. Not one to give up I asked, “What do you think?” Long long pause. (Translation- don’t mess with my pancakes.) Finally a reply, “Let’s leave it up to B. Whatever she thinks.” I have to admit, at this point the deal was sealed because I knew exactly what B would say, “Pumpkin pancakes? Yum!”

The regular weekend pancakes were already top notch, but the addition of pumpkin, cider, and the classic spice combination of cinnamon, ginger, allspice, and cloves turned already stellar pancakes into something very special for fall and winter breakfasts (and dinners!).  Gently warmed maple syrup with butter added a touch of sweetness, while the toasted walnuts sprinkled on top provided a satisfying crunch to contrast with the fluffiness of the pancakes.

Needless to say, pumpkin pancakes have been officially added to the rotation at White House Red Door.

Have you ever had that moment of spontaneity in the kitchen? A eureka moment that led to something delicious?

Pumpkin Pancakes with Maple Syrup and Toasted Walnuts

Pumpkin Pancakes

  • Servings: 15-20 pancakes
  • Print

Ingredients:
2 cups all purpose flour
3 Tablespoons sugar
2 teaspoons baking powder
1 teaspoon cinnamon
1 teaspoon ground ginger
½ teaspoon salt
¼ teaspoon allspice
¼ teaspoon ground cloves
3 eggs
1 cup milk
1 cup apple cider
1 cup pumpkin purée
¾ teaspoon pure vanilla extract
3 Tablespoons unsalted butter, melted

For serving:
warm maple syrup with butter
toasted walnuts or pecans

Instructions:
Preheat griddle to 350°-375°.

Mix dry ingredients. In a separate container, whisk eggs, then add vanilla, cider, and milk stirring well.

Add the wet ingredients to the dry and whisk until just combined.

Stir in pumpkin, then add melted butter.

When griddle is ready, spoon 1/3 cup batter onto the griddle for each pancake. Cook until the top of each pancake is dotted with bubbles and some have popped open. Carefully flip and cook until the other side is golden brown. Serve immediately with maple syrup and toasted walnuts. Though best enjoyed right away, the pancakes can also be kept warm in a 200° oven until ready to serve.

Pumpkin pancakes dry ingredients whisked together.
Whisk the dry ingredients together.
3 eggs ready for whisking.
Whisk the eggs together.
Whisking vanilla into eggs.
Whisk vanilla into eggs.
Whisk cider and milk into egg/vanilla mixture.
Pumpkin Pancakes- gently combine liquid and dry ingredients
Add the liquid ingredients to the dry ingredients and gently combine.
Stir the pumpkin purée into the batter.
Stir the pumpkin purée to the batter.
Stir melted butter into the batter.
Pancakes on the griddle are dotted with popped and unpopped bubbles.
When the tops of the pancakes are dotted with popped and unpopped bubbles, it is time to flip.

Flipped pancakes on the griddle.

Pumpkin pancakes served with warm maple syrup and toasted walnuts.
Serve with warm maple syrup and toasted walnuts.


Roasted Pumpkin Purée

Sugar PumpkinBeing part of a CSA has so many benefits… supporting and connecting with local farmers while picking up my weekly share under a tent in a field is far more interesting than maneuvering the aisles of the grocery store, and enjoying veggies that were literally just picked earlier that day, they don’t get any fresher and more delicious! Because the nature of a CSA promotes a “you get what you get, and you don’t get upset” mentality, another benefit is that I’m challenged to finds ways to use vegetables that I normally would pass by, as well as the ones that I don’t care for (I’m talking to you zucchini).

Each fall, sugar or pie pumpkin make appearances in our CSA pick up. At first I was intimidated, my hands on experience with pumpkin was limited to a once a year carving for Halloween, followed by roasting the seeds. The only other pumpkin I had ever used in the kitchen came from a can. But stretched to do something with this new addition to the weekly pick up, I found myself roasting pumpkins. It couldn’t be any easier. Lately, more and more sugar and pie pumpkins are showing up at the grocery store, so I can’t be the only one using them. And while definitely not necessary because canned pumpkin is so good (though it may not be all “pumpkin”), roasting your own pumpkin is fun to try.

***Important note- Do NOT use jack-o-lantern pumpkins, they are far too watery! Instead, look for small sugar or pie pumpkins, usually in the 3-6lb range.***

Pumpkin Purée

Roasted Pumpkin Purée

  • Servings: approximately 3 cups
  • Print

Ingredients:
1 sugar or pie pumpkin, 3-6lbs

Instructions:
Preheat oven to 375°. Line a baking sheet with parchment or foil.

Remove stem and cut pumpkin in half. Scoop out seeds (save and roast later) and using a spoon, scrape out stringy pulp. Cut each half in half, so that you have 4 quarters.

Transfer pumpkin quarters to lined baking sheet. Roast until fork tender, about 45 minutes.

When cool enough to handle, use a spoon to scoop out the flesh and purée in a food processor or simply mash it.

Use in any recipe that calls for canned pumpkin or pumpkin purée. This purée also freezes well.

Sugar pumpkin halved and seeded.
Using a large chef’s knife, cut the pumpkin in half and scoop out the seeds. Remember to save the seeds for roasting.
Scrape away any stringy pulp and discard. Place the pumpkin pieces on a parchment lined sheet pan.
Roasted pumpkin quarters on sheet pan.
Pumpkin is done when it is easily pierced with a fork.
Roasted pumpkin being scooped out.
When cool enough to handle, scoop out the flesh.
Pumpkin Purée
Either purée in a food processor or mash. Use as you would in any recipe calling for canned pumpkin or pumpkin purée.