Pesto

Pesto

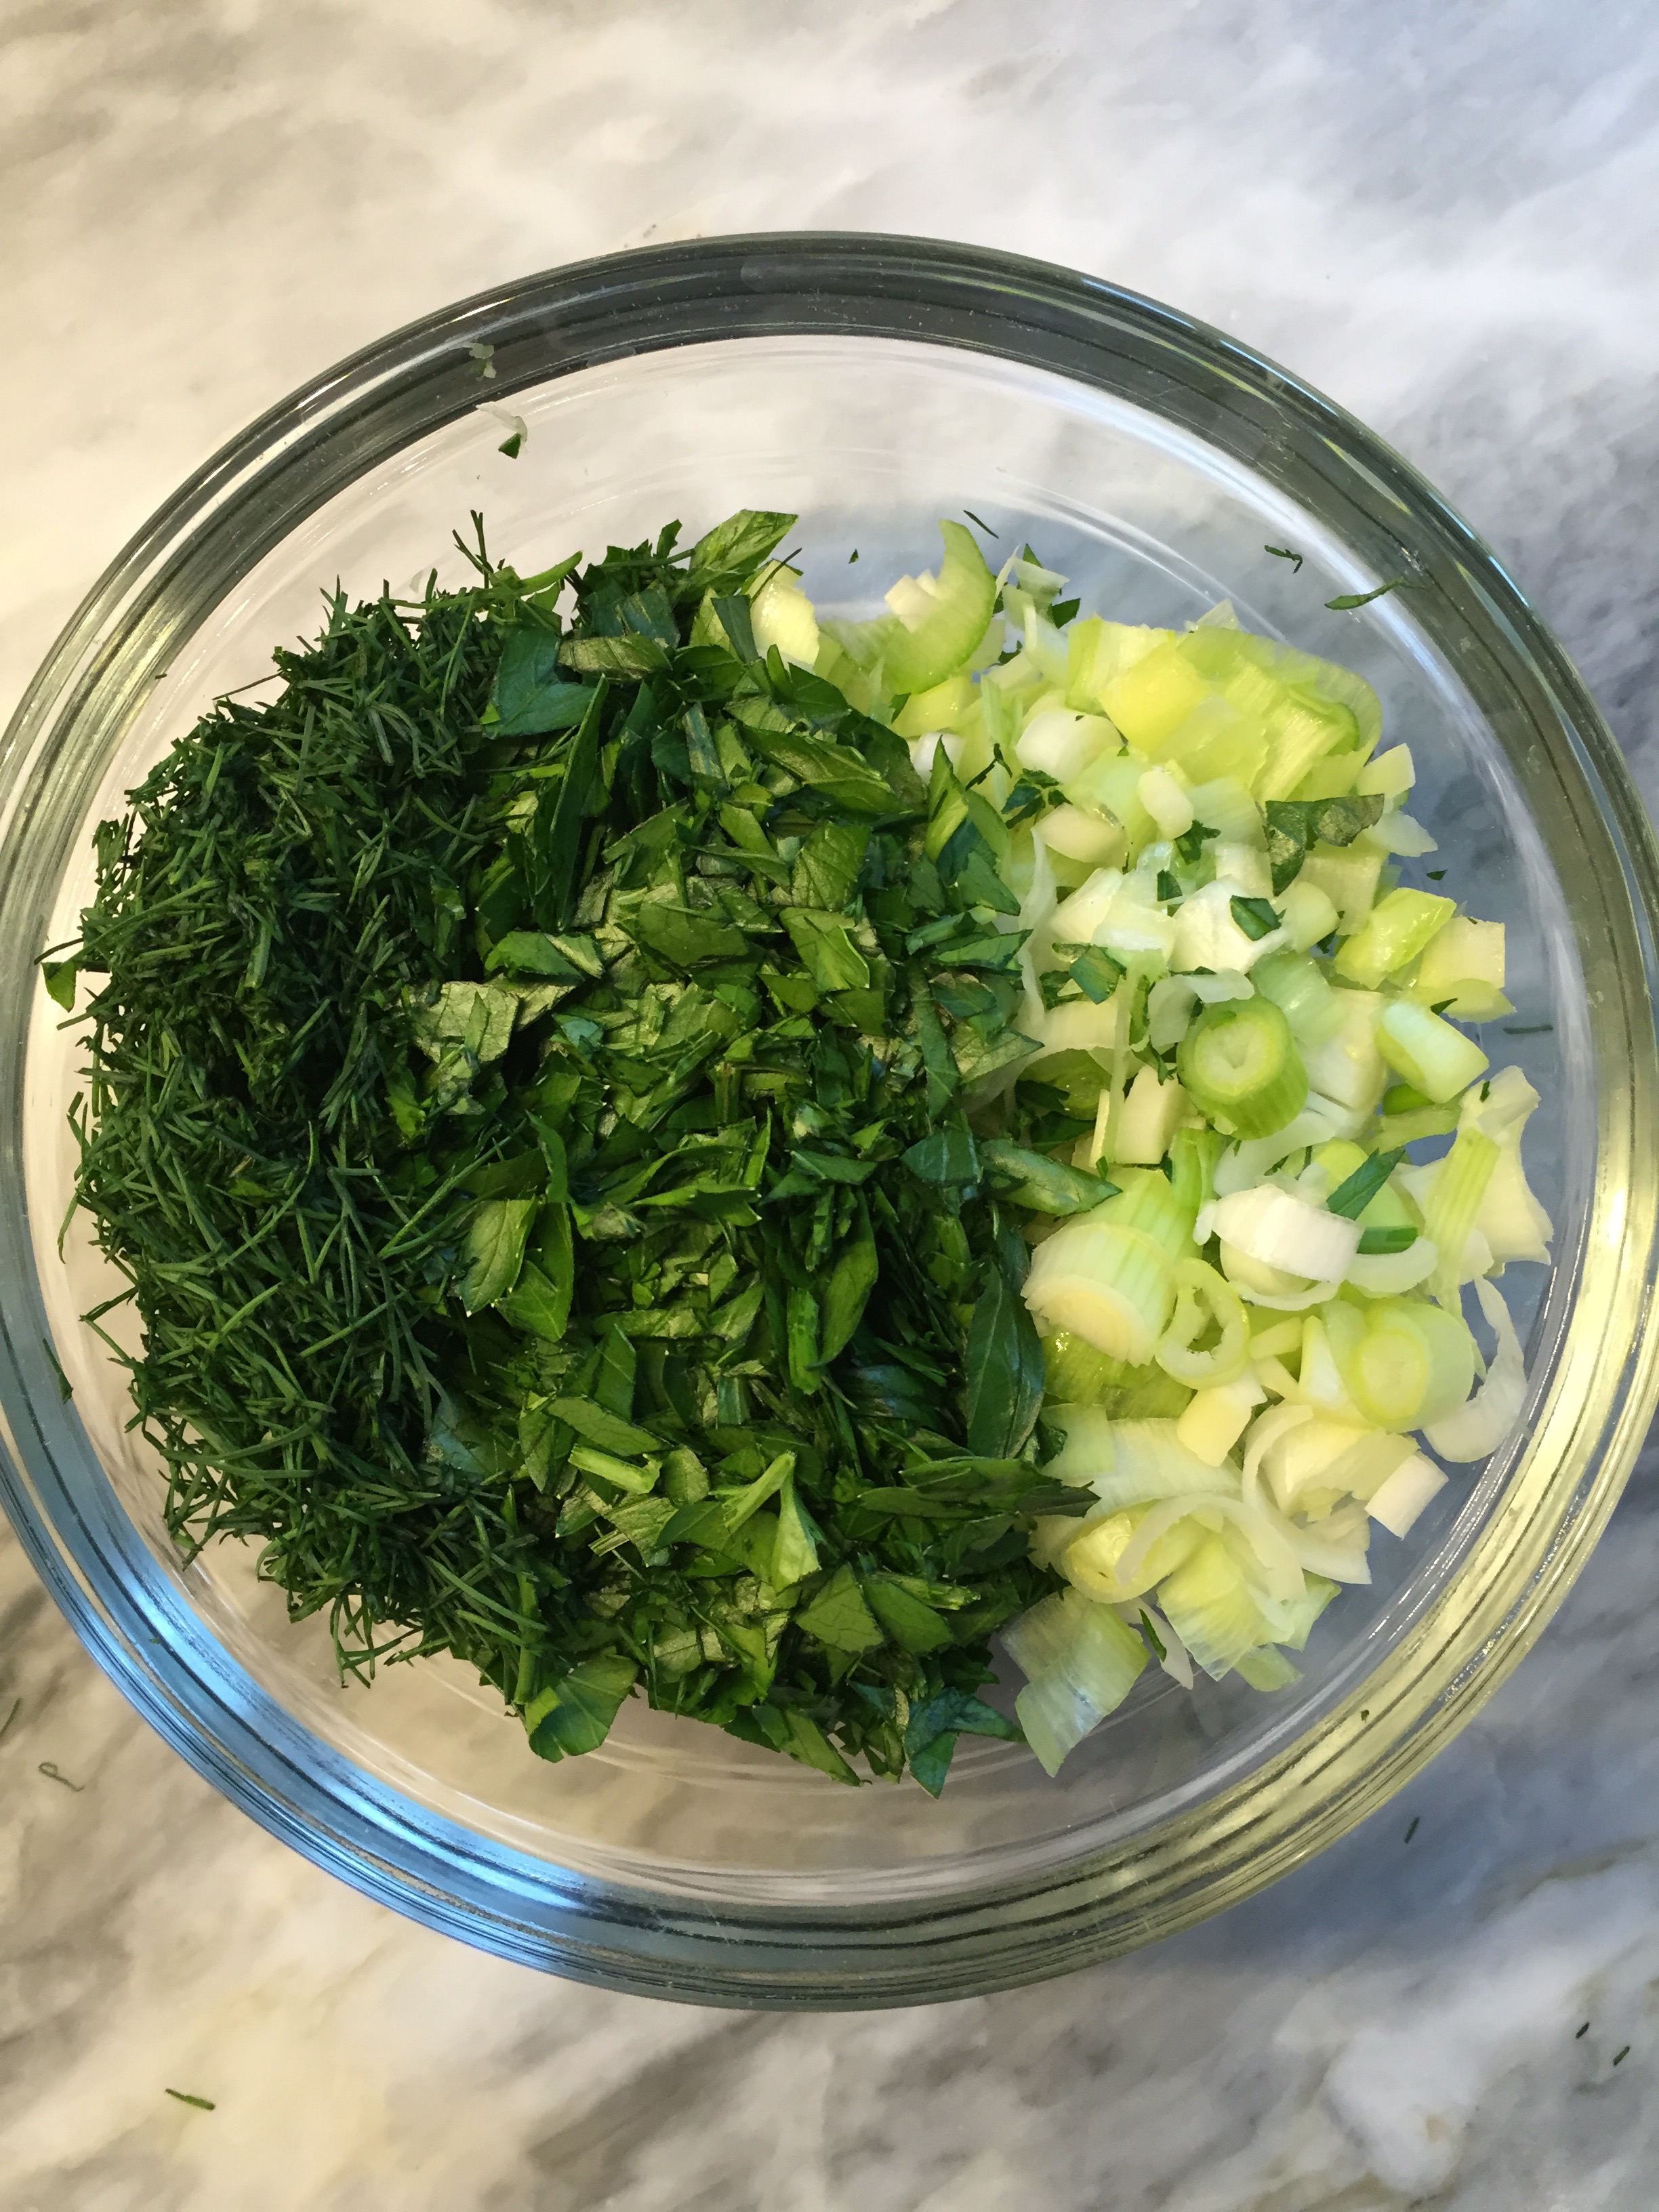
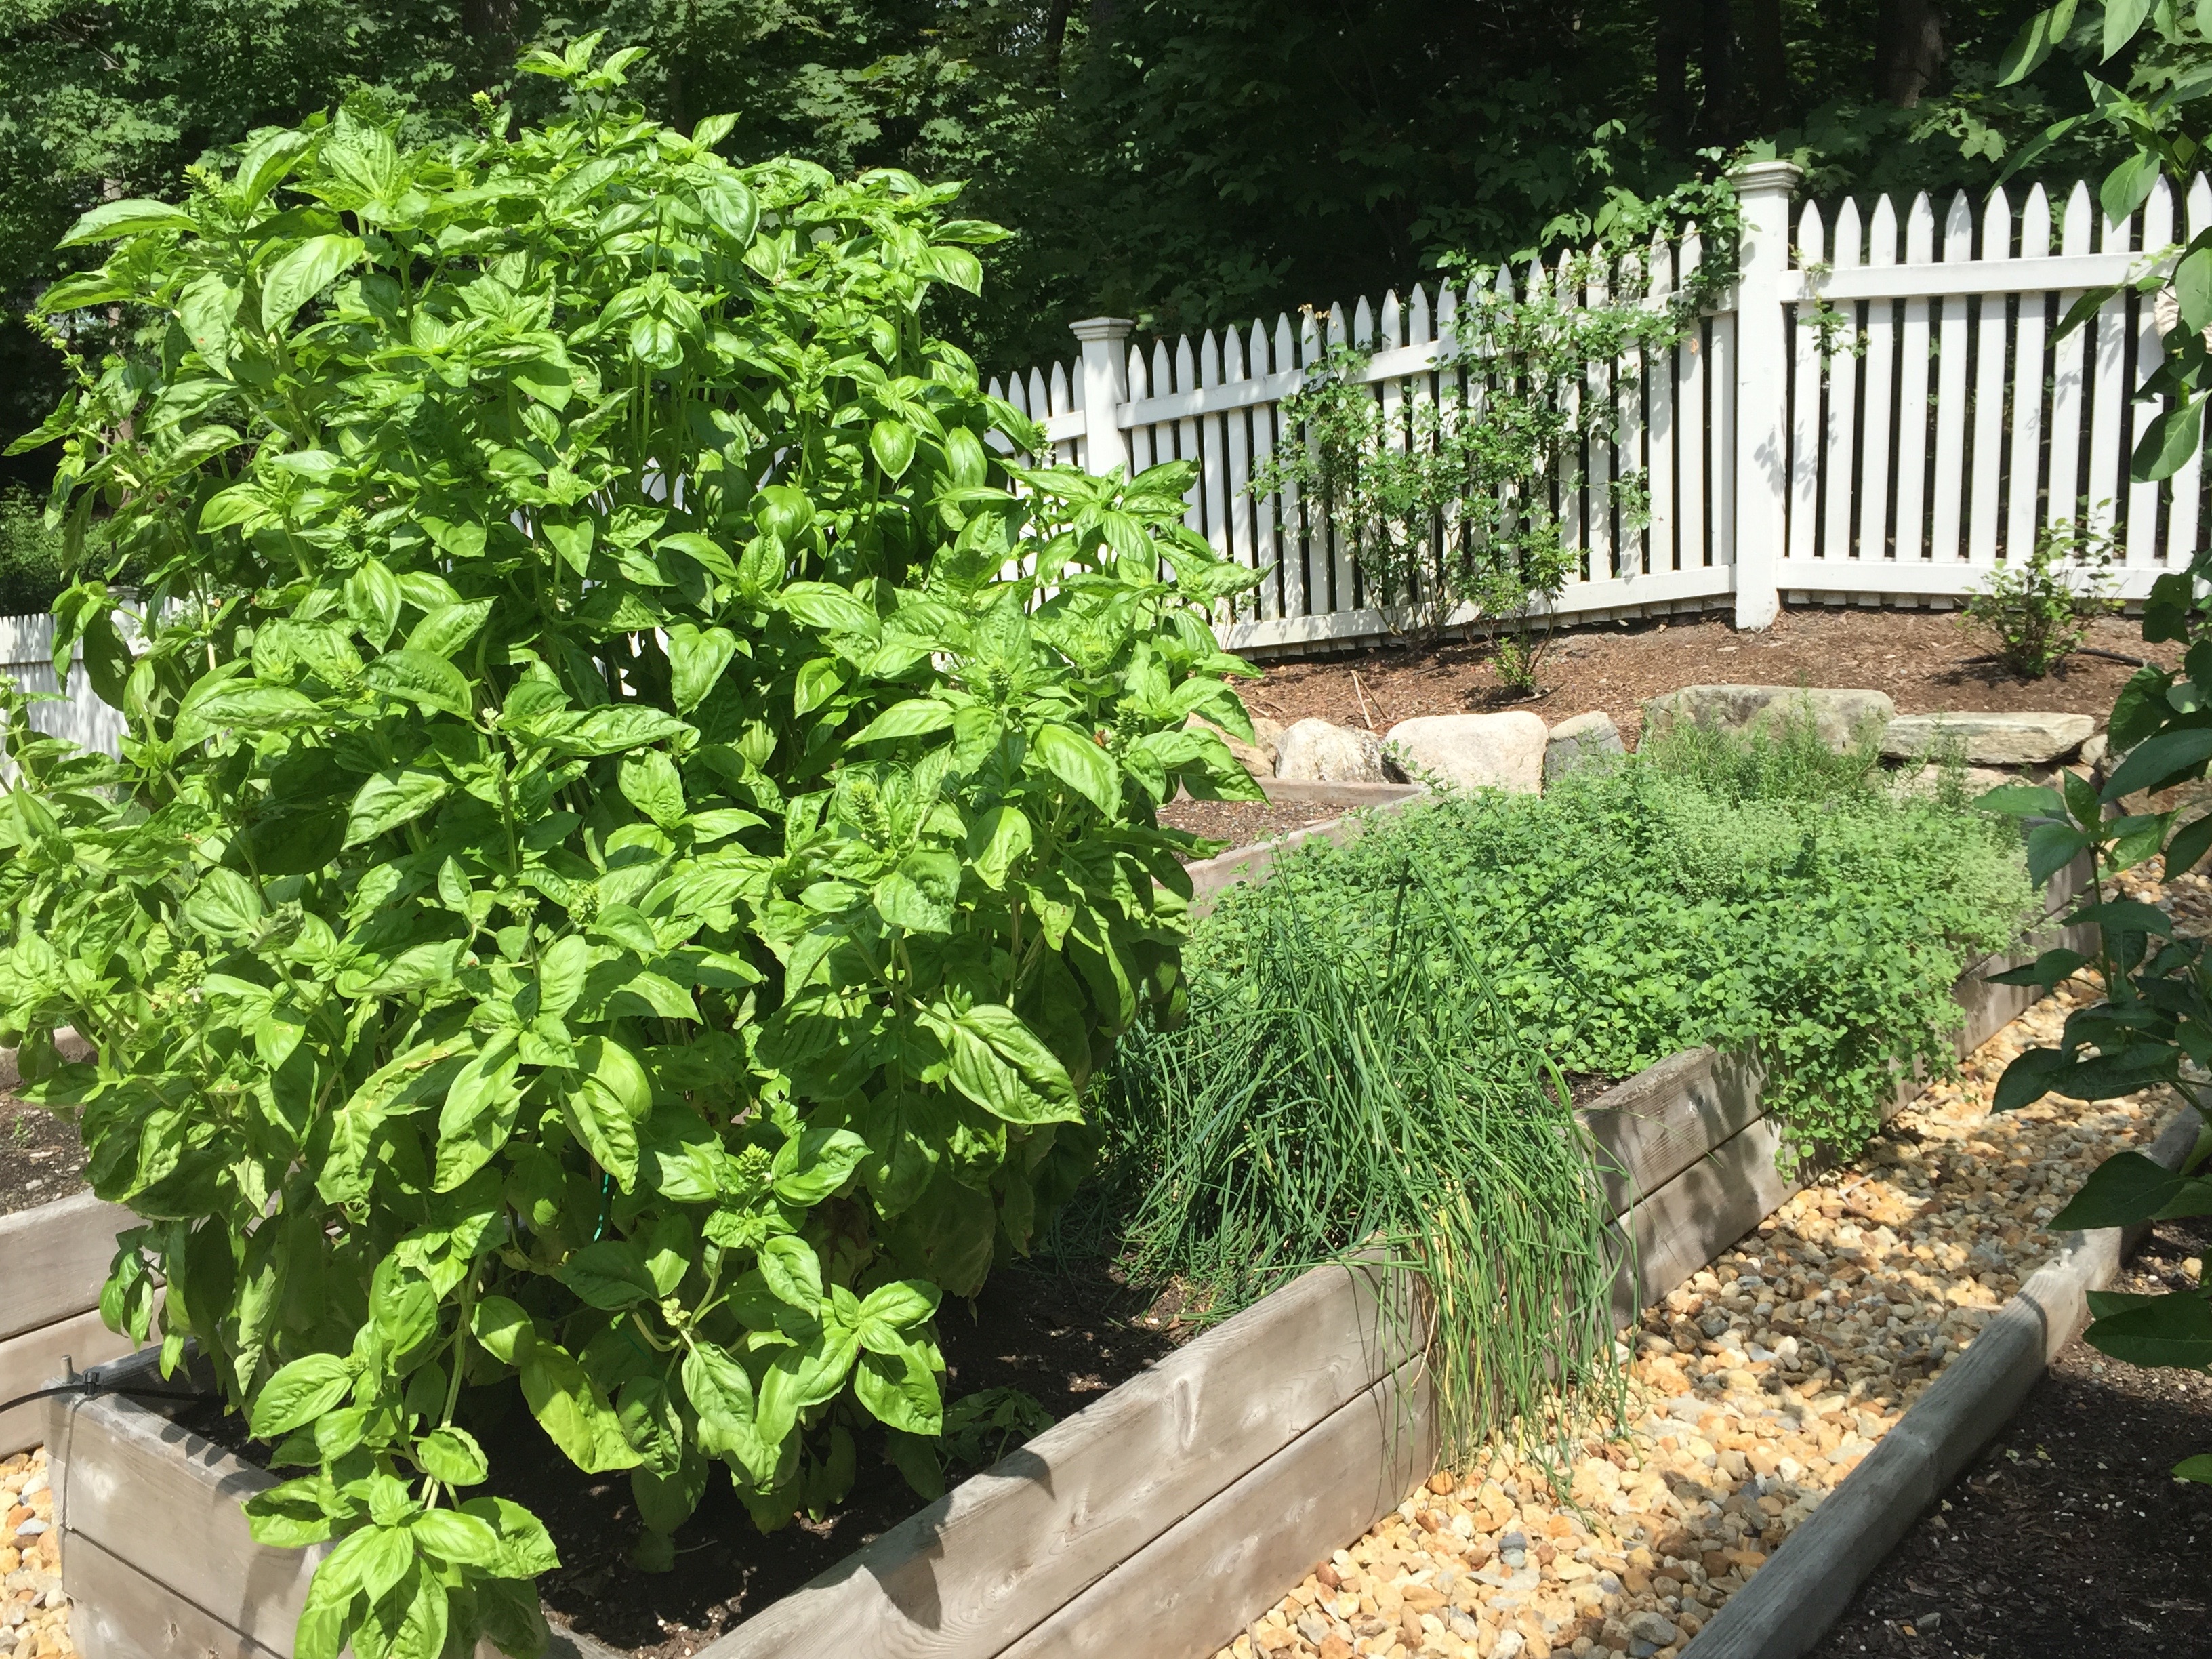
You know how each summer there is THE song of the summer, the one that puts smiles on faces, gets toes tapping, and windows rolled down while everyone sings along? Well, this summer I have THE herb of the summer growing in my garden… basil. The three or four small plants that went into the ground in late spring have grown into a mighty basil forest, extraordinarily tall and lush. We cannot keep up with it; despite our best efforts, that is an enormous amount of caprese salad to eat!

Herb garden with basil, chives, oregano, thyme, and rosemary
This basil is out of control.

As the days grow shorter, I am only too aware of the cool weather that is sure to follow. Feeling a bit like the ant preparing for winter in Aesop’s The Grasshopper and the Ant, I’ve gone on a pesto making binge; not only preserving basil’s quintessential summer flavor at its best, but capturing a sunny moment in time. These green gems, pulled from the depths of the freezer, will bring warm memories to cold snowy nights sometime in the (not too distant) future.

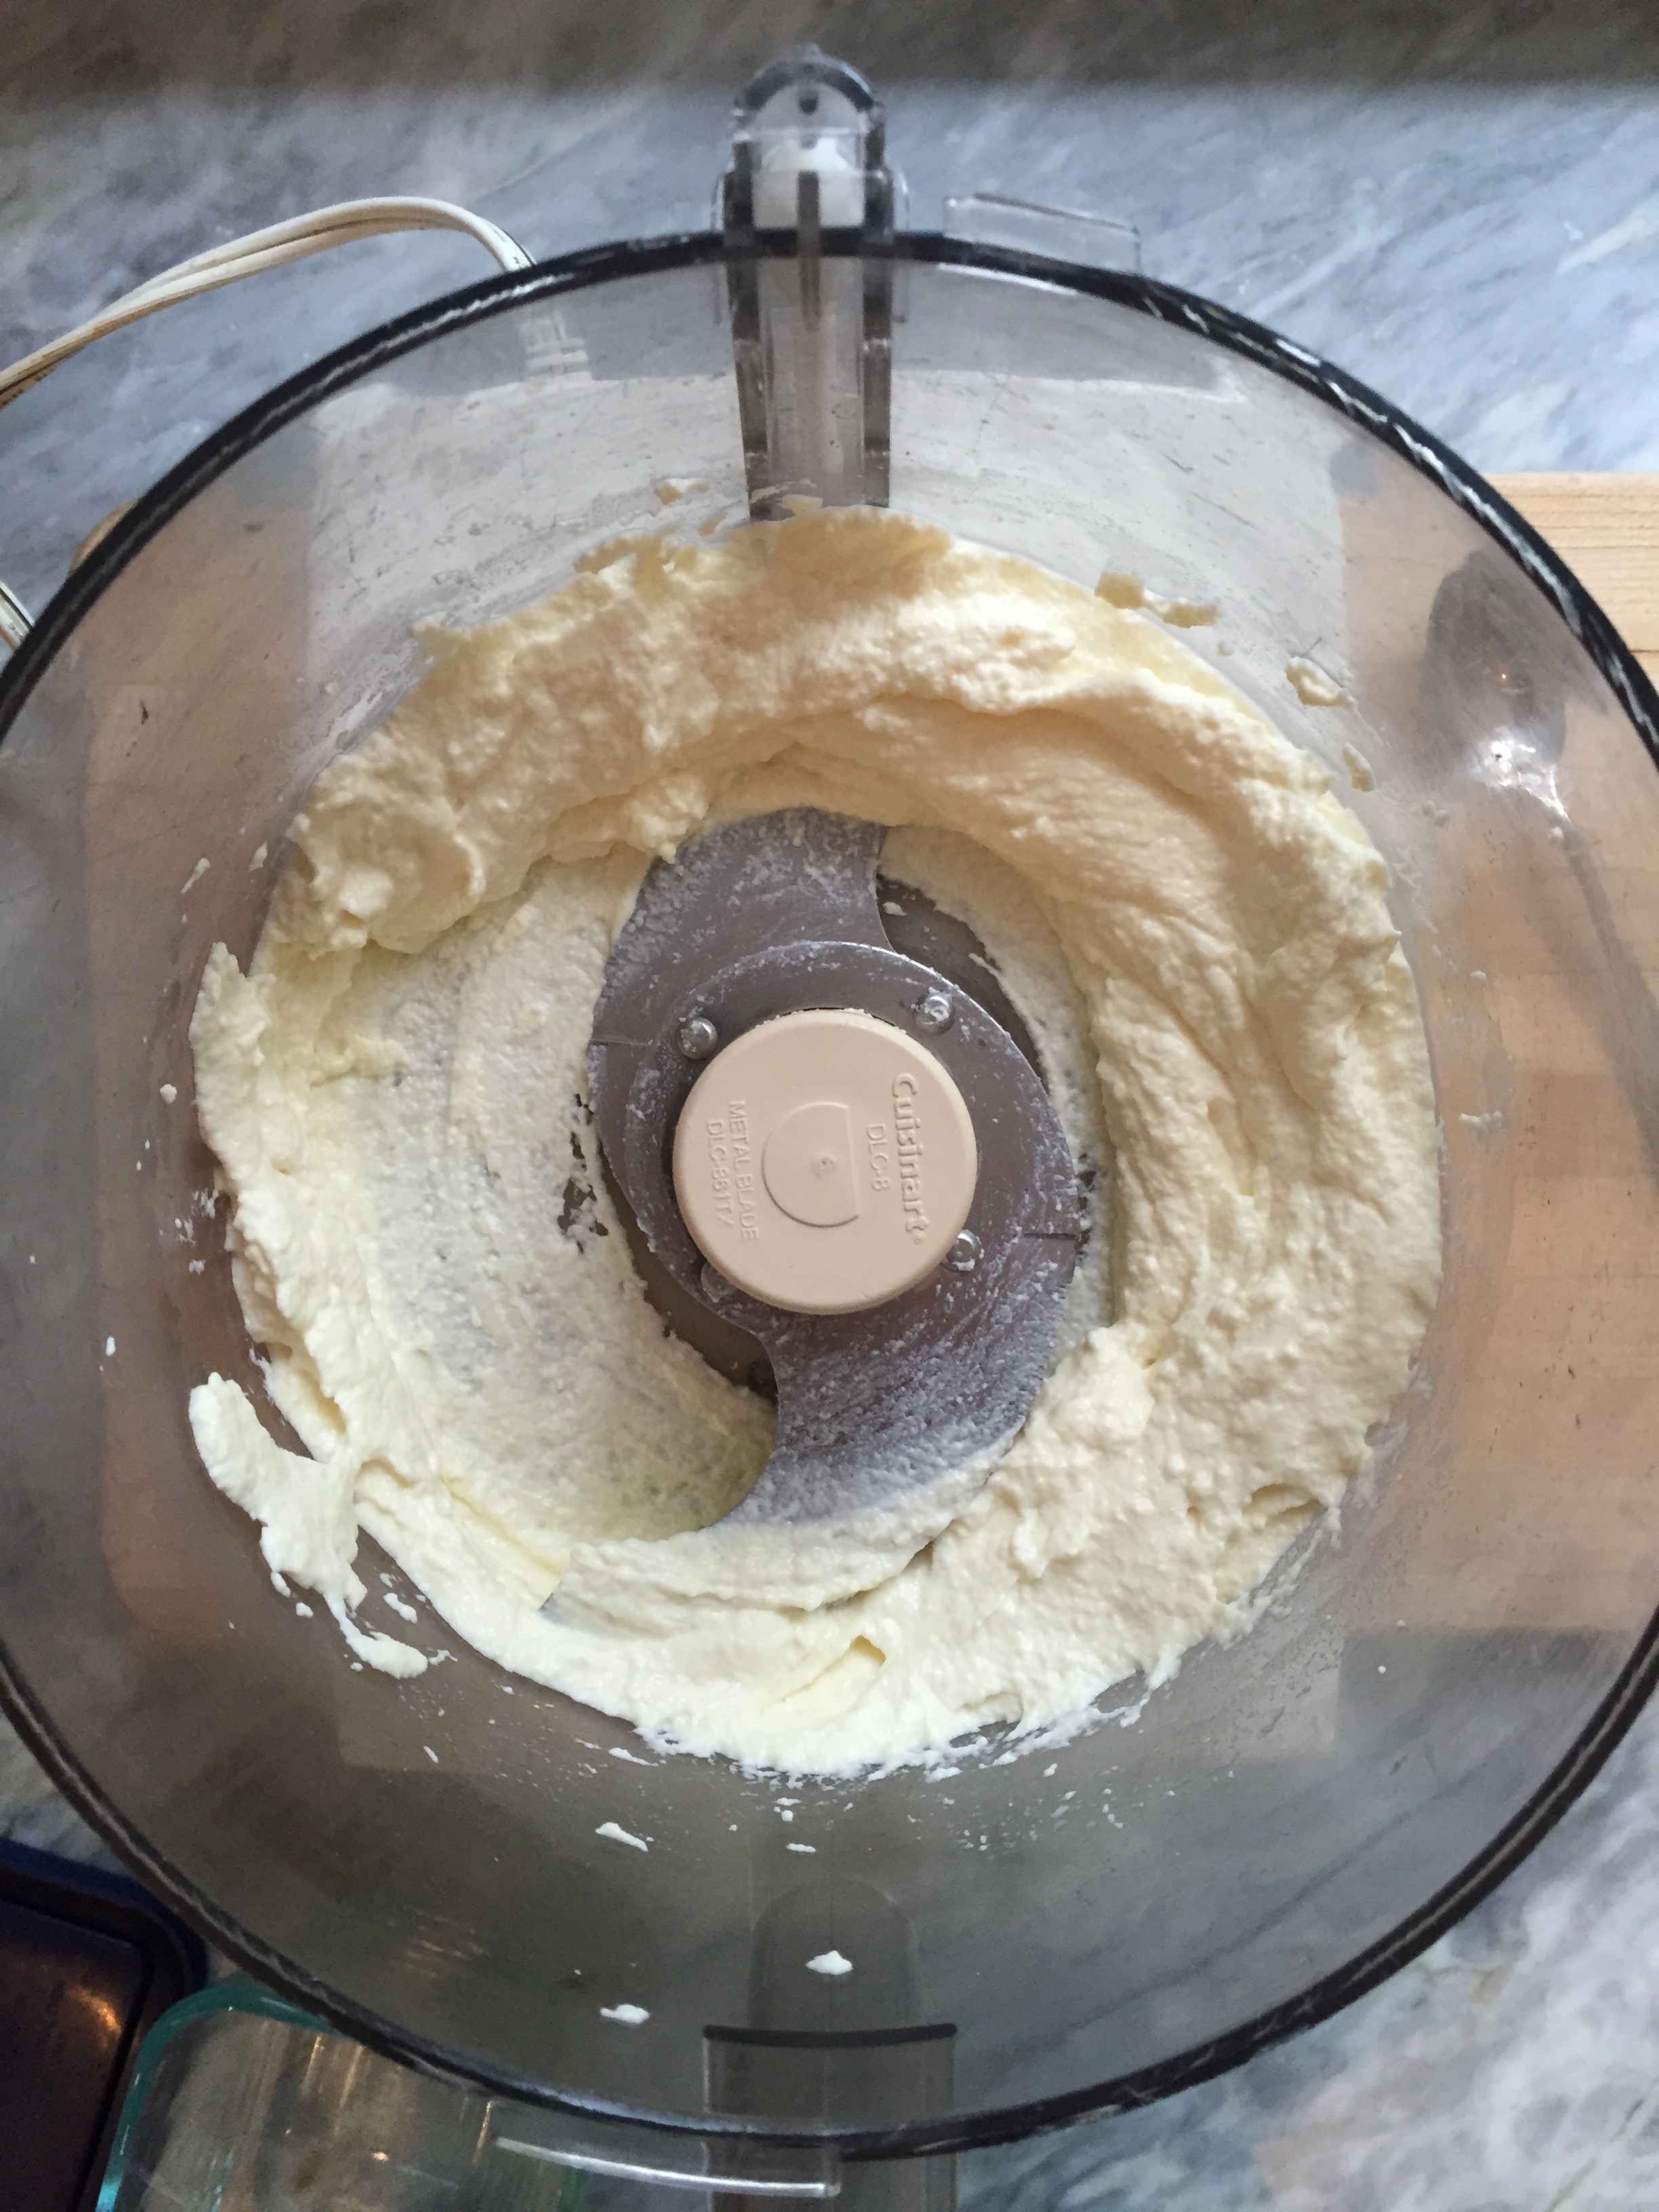
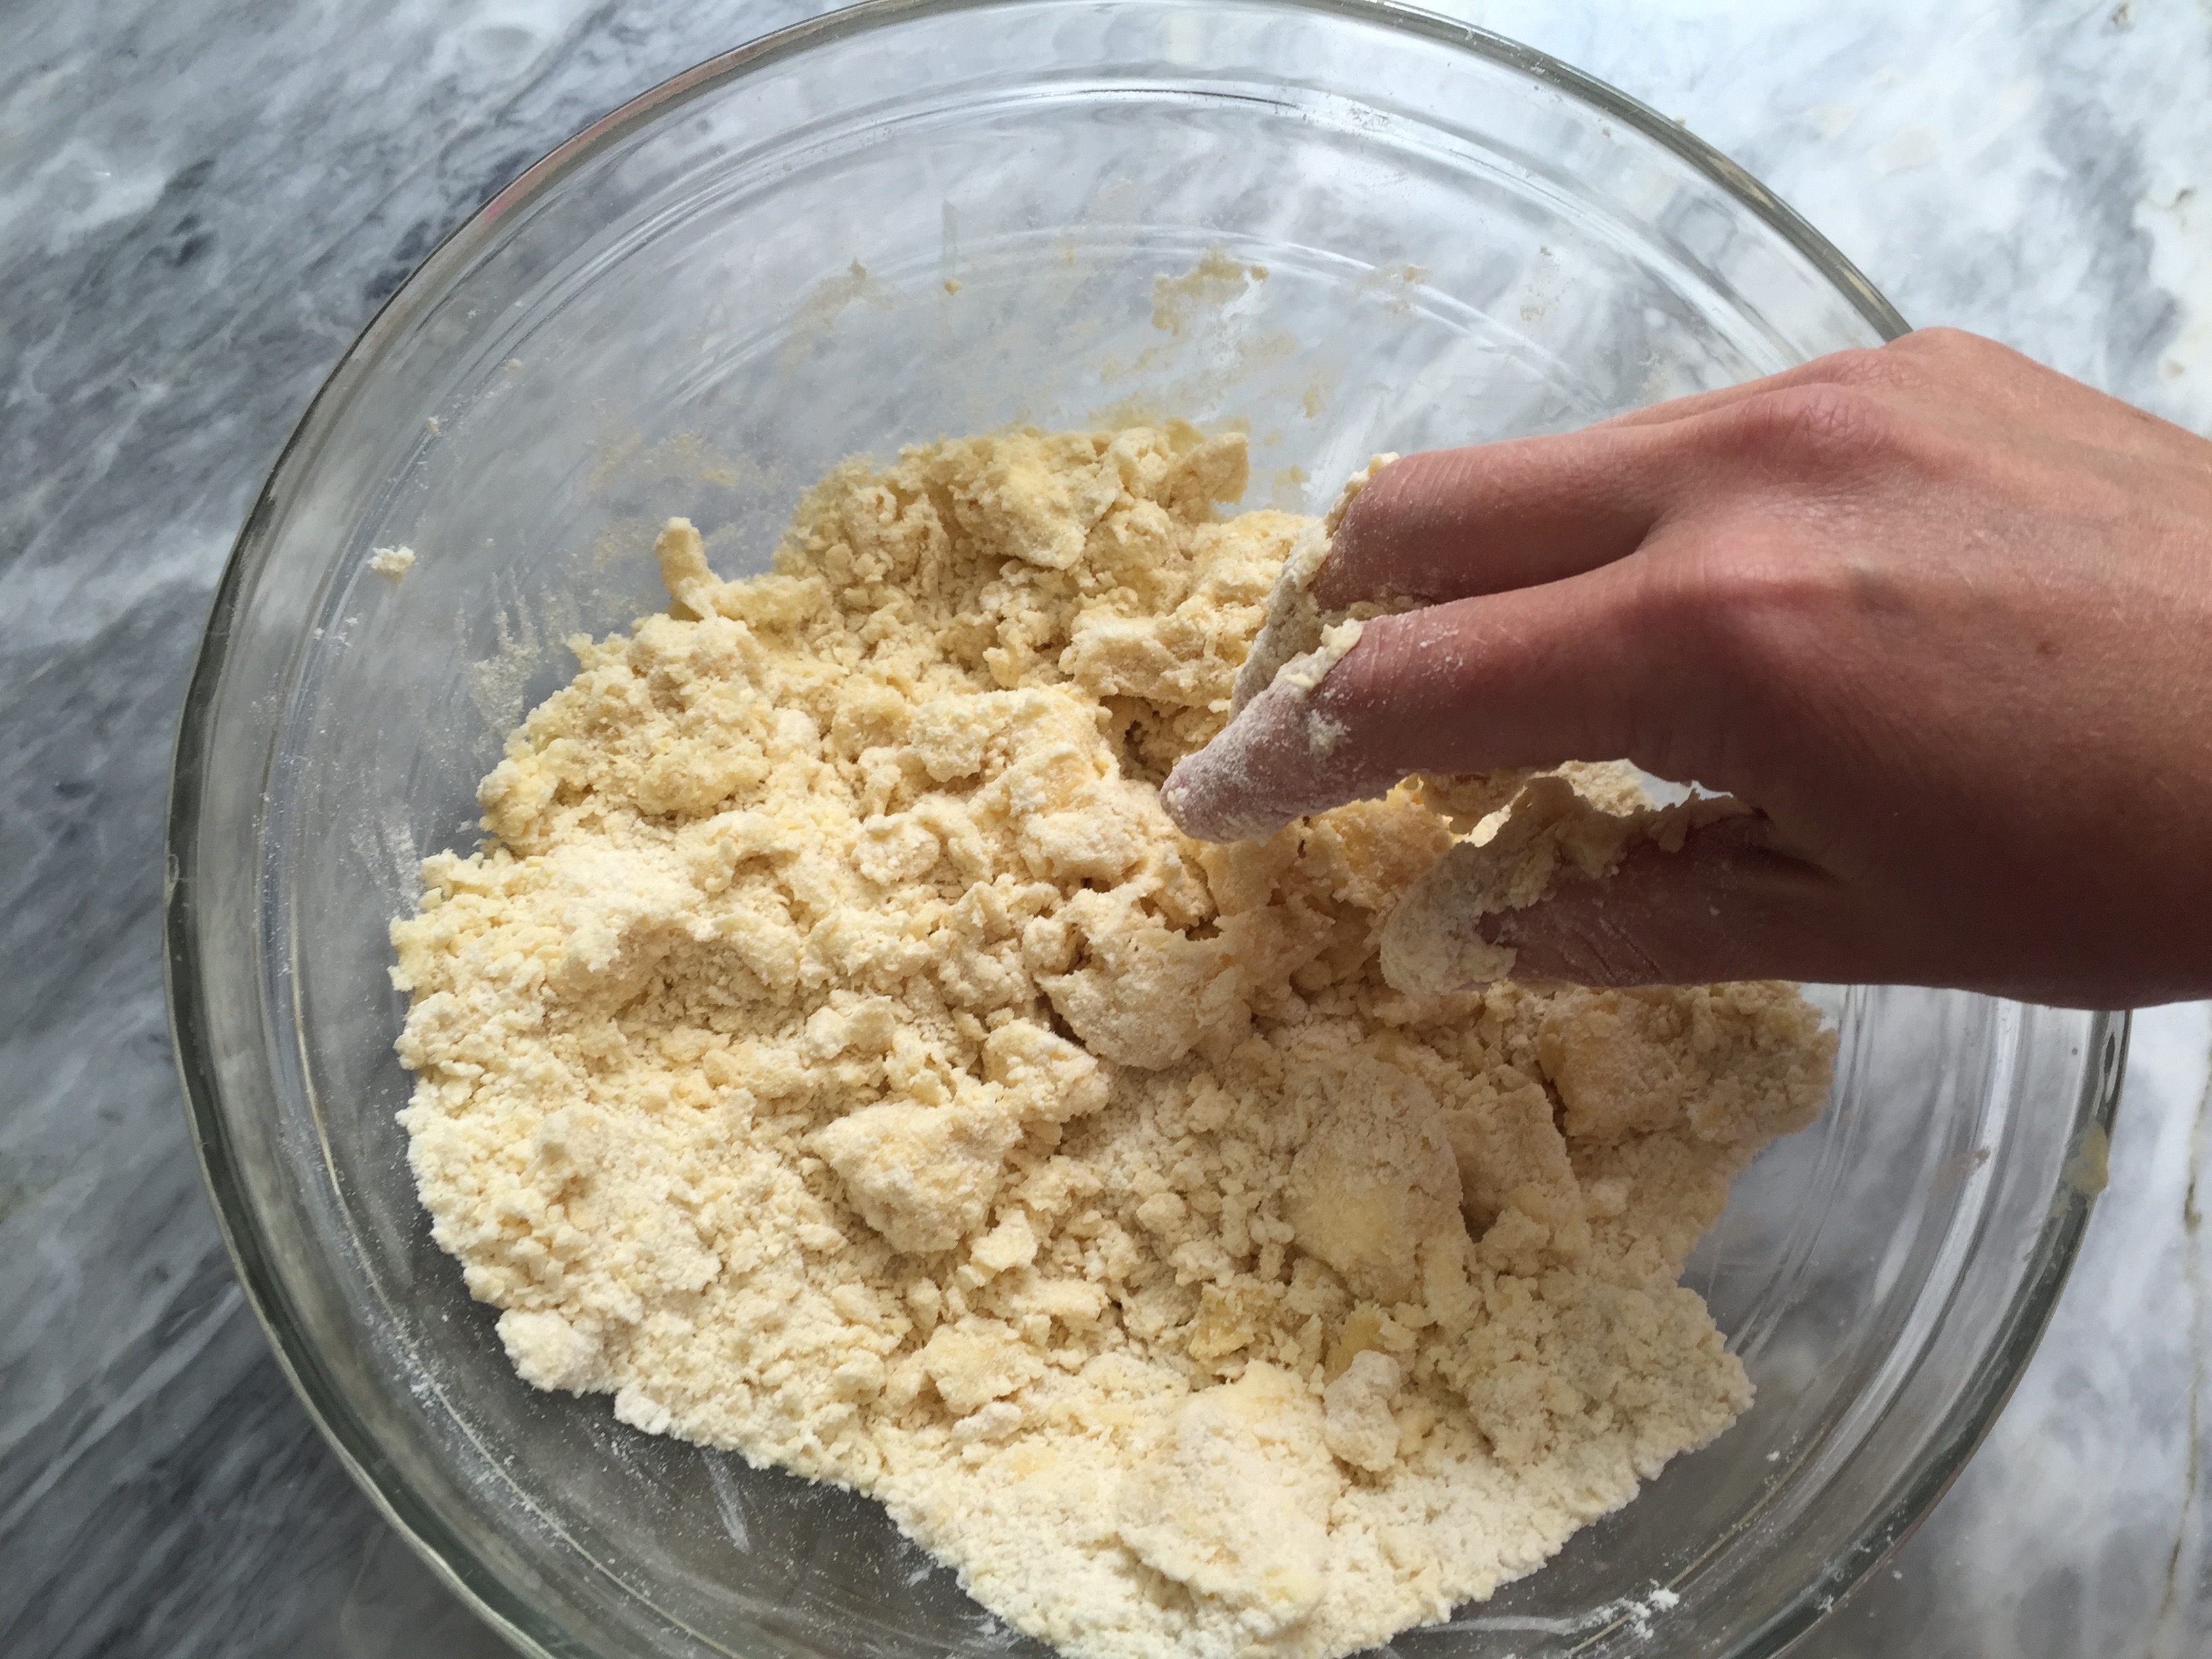
Pesto is from the Italian word pestare which means to pound or crush. The English word for pestle shares the same Latin root. Traditionally, pesto is made by hand with a mortar and pestle, but in the quantities I’m dealing with the food processor is helping. No shame in that.

fresh basil

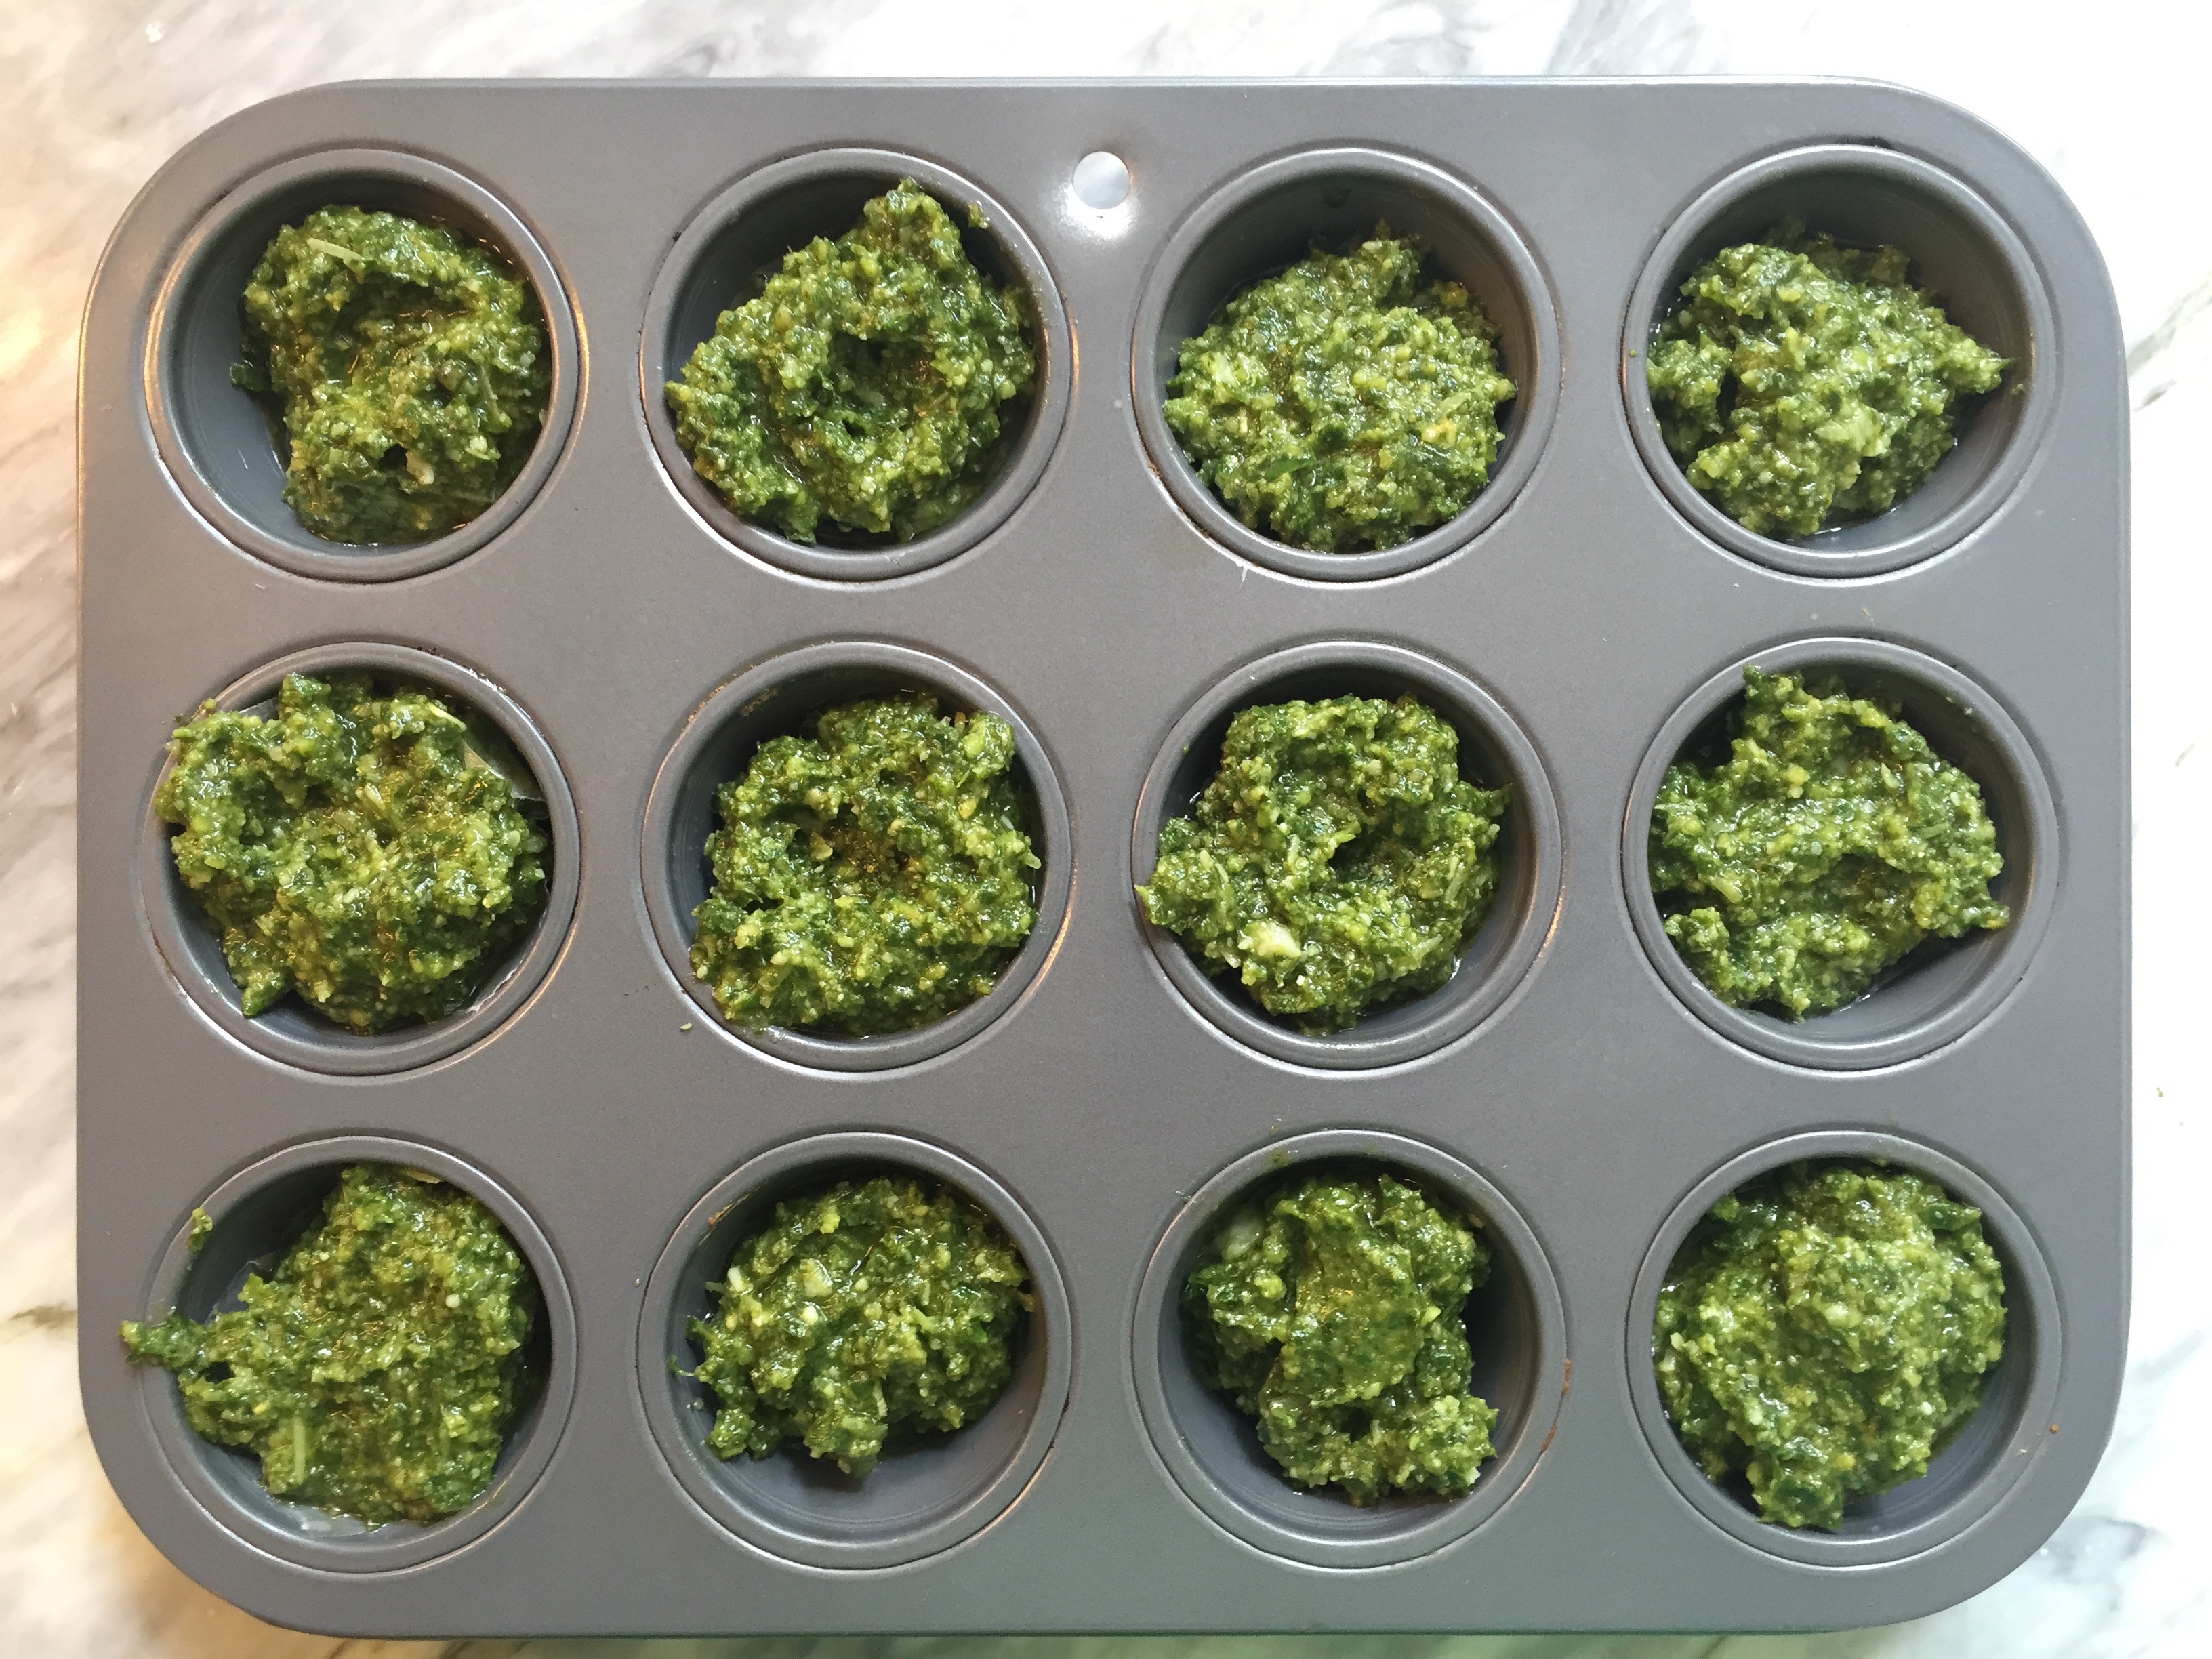
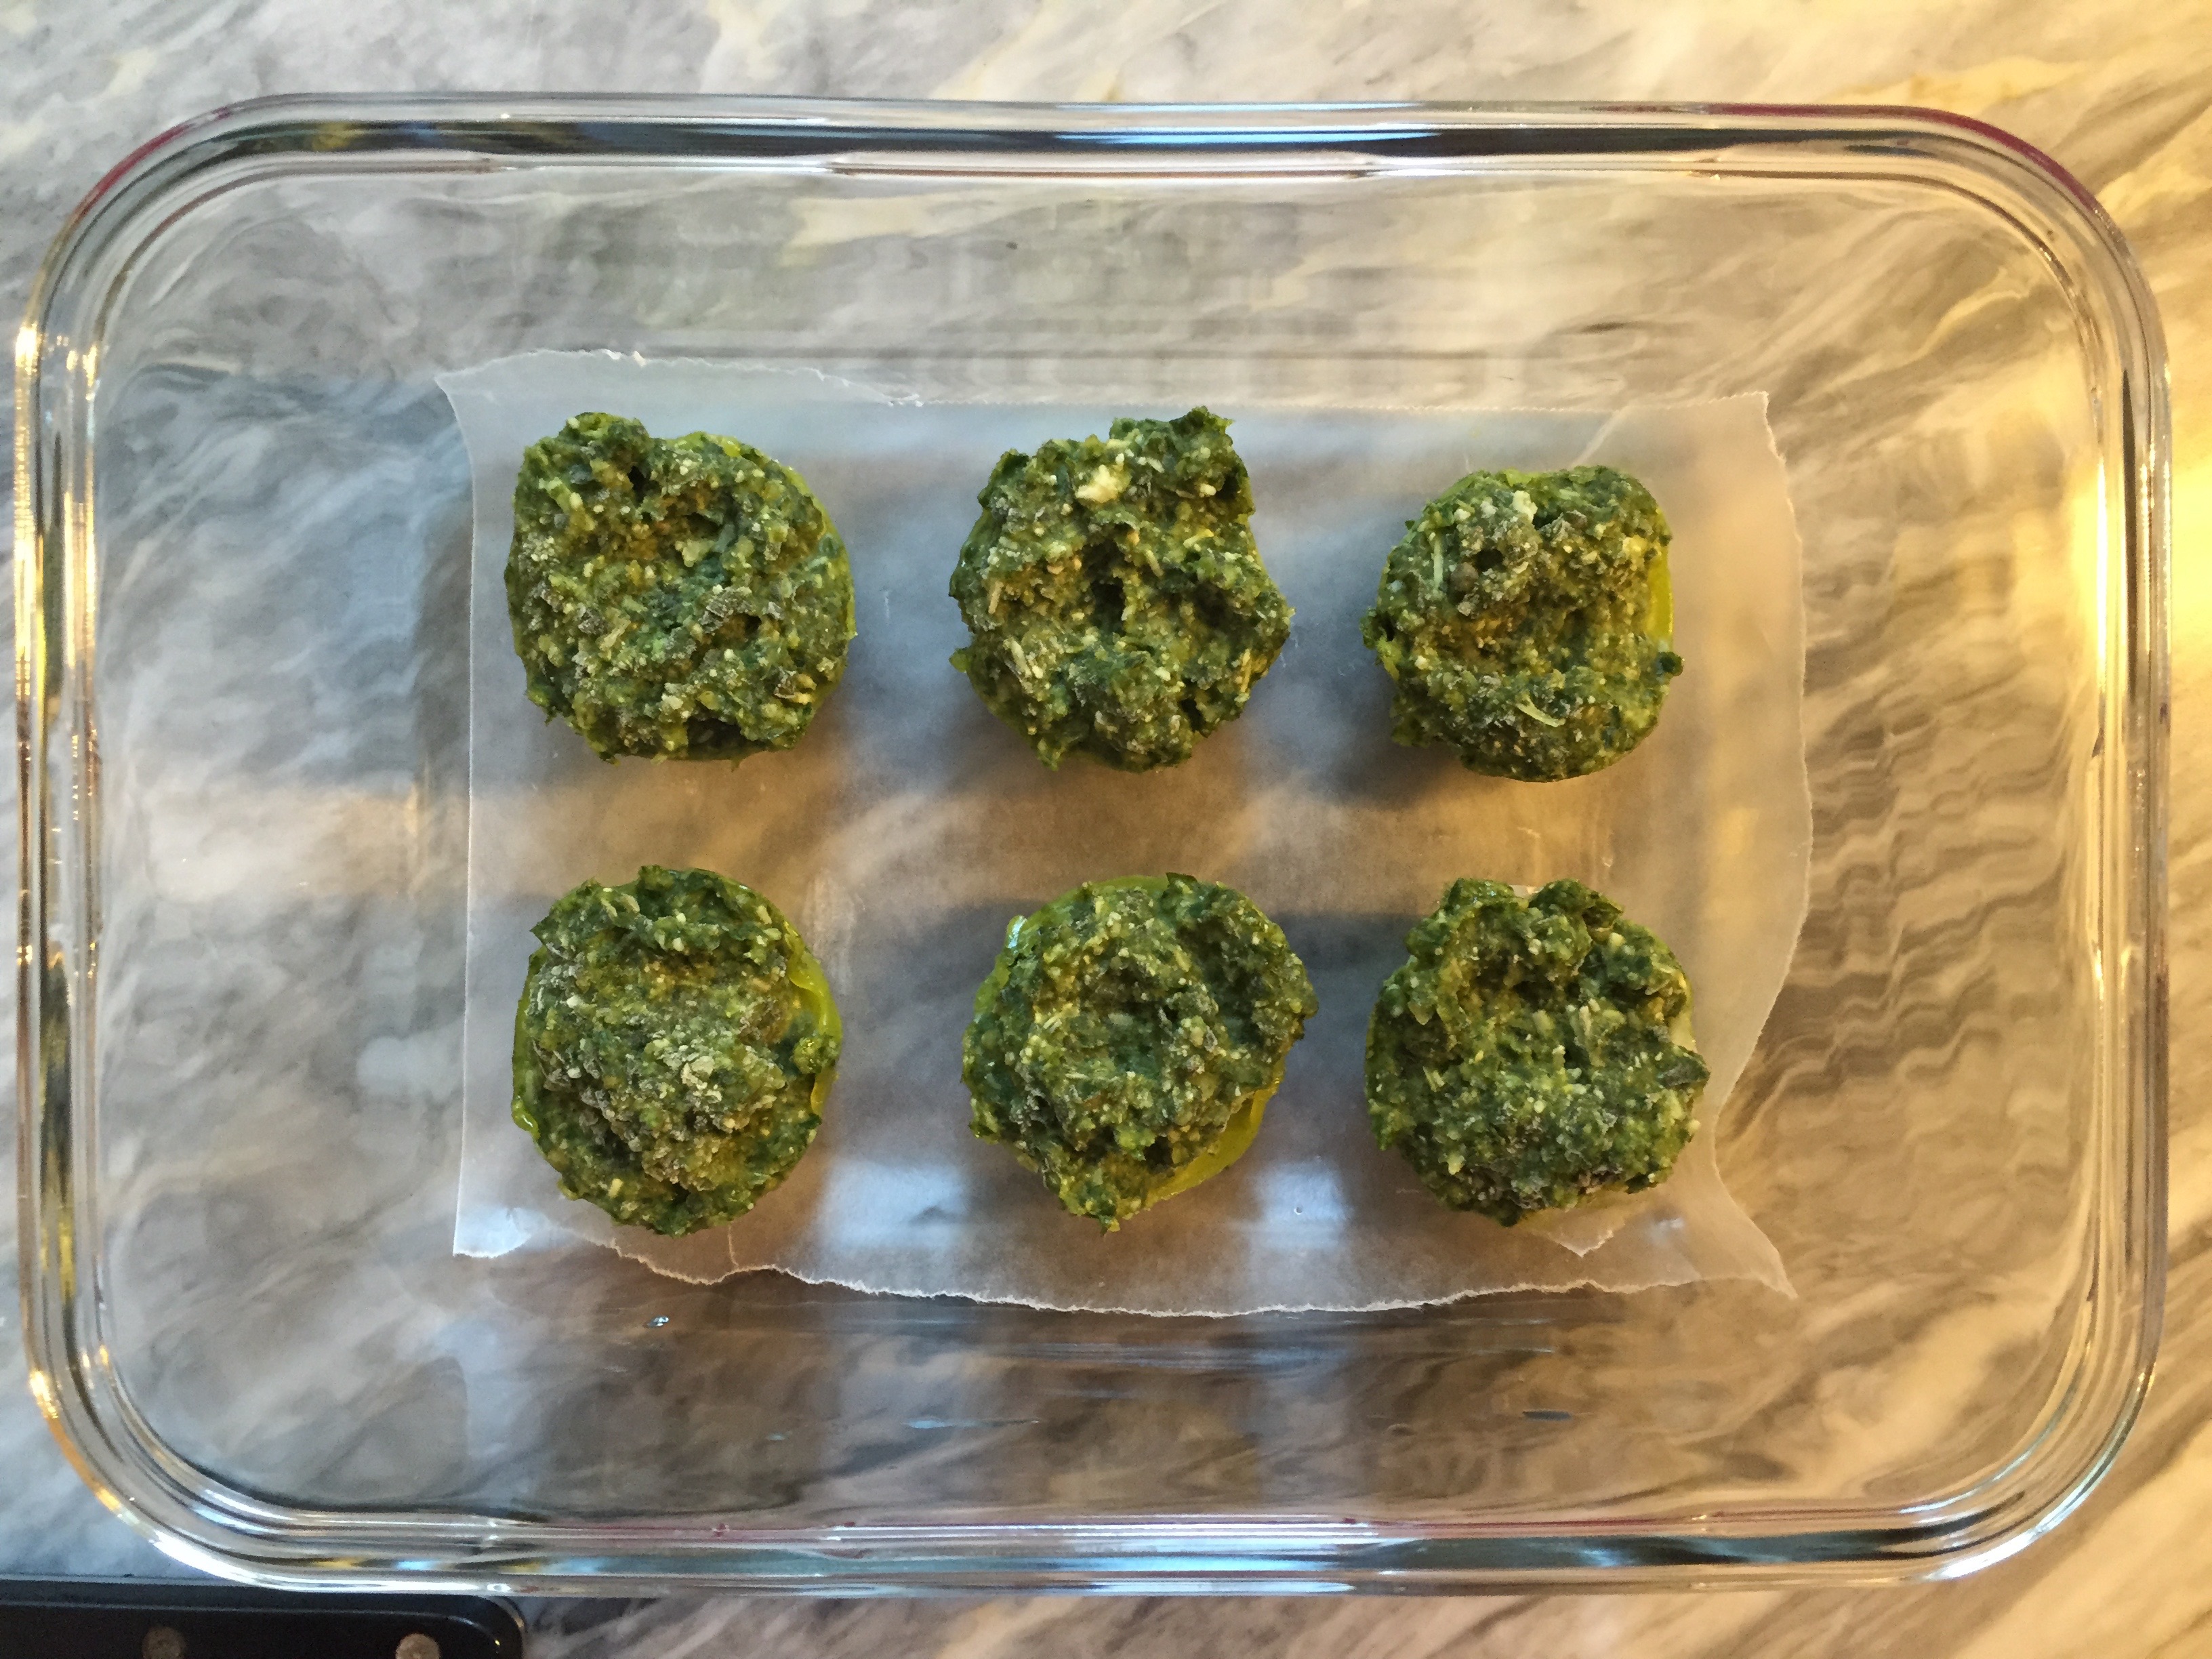
Some of the pesto is for enjoying now, but the majority is getting scooped into mini muffin tins, frozen, then transferred into storage containers for the freezer. The mini pesto “muffins” are just the right size to add to dishes all winter long.

And pesto isn’t just for pasta… here are some others ways to savor it.
• Potatoes- pesto and potatoes are a wonderful pair. Gently stir a spoonful of pesto into freshly boiled potatoes or mix a spoonful into mashed potatoes.
• Marinara Sauce- add pesto to your regular marinara sauce
• Dip- mix pesto into greek yogurt, crème fraiche, or sour cream for a dip
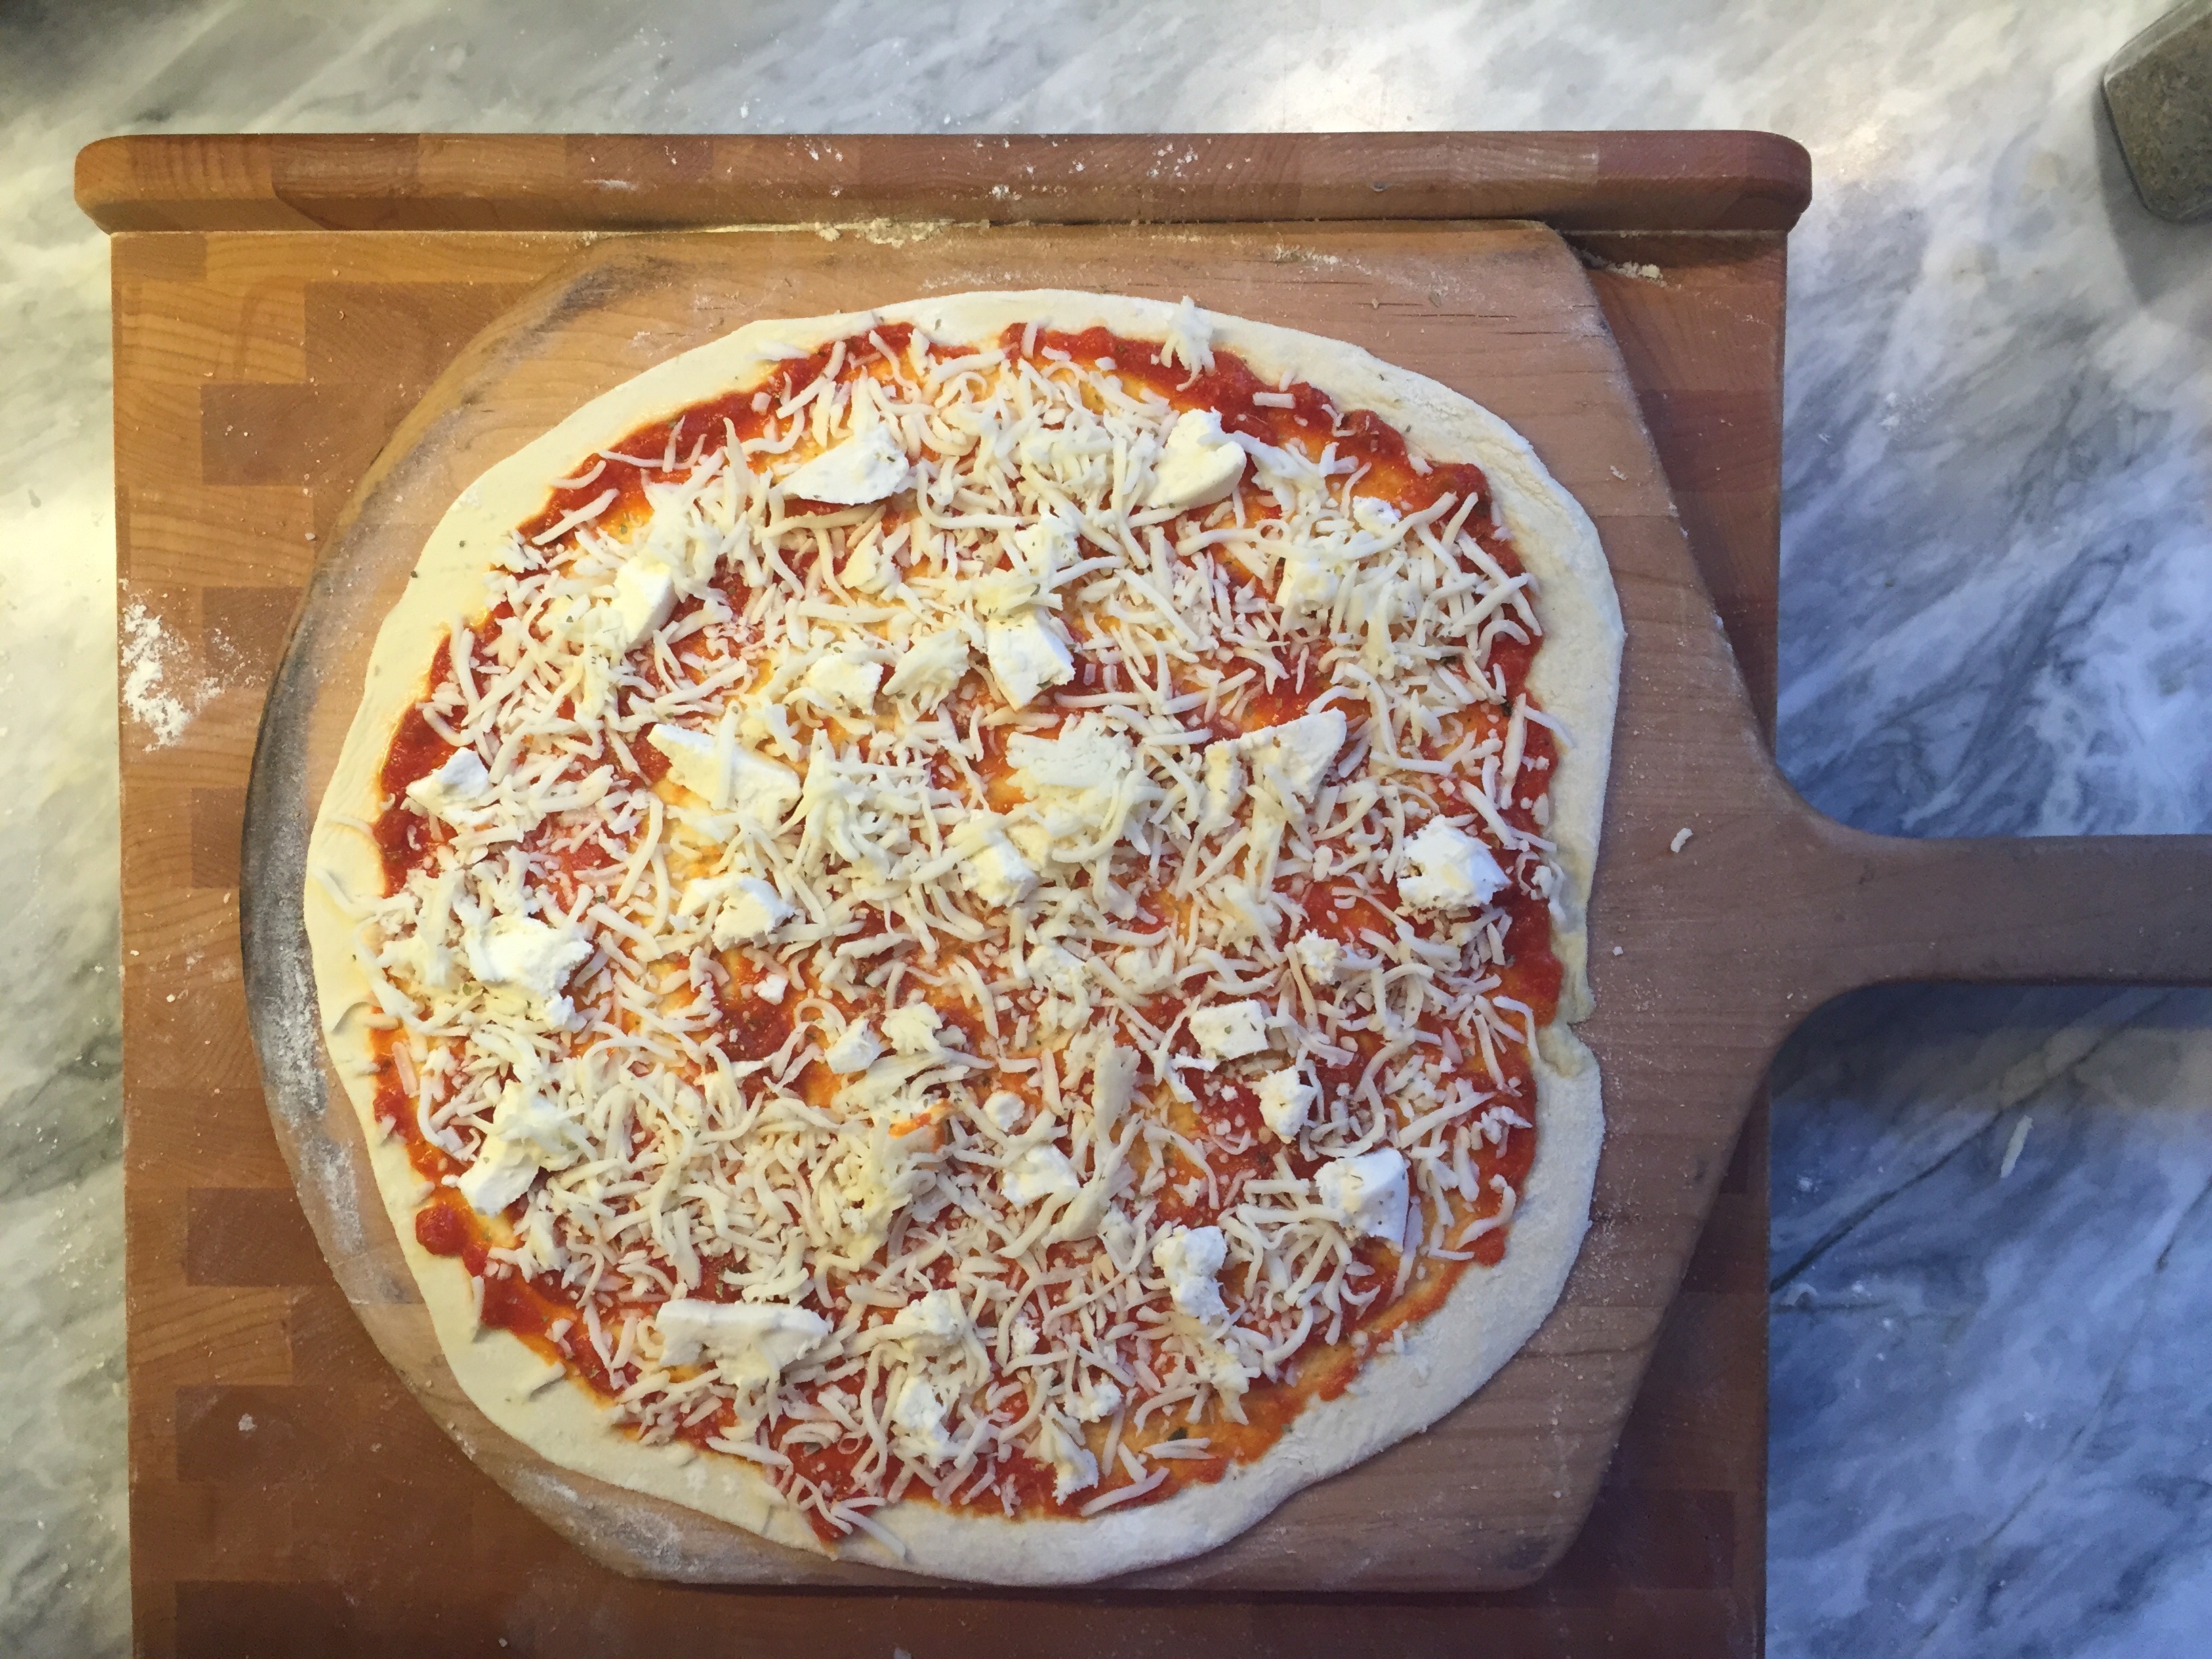
• Pizza- use pesto instead of pizza sauce on your next homemade pizza
• Sandwiches- spread pesto on your favorite crusty sandwich bread, top with sliced chicken and roasted red peppers

Those are just some of my suggestions.  I’d love to hear from you… what are your favorite ways to use pesto?

Pesto

Pesto

  • Servings: makes approximately 1 cup
  • Print

*recipe adapted from Marcella Hazen

Ingredients:
For the food processor-
2 cups tightly packed fresh basil leaves
1/3 cup extra virgin olive oil
3 Tablespoons lightly toasted pine nuts
2 garlic cloves, chopped fine
salt

For completion by hand-
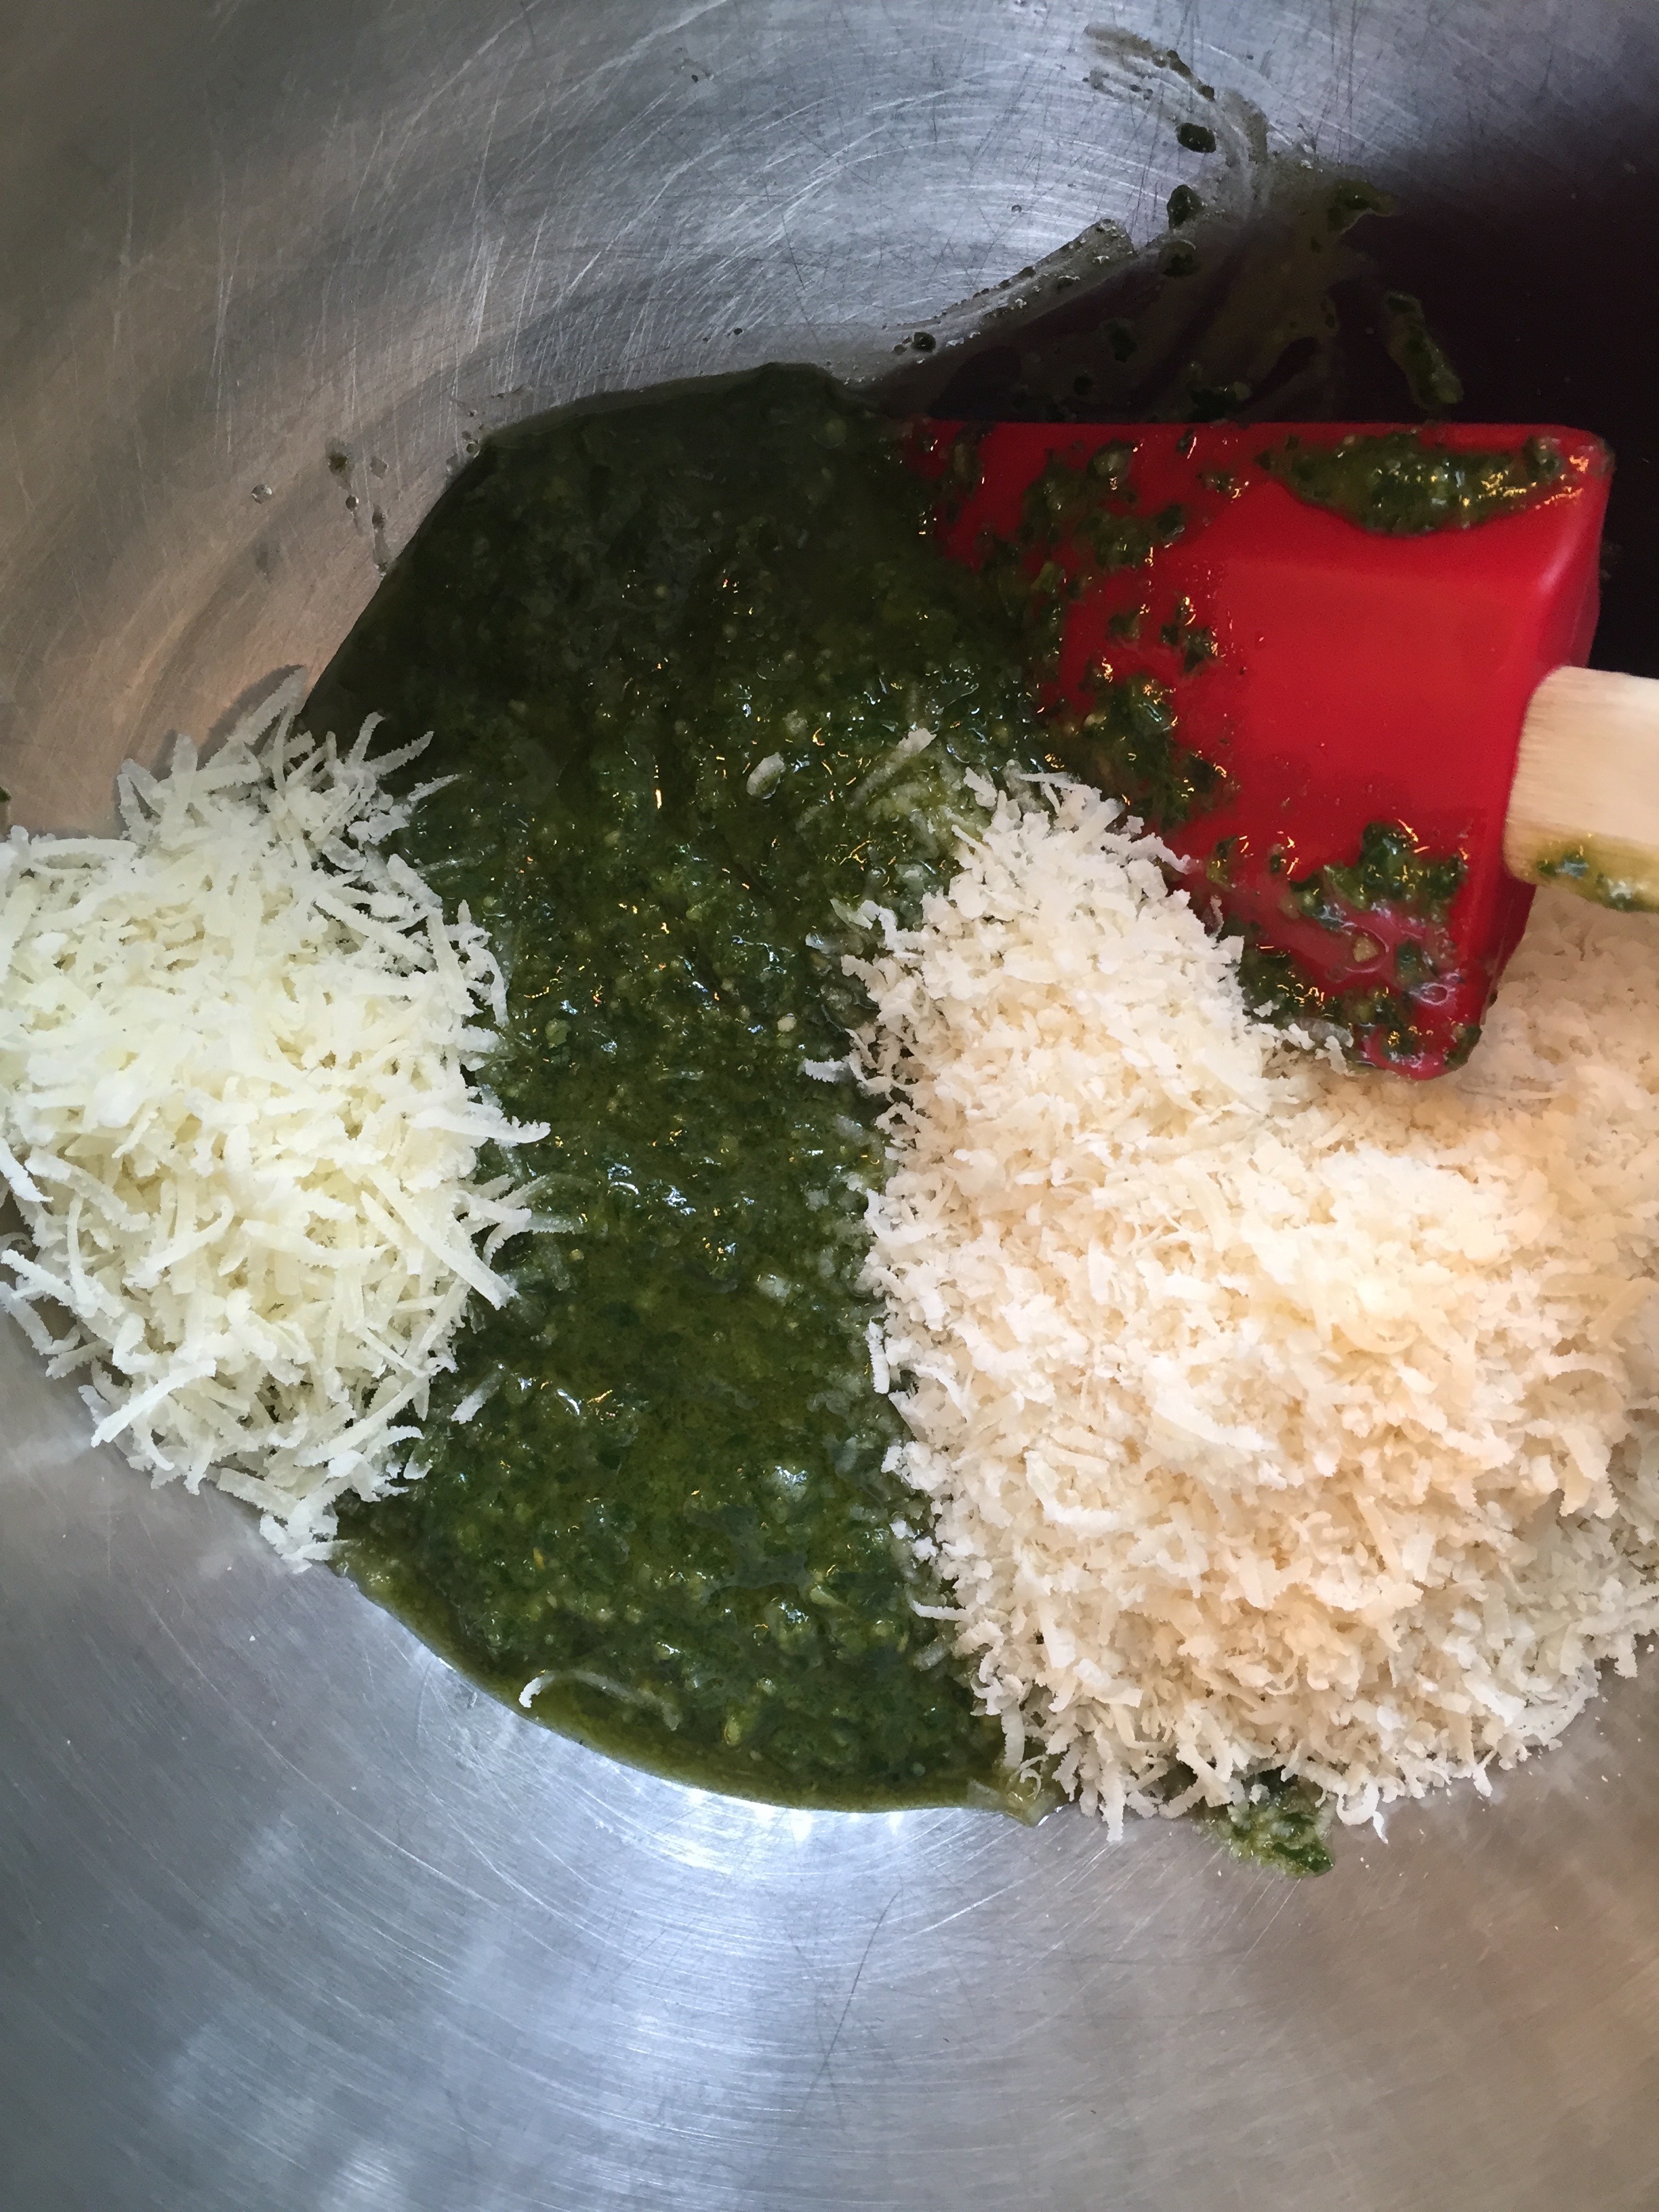
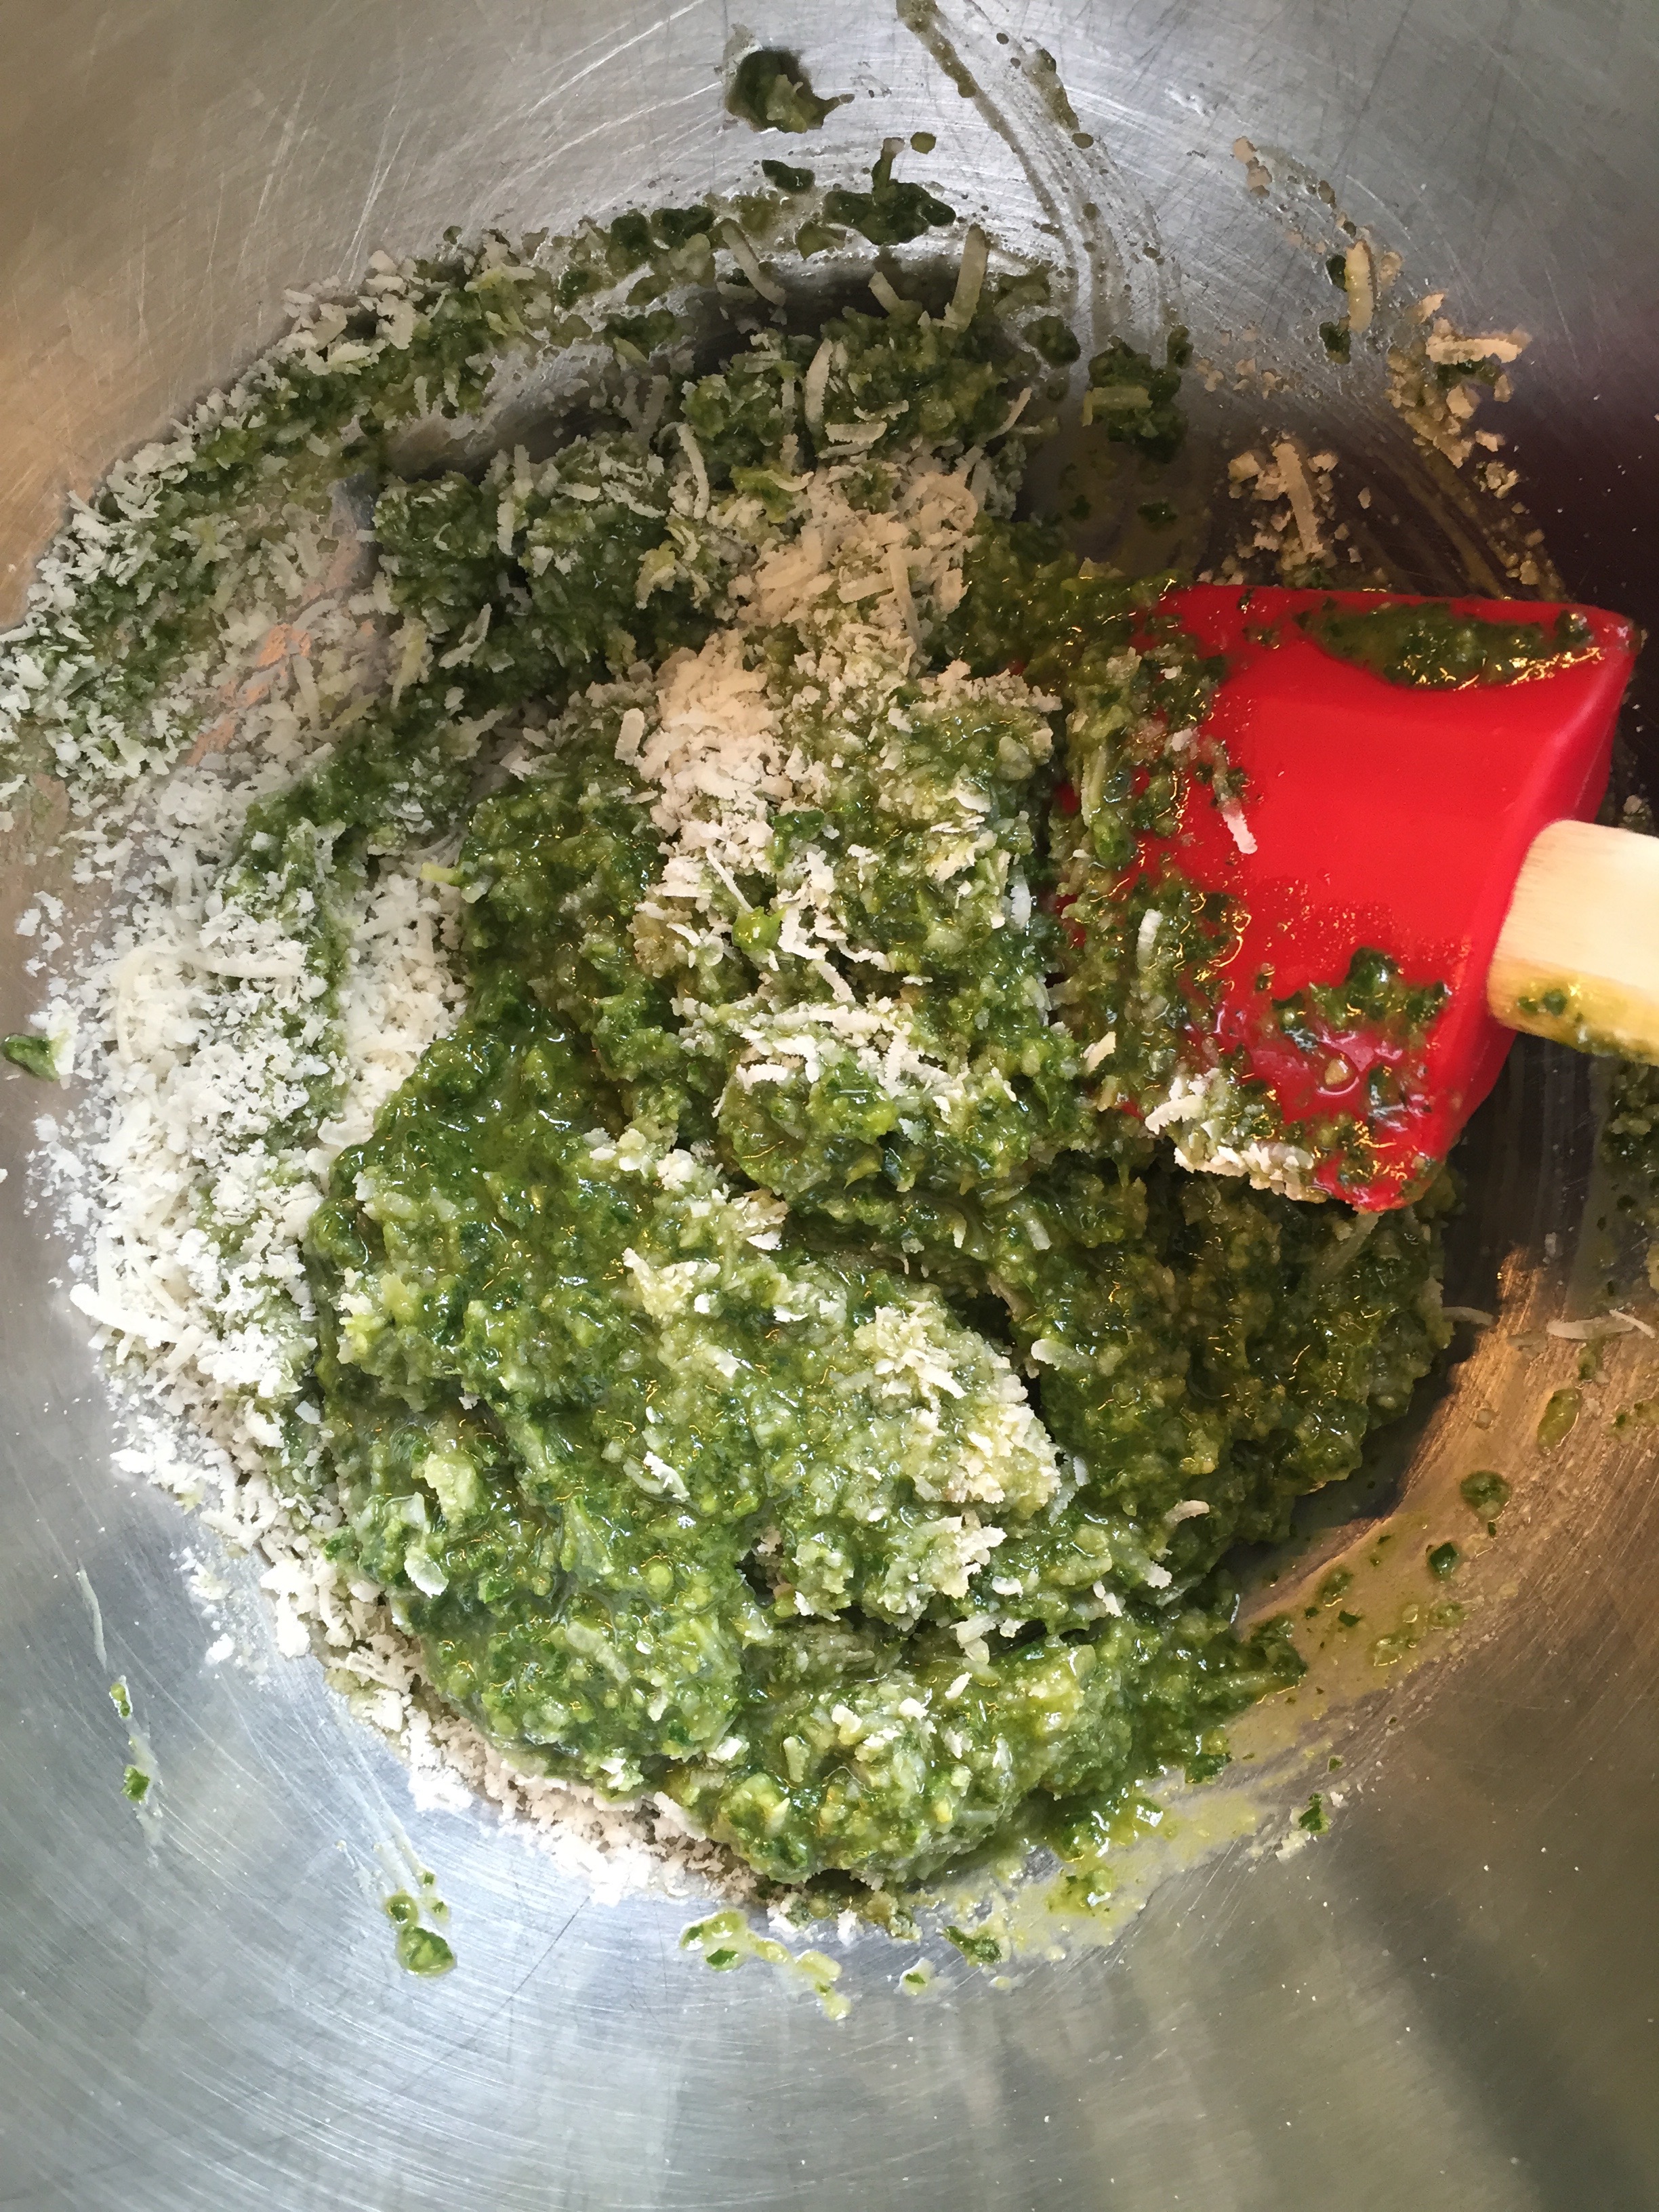
½ cup freshly grated parmesan cheese
2 Tablespoons freshly grated romano cheese

Instructions:
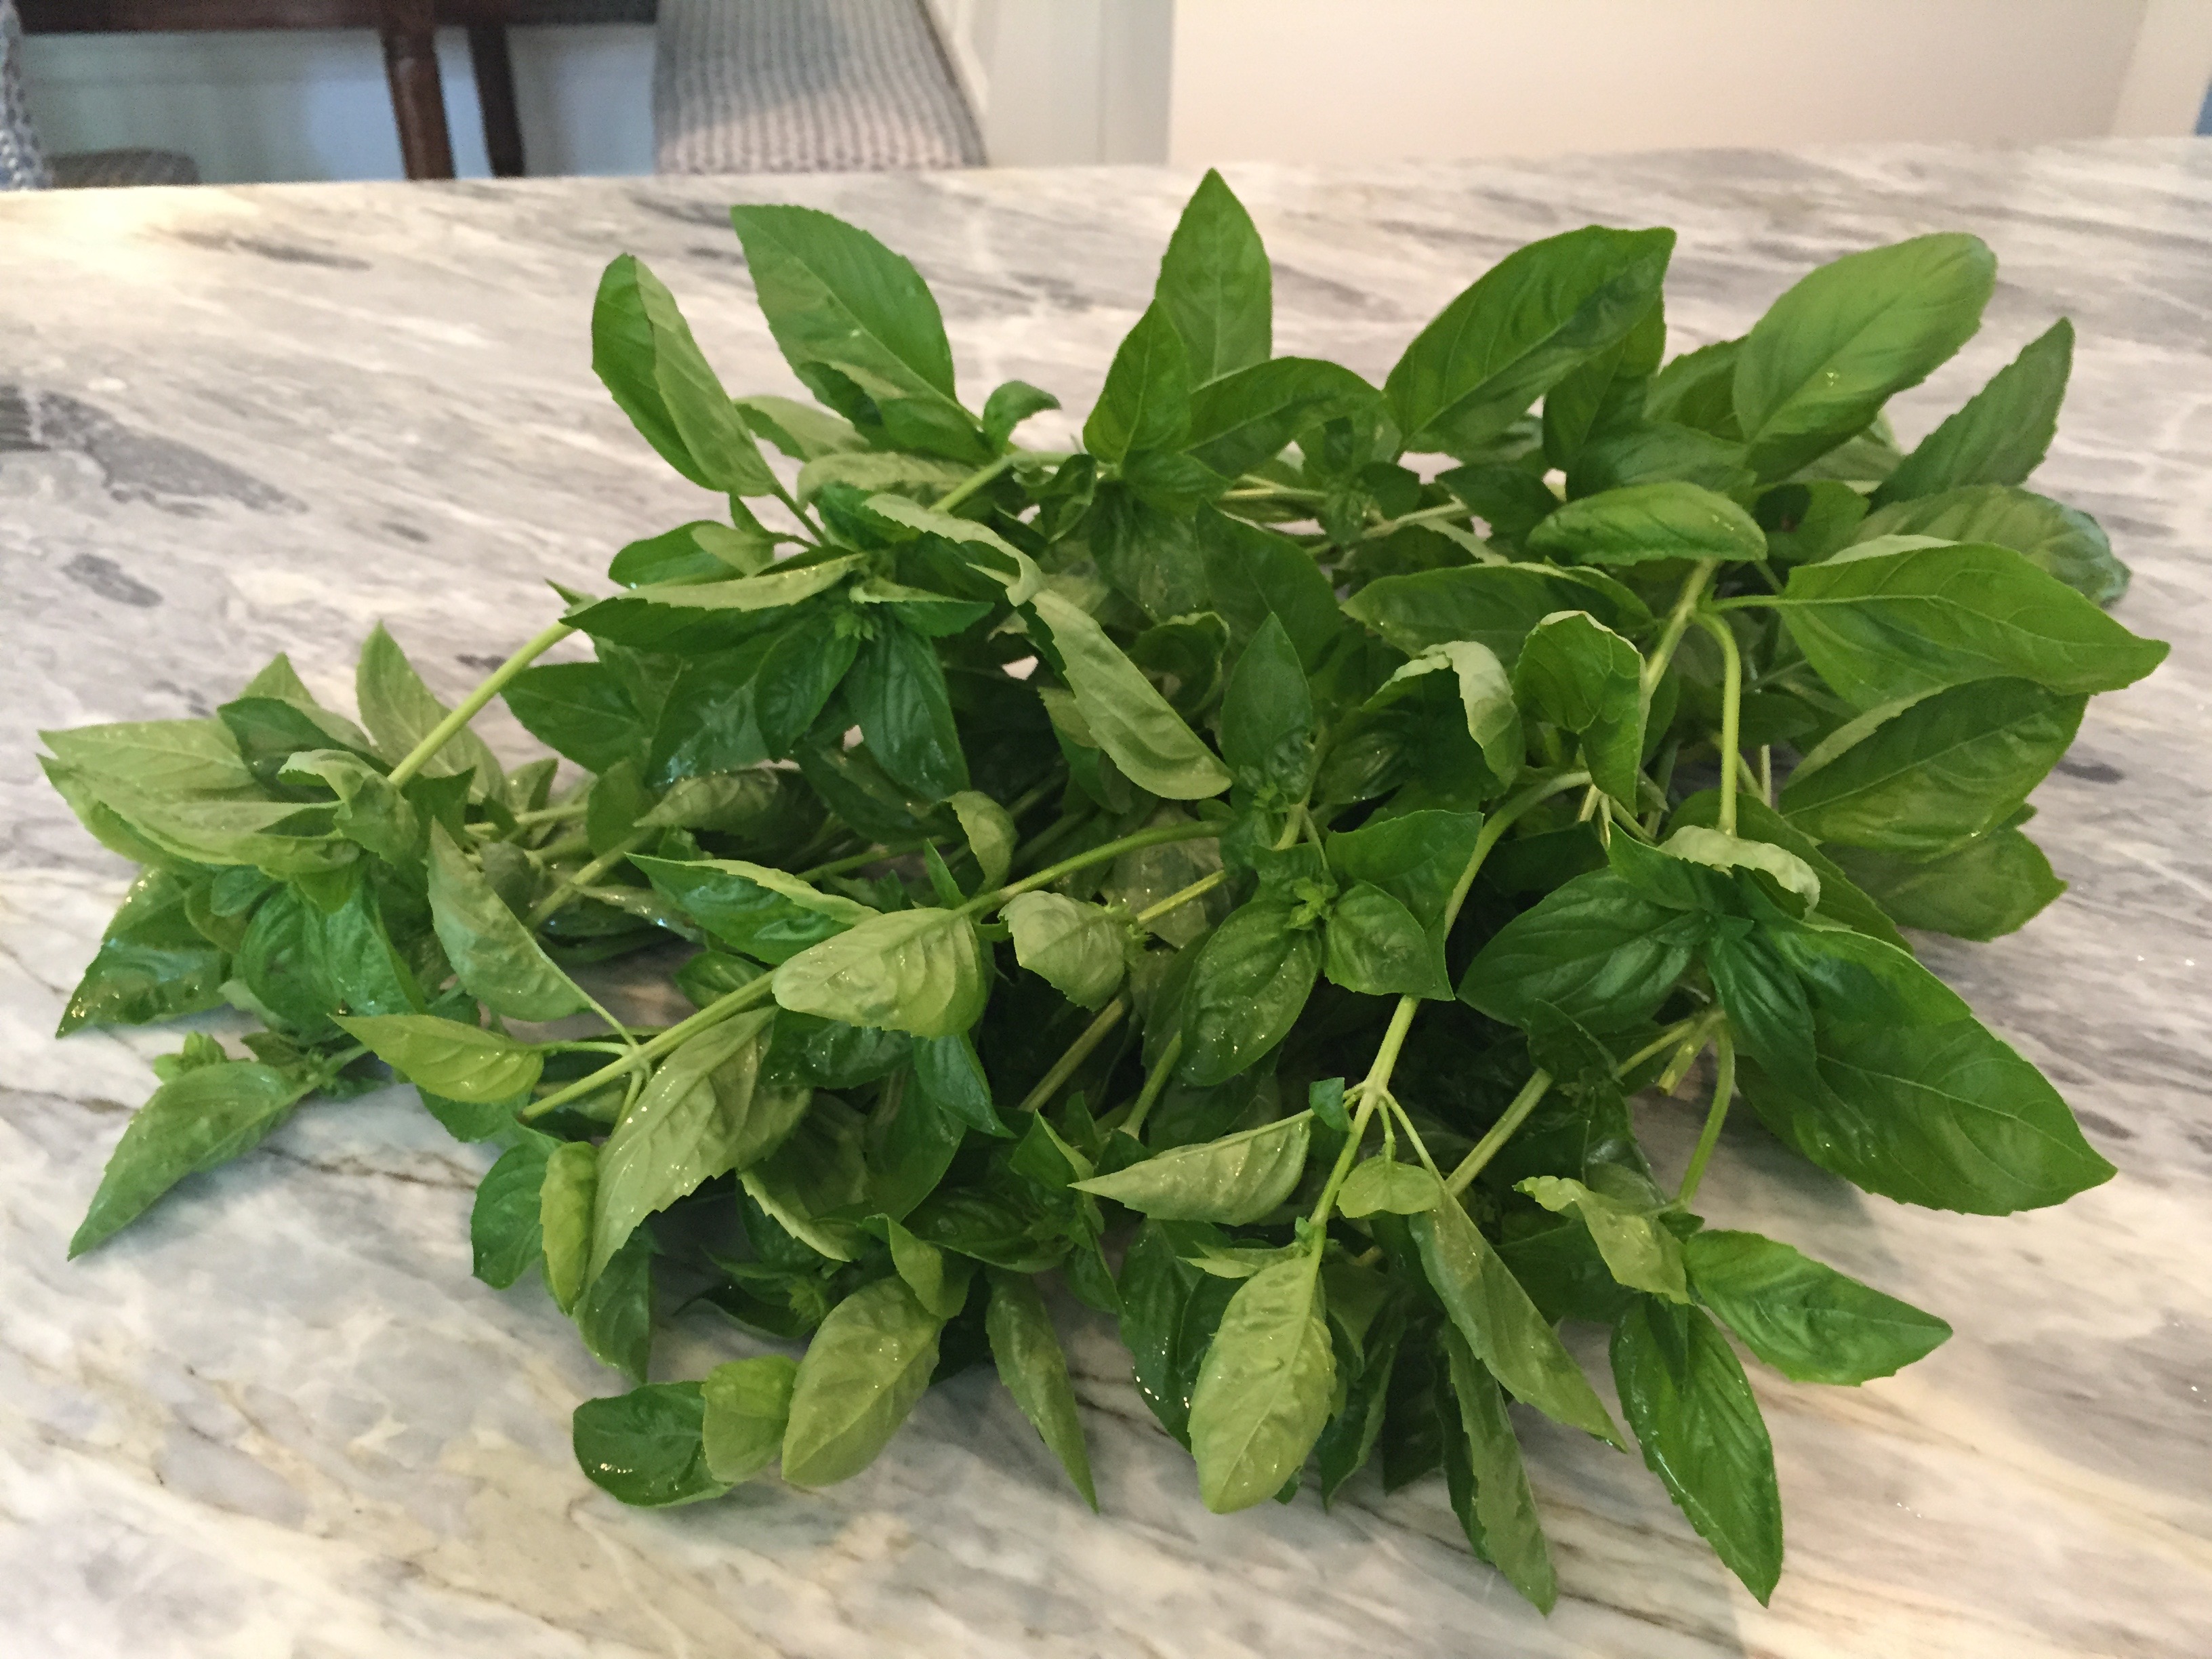
Briefly rinse basil under cold water and pat dry.

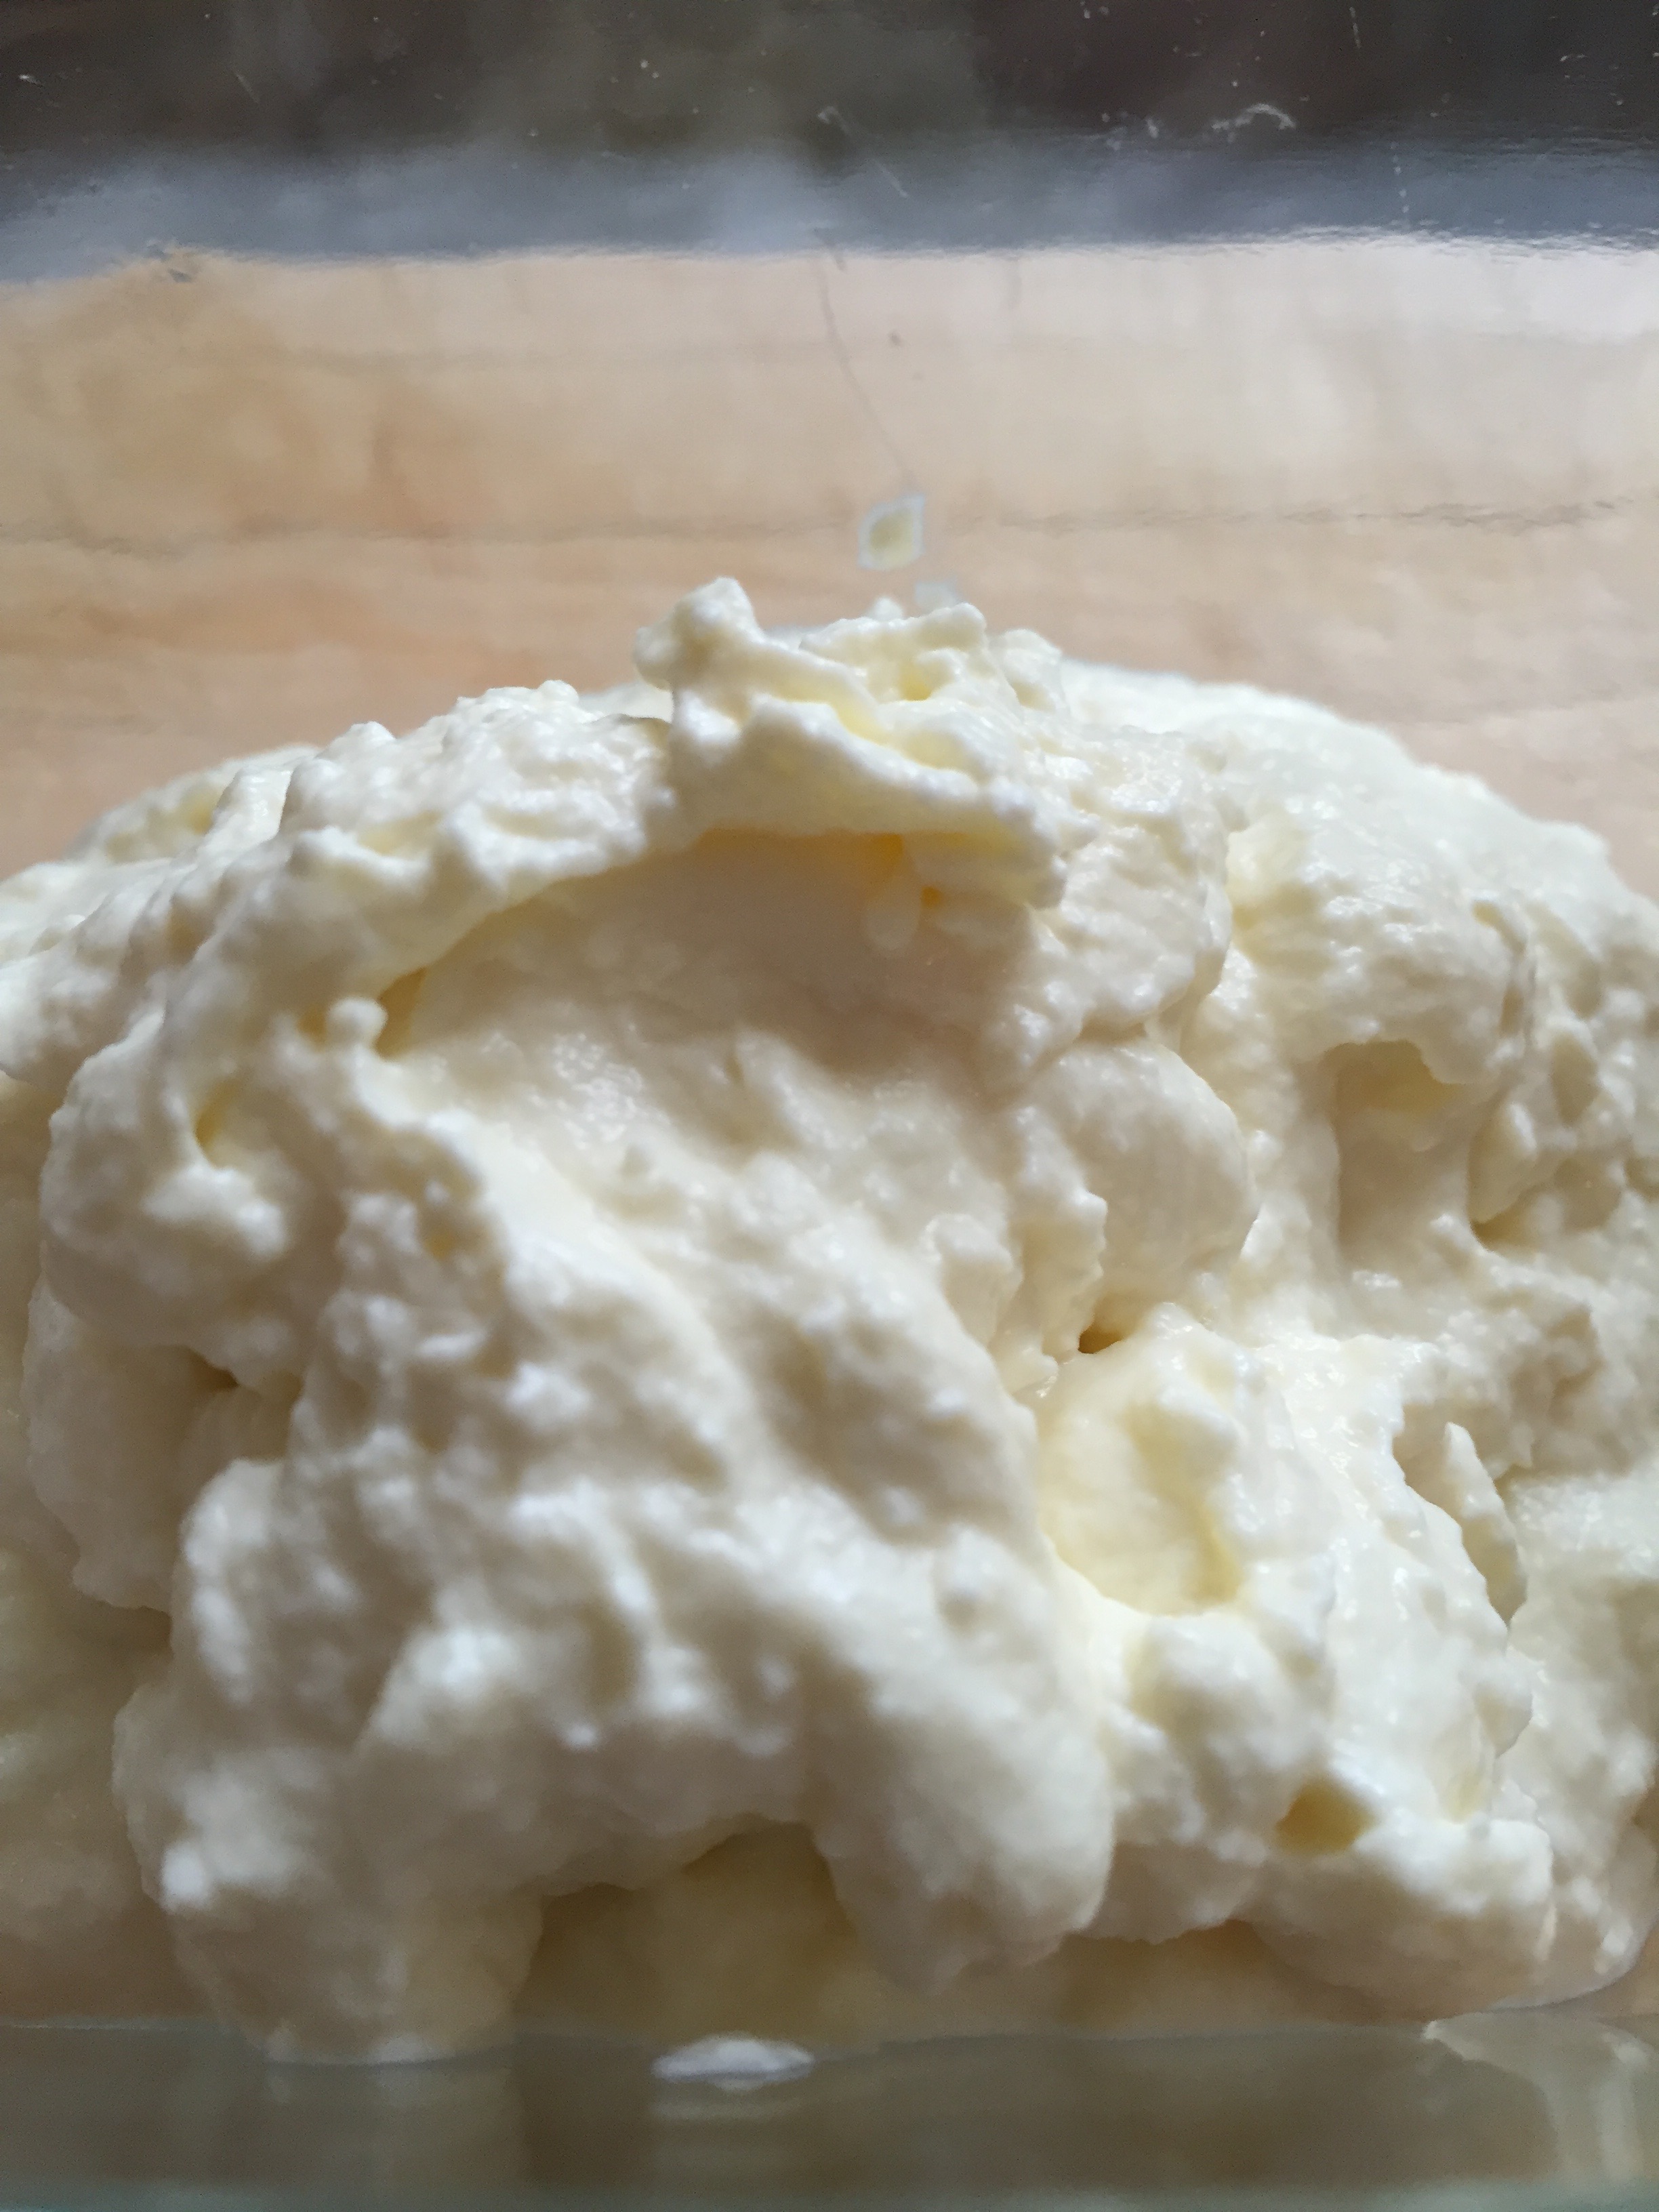
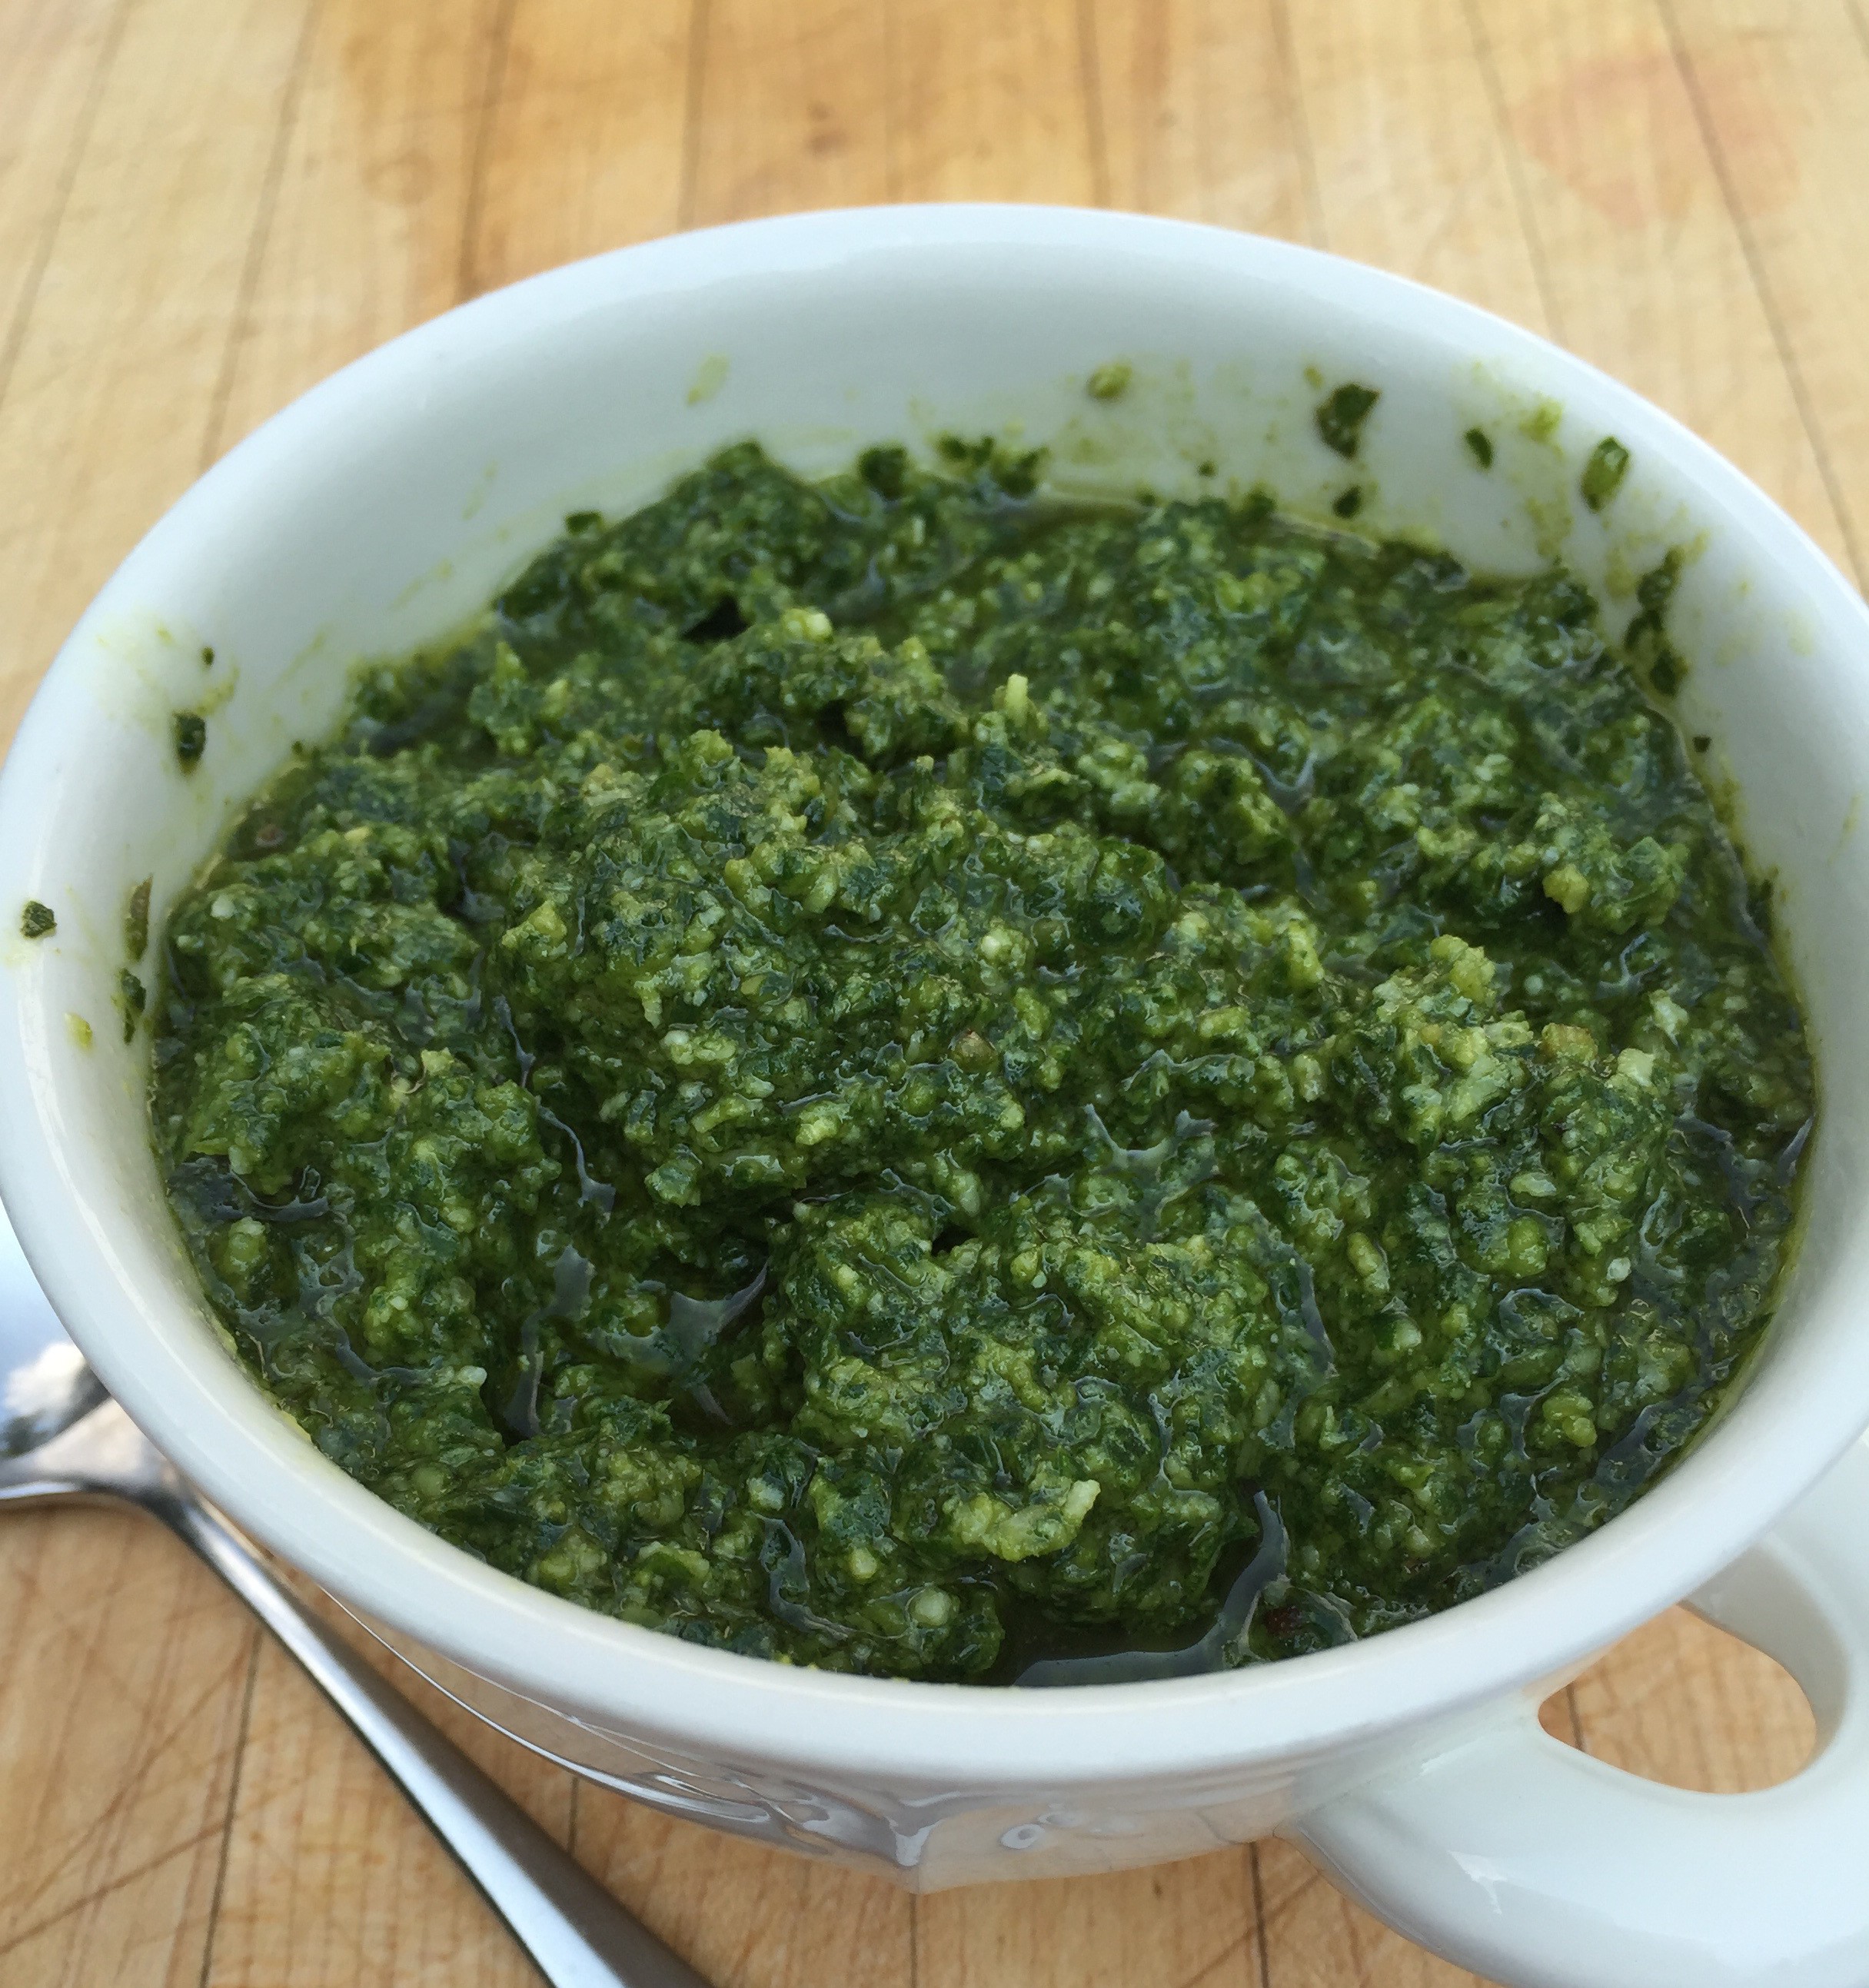
Place basil, olive oil, pine nuts, chopped garlic, and a pinch of salt into the bowl of a food processor. Process to a uniform creamy consistency.

Transfer to a bowl, and mix in the two grated cheeses by hand.

The pesto can be frozen in pre-portioned amounts to be pulled from the freezer whenever you want a taste of summer.

Basil, extra virgin olive oil, and salt are placed in a food processor.
Place the basil, extra virgin olive oil, pine nuts, garlic, and salt into a food processor and blend.
Basil, extra virgin olive oil. pine nuts and salt have been blended to a creamy consistency.
Blend the basil, extra virgin olive oil,  pine nuts, garlic, and salt to a creamy consistency.
Parmesan and romano cheeses are added to the basil mixture.
Transfer the basil mixture to a bowl. Add the parmesan and romano cheeses.
Mixing the parmesan and romano cheeses into the pesto by hand.
Mix the parmesan and romano cheeses by hand.
The parmesan and romano cheeses have been thoroughly incorporated.
Pesto fills a mini muffin tin
Using a mini muffin tin, small portions of pesto are ready for the freezer. After freezing, transfer them to a container for long term freezer storage.
Pre-portioned amounts of frozen pesto
Wax paper separates layers of frozen pesto “muffins” for long term storage in the freezer.

Homemade Ricotta

Homemade ricotta with herbs

Borough MarketThis summer, we had a phenomenal family trip to London and Ireland.
While we explored the British Museum, Hyde Park, the Churchill War Rooms and the Tower of London, observed the Changing of the Horse Guard and took a spin on the London Eye, my thoughts were never too far from food. In fact, we kicked our trip off with a tour of Borough Market (I highly recommend Context Travel).

Tasting our way down the counter...
Tasting our way down the counter…

Celebrating and tasting your way through artisanal British and Irish cheeses at Neal’s Yard Dairy is a wonderful beginning to any day.  Meeting and sharing ideas with farmers, spice vendors, and even a tea importer helped us connect to London in a very real way. Continuing the unofficial theme of local foods, we planned our dinners at restaurants that embrace a farm to table philosophy, locally sourcing their products based on seasonal availability. We enjoyed delicious meals at St. John, The Harwood Arms, and Tom’s Kitchen. An absolute standout at Tom’s Kitchen was the “Homemade Ricotta [with] balsamic glaze, dried herbs, grilled sourdough.” Oh. My. Goodness. This ricotta was so incredibly luscious, smooth, and creamy- yet light and airy, that only the fear of public humiliation kept me from stealing the entire dish, huddling in a remote corner, and licking the bowl clean.

Homemade ricotta with bread from Tom's Kitchen.
The inspiration- Homemade Ricotta starter from Tom’s Kitchen.

Since our return home, that ricotta has been on my mind. We have a fairly wide selection of ricotta cheese at the grocery store, but it seems unfair to compare them to what I had in London. Even the best that I can get here is good, but not Tom’s Kitchen Homemade Ricotta good. What to do? The kitchen gods spoke. Challenged accepted. I learned to make my own.

It turns out, homemade ricotta is not hard to make. In 30 minutes you can be sitting down with your own bowl of lusciousness, ready to devour, spoon in hand. Even better, you control the ingredients. No fillers, thickeners, or stabilizers needed, just four simple ingredients- milk, cream, white vinegar and salt. It’s a bit like a science experiment, so if you have kids they are going to love this. But please don’t let “science experiment” intimidate you.  My nine year old is now making the ricotta on a weekly basis.

The final texture depends on how long you leave the ricotta to drain. Ten minutes yields warm, soft curds perfect for enjoying by the spoonful; twenty minutes yields still soft but slightly more spreadable ricotta, while thirty minutes or more will leave you with a firmer, drier, ricotta that holds it shape. Between 10-20 minutes of draining is my favorite for spreading on grilled bread- savory with a drizzle of extra virgin olive oil, sprinkle of fresh herbs and a pinch of salt, or sweet with a drizzle of honey and topping of sliced berries. The ricotta that sits longer is perfect to dollop on warm pasta or pizza, either before or after it comes out of the oven.

PS- What about the whey? From 4 cups of milk/cream you will have about 1 cup of ricotta and 3 cups of whey. That is a lot of whey. Before you toss it down the drain you could…
• Replace the water with whey in pizza or bread dough recipes
• Add the whey to soups and stews
• Feed it to your chickens, pigs, etc.

Homemade ricotta with herbs


Homemade Ricotta

  • Servings: 1 cup
  • Print

*recipe inspired by several sources including Serious Eats, The Kitchn and Smitten Kitchen

Ingredients:
3 ½ cups whole milk (NOT Ultra High–Temperature (UHT) pasteurized)
½ cup heavy cream
¼ cup white vinegar
½ teaspoon salt

Instructions:
Line a sieve with cheesecloth and place in a bowl. Set aside.

Combine milk and heavy cream in a saucepan. Gently warm the milk mixture over medium heat until it reaches 180°. Remove from heat.

Add the white vinegar and salt, stirring gently once or twice to distribute evenly. Leave the milk mixture undisturbed for 10 minutes while the curds and whey form.

After 10 minutes, use a slotted spoon to transfer the curds to the cheesecloth lined sieve. Once the larger curds have been placed in the sieve, carefully pour the remaining curds/whey into the sieve. Let drain for at least 10 minutes, or until desired consistency is reached. The longer the ricotta drains, the firmer it will be.

Transfer to storage container and keep refrigerated until ready to use.

Enjoy as you would any ricotta, savory or sweet… in lasagna, ziti, cannoli, atop grilled bread, or just by the spoonful from the bowl!

Milk and cream heating on the stove until it reaches 180°.
Heat the milk and cream mixture to 180°.
The milk/cream mixture is curdling.
After adding the vinegar gently stir once or twice. Leave undisturbed for 10 minutes while the curds develop.
Removing the curds with a slotted spoon.
After 10 minutes the vinegar has worked its magic. You have curds and whey!
Fresh ricotta draining in a fine meshed sieve.
Using a slotted spoon, transfer the curds to a fine mesh strainer or cheesecloth lined sieve. Leave to drain for at least 10 minutes. The longer you leave the ricotta, the firmer it will be.
Fresh ricotta after 20 minutes of straining.
20 minutes later…
Fresh ricotta after a few pulses in a food processor.
*Completely optional step*  You could stop after draining the ricotta and enjoy as is, or for an extra creamy texture, give your freshly strained ricotta a very brief spin in a food processor.
Freshly whipped ricotta
Basil, oregano and thyme sprigs
Snip a few herbs to sprinkle on top of the whipped ricotta. Serve with slices of grilled bread for an easy appetizer or lunch.
Homemade whipped ricotta sprinkled with herbs and served with grilled ciabatta.
Lunch
Strawberries and Ricotta on Toast
Breakfast the next day…

Maple Nut Granola

Granola in mason jars.

The back to school catalogs began arriving in mid July and straight into the recycling bin they went. Now, more than a month later, I can no longer deny the fast approaching first day of school. The highlighted square on the calendar smugly reminding me that order will return in the form of routines, schedules, homework, and afterschool activities. Fuel is needed for us all, especially first Maple Nut Granola in a cereal bowl.thing in the morning. Enter granola.

Good granola is a tasty mix of humble ingredients barely touched with sweetness. Oats, nuts, seeds, dried fruits- all relatively inexpensive on their own, but for reasons I don’t understand, suddenly become a hot commodity when combined, packaged, and put on your local grocery store shelf. Make your own. You’ll save money, have control over the ingredients, and create something far better than anything you could get from a cardboard box.

This recipe makes a little more than 8 cups and keeps for several weeks in anYogurt parfait with granola and berries. airtight container. My granola goes into mason jars, but tupperware,and ziploc bags work too. I have it every morning with plain yogurt and whatever fruit is in season. My daughter‘s spin is little fancier; she likes to make yogurt parfaits- layering the granola with fruit and yogurt. Keep it simple and put the granola out in the morning as part of a breakfast bar. Each person can enjoy it the way they like best… with milk… with yogurt… with fruit… or even straight up by the handful as they race out the door to catch the school bus.

PS- A batch of homemade granola makes an excellent gift. Think teachers, new moms, care package for college kids…

Maple Nut Granola

  • Servings: approximately 8 cups
  • Print

Ingredients:
3 cups rolled old-fashioned oats
1 cup unsweetened shredded coconut
1 cup unsalted raw sunflower seeds
1 cup unsalted raw pumpkin seeds
1 cup unsalted nuts… almonds, walnuts- whatever you want
2 teaspoons ground cinnamon
1 teaspoon ground ginger
¾ cup maple syrup
⅓ cup coconut oil (comes in a jar- solid form)
1 teaspoon vanilla extract
pinch of salt
1 ½ cups total of your favorite dried fruits (raisins, cranberries, dried apricots, dried figs, dried apples, dried cherries)- either a combination of fruits or just one

Instructions:
Position a rack in the middle of the oven. Preheat the oven to 300°. Line a large cookie sheet with parchment paper or foil.

In a large bowl, combine the oats, coconut, sunflower seeds, pumpkin seeds and nuts. In a small saucepan melt coconut oil over low heat, add cinnamon, ginger and maple syrup- stirring to combine. Take off the heat and add vanilla and pinch of salt. Pour coconut oil/maple syrup mixture over oat mixture and combine- stirring to be sure everything is evenly coated. Spread onto cookie sheet.

Bake for 30 to 40 minutes, stirring the granola about every 10 minutes- rotating the cookie sheet once or twice so the granola bakes evenly. The granola is ready when it just begins to turn a light golden color.

Remove from the oven, add dried fruits and stir well. Let cool,
stirring once or twice to break up any clumps.

*This recipe is very easy to play around with. Consider adding different dried fruits, wheat germ, flax seeds, etc.

oats, unsweetened coconut, walnuts, pumpkin seeds and sunflower seeds
Measure the oats, unsweetened coconut, walnuts, pumpkin seeds and sunflower seeds into a bowl. Set aside.
Coconut Oil, Maple Syrup, Cinnamon, Ginger, Vanilla and Salt
Melt the coconut oil over low heat, then add the maple syrup, cinnamon, ginger, vanilla and salt. Here I played around with the flavors and tossed in a cinnamon stick and cardamom pod for a brief dip. I was sure to remove both before combining the liquid and dry ingredients.
Coconut Oil/Maple Syrup Mixture are poured over the dry granola ingredients.
Pour the coconut oil/maple syrup mixture over the dry ingredients.
Coconut oil/maple syrup mixture and dry ingredients have been combined.
Stir ingredients thoroughly so that everything is evenly coated.
Wet granola ingredients on a cookie sheet, ready for the oven.
The granola is ready to spend 30-40 minutes in a preheated 300° oven. Stir every 10 minutes or so. Bake until lightly golden.
Granola and Dried Fruit
After the granola comes out of the oven add your favorite dried fruits. This batch has dried cherries, raisins, and chopped dried figs.
Granola in mason jars.
Heading to the pantry (and future breakfasts, lunches, yogurts, late night snacks…)

Ice Cream ‘Wiches and Affogatos

Oatmeal Raisin Ice Cream 'Wich with Rainbow Sprinkles

This time of year is absolutely glorious! Lazy, hazy dog days of summer complete with ice cold lemonade, warm sand between your toes, and the echoes of “Marco… Polo” filling the air as you read the latest best seller. Dinners are easier; spontaneous invites for backyard barbeques are extended and accepted. It’s not hard to quickly pull a beautiful simple summer meal together; throw something on the grill and add a delicious salad of farm fresh vegetables on the side. Then your thoughts turn to dessert, but don’t panic! If spontaneity fueled the dinner, time to create a completely from scratch dessert is probably non-existent. Ice cream is a safe bet, cookies as well, but add some sprinkles and now you’ve got a party! Remember chipwiches? Those chocolate chip cookie sandwiches rolled in chocolate chips? Make your own and get the kids (and grownups) involved!

Oatmeal Raisin Cookie Ice Cream Sandwiches
Ice Cream ‘Wiches

For this night, I used store bought oatmeal raisin cookies and vanilla ice cream and rolled them in rainbow sprinkles. But don’t stick to that script. The cookie and ice cream combinations are absolutely endless. Choose flavor combinations based on what you like! Here are some ideas to get you started…

Oatmeal Raisin Cookies + Vanilla Ice Cream + Sprinkles
Chocolate Chip Cookies + Vanilla Ice Cream + Sprinkles
Peanut Butter Cookies + Banana Ice Cream + Mini Chocolate Chips
Peanut Butter Cookies + Vanilla Ice Cream + Crushed Candied Peanuts
Molasses Cookies + Cinnamon Ice Cream + Crushed Walnuts
Chocolate Cookies + Coffee Ice Cream + Crushed Hazelnuts
Gingersnap Cookies + Pumpkin Ice Cream + Crushed Pecans

To be honest, more hands-on research is necessary… it’s going to be tough, but I promise to report back after time spent in the field taste testing. Who wants to help??

Another incredibly delicious and easy dessert to make on the fly is an affogato. Literally and figuratively, affogato in Italian means, “drowned.” In this case, a scoop of vanilla gelato or ice cream is drowned in a shot of espresso. The hot espresso immediately begins melting the gelato, creating the most perfect “coffee ice cream” ever. As I sit typing, I’m already imagining that a dash of Frangelico or Amaretto would be a sophisticated twist. Two (or three) ingredients and you are done! It doesn’t get any easier.

Play around with the flavor combinations of both desserts, and let me know how it goes!

Ice Cream ‘Wiches

  • Servings: 6 sandwiches
  • Print

Ingredients:
12 cookies (your favorite- homemade or store bought)
1 container ice cream (your favorite)
sprinkles, crushed nuts, or mini chocolate chips

Instructions:
Soften frozen ice cream at room temperature for approximately 10 minutes. Be sure to check, you don’t want soup, just soft enough to scoop easily and “sandwich” between the cookies.

While ice cream is softening, line a cookie sheet with wax paper and set aside.

Pour sprinkles, crushed nuts, or mini chocolate chips into a wide shallow bowl or container.

When ice cream is soft enough to work with, place a scoop of ice cream onto the flat-bottomed side of a cookie. Top with another cookie, flat-bottomed side down. Press gently together to ensure that ice cream reaches edges of cookie.

Roll the sides of the cookie in the sprinkles, crushed nuts, or mini chocolate chips so that they adhere to the ice cream sides.

Place on cookie sheet. Repeat with remaining cookies and immediately place in the freezer until firm, approximately 30-45 minutes.

*Make ahead- when firm, transfer to a freezer bag, separating the sandwiches with wax paper, or individually wrapping them.

Oatmeal Raisin Cookies with Vanilla Ice Cream
Sandwich softened ice cream between two cookies.
Rolling Ice Cream 'Wich in Rainbow Sprinkles
Roll the sides in sprinkles, crushed nuts, mini chocolate chips or whatever suits you.
Ice Cream 'Wiches on Lined Cookie Sheet
Place the ice cream ‘wiches on a lined cookie sheet and immediately place in freezer.
Oatmeal Raisin Ice Cream 'Wich with Rainbow Sprinkles
After firming up in the freezer this ‘wich is ready to enjoy!

Affogato

  • Servings: 1
  • Print

Ingredients:
1 generous scoop of vanilla gelato or ice cream
1 shot of freshly brewed espresso or strong hot coffee

Instructions:
Put one generous scoop of vanilla gelato or ice cream into a serving dish. Pour hot espresso directly on top. Serve immediately and enjoy.

Espresso and Gelato
Brew a shot of espresso or very strong coffee. While your espresso is brewing, place a generous scoop of vanilla gelato or ice-cream in a serving dish.
Affogato
Pour the freshly brewed espresso on top of the gelato. Serve immediately.
Affogato
Buon Appetito!

Zucchini Fritters, Tzatziki Sauce, and Carpaccio

Zucchini Fritters make a great appetizer or side dish.

Zucchini Fritters make a great appetizer or side dish.

I love vegetables, especially those I can cook quickly and simply. Shopping with the seasons in mind makes it easy to enjoy their flavors in their truest form… you don’t have to do much to a perfectly ripe, in season tomato, or green beans, or [insert your favorite vegetable of choice].

a typical July pick up at the farm
A typical July pick up at the farm.

Our town is home to a small organic farm and we are fortunate enough to belong to its CSA (Community Supported Agriculture); in the cold dark months of winter we pre-pay our local farm for a season’s worth of fruits, vegetables, and flowers. Here in our part of the world that means I pick up our weekly share beginning in June and go through October. Each pick up day is a little like Christmas morning… what is in my share this week? How much am I going to get? Since June, this season has brought greens of all sorts, lettuces, scallions, scapes, carrots, cabbage, cucumbers, kohlrabi, onions, garlic, beets, fennel, beans, herbs, and berries. With every pick up comes the happy challenge of how to use each of these gifts before next week’s share demands my attention and refrigerator space.

Part of a weekly pick up in July
Part of a weekly pick up in July.

Unfortunately, there is a dark side. Because of the seasonality, the downside is that “you get what you get and you don’t get upset.” Words I’ve often said to my kids and lately, find myself repeating weekly as I pick up an every growing ration of zucchini. It’s the nature of the beast and we are in prime zucchini season. I’m sure you are seeing loads of zucchini too… in your CSA, at the farmer’s market, and at the supermarket.

Zucchini
Zucchini

Despite all my veggie love, zucchini is one that I could do without. It’s my personal kryptonite. I’m not sure why this is… I don’t recall any traumatic childhood dinner table incidents involving zucchini. Maybe it’s because it looks so much like a cucumber- and I love cucumber, so that I’m always disappointed by the false pretense, a poser. Maybe it’s the tendency to quickly turn to mush if left a minute too long on the stove, in a soup, or on the grill.  In any case, I must accept that we are at peak zucchini season. Each passing week larger and larger quantities are appearing in my share, stretching my creativity, pushing me out of my zucchini comfort zone. Rising to the challenge, I’ve found a few ways to prepare this green monster so that I actually enjoy eating it. Zucchini season won’t last forever, by the time I’m ready to wave the white flag, or dishtowel in this case, it’s time will be done, replaced by one of my favorites- tomatoes. In the meanwhile, enjoy these easy and delicious takes on zucchini.

The Zucchini Fritters make excellent appetizers, sides, and stand on their own for lunch (or breakfast- eaten straight from the fridge!).  You’ll find plenty of uses for the accompanying Tzatziki Sauce recipe. In addition to serving it with the fritters, I use it as a topping for meat- think lamb burgers and seafood, especially shrimp; use it as a dip for veggies or pita chips; spread it on naan, add the protein of your choice and some crunchy lettuce to build a delicious wrap.   The Zucchini Carpaccio recipes are incredibly versatile, and take about 5 minutes to get on the table.  I’ve given measurements, but please improvise according to your taste.  There is no right or wrong!  If you love lemon, use more lemon!  Don’t like goat cheese and thyme?  Use feta and oregano!  Play with your food.

Please feel free to share your favorite ways of preparing zucchini. I’m always on the hunt for more tasty ideas.

Zucchini Fritters
Zucchini Fritters

Zucchini Fritters

  • Servings: about 18 fritters
  • Print

adapted from Bon Appetit, May 2007

Ingredients:
2 ½ cups coarsely grated zucchini (from about 3 medium)
1 teaspoon salt, divided
1 large egg
1 large egg yolk
½ cup (or more) all purpose flour
½ cup crumbled feta
1 cup chopped fresh Italian parsley
½ cup chopped green onion
1 ½ Tablespoons chopped fresh dill

Tzatziki Sauce (recipe follows)

Preparation:
Toss zucchini in ½ teaspoon salt in a colander, place in the sink allowing the zucchini to “sweat.” Let stand for 5 minutes. Press out excess liquid; transfer zucchini to a dry bowl.

Mix in egg, yolk, ½ cup flour, cheese and remaining ½ teaspoon of salt. Mix in parsley, onions, and dill. If batter is very wet, add more flour by the spoonful.

Preheat a cast iron skillet or griddle* over medium high heat. Working in batches, drop batter by rounded tablespoons onto skillet. Cook fritters until golden, about 5 minutes per side.

Serve with tzatziki sauce or plain greek yogurt.

*Because seasoned cast iron is non-stick I didn’t need to use oil. If you are using a regular skillet, you will have to fry the patties in a mixture of 2 tablespoons of olive oil and 2 tablespoons of corn oil, adding more olive and corn oil as needed.
**Can be made 1 day ahead. Place on baking sheet, cover, and chill. Rewarm uncovered in 350° oven for 12 minutes.

Grated zucchini waiting to be salted.
After grating the zucchini, toss it with 1/2 tsp of salt. Set in a colander and place in the sink to let it “sweat.”
prepped and chopped dill, parsley, and green onion
Dill, parsley, and green onion prepped, chopped, and ready to go.
grated zucchini, flour, egg, egg yolk, and feta
Gently combine the grated zucchini, flour, egg, egg yolk, and feta.
adding the herbs to the zucchini mixture
Add the herbs to the zucchini mixture.
the zucchini batter is ready
After gently incorporating the herbs with the zucchini mixture, the batter is ready.
zucchini fritters cooking on the griddle
Drop batter by rounded tablespoons onto a preheated cast iron skillet or griddle.
zucchini fritters are cooking on the other side
When the fritters are golden on one side, flip them. Cooking time is about 5 minutes per side.
zucchini fritters
Serve the zucchini fritters with dollops of tzatziki or plain greek yogurt.

Tzatziki Sauce

  • Servings: approximately 1 cup
  • Print

This sauce is a delicious multitasker. Serve it as a dip for vegetables, pita chips or wedges, grilled lamb, and the zucchini fritters.

Ingredients:
8 oz full fat greek yogurt
½ a hot house cucumber, cut lengthwise, seeded, quartered, and finely diced
2 Tablespoons lemon juice
1 Tablespoon chopped fresh dill
2 teaspoons extra-virgin olive oil
3/4 teaspoon minced garlic
1/2 teaspoon salt

Preparation:
Combine all ingredients in a bowl.

Serve immediately, or let it sit in the fridge to really let the flavors come together.

Yogurt, cucumber, dill, lemon juice, extra-virgin olive oil, garlic, and salt
Combine the yogurt, cucumber, dill, lemon juice, extra-virgin olive oil, garlic, and salt. It really is that easy!
Tzatziki Sauce with olives and pita wedges
Tzatziki Sauce with olives and pita wedges. Add the zucchini fritters and a glass of rosé … a perfect way to start a summer evening.

Zucchini Carpaccio with Parmesan, Pine Nuts, and Basil

  • Servings: 2
  • Print

Ingredients:
½ zucchini, any size
1 Tablespoon toasted pine nuts
1 teaspoon extra-virgin olive oil
½ teaspoon lemon juice
2 teaspoons chopped basil
parmesan shavings
salt and pepper to taste

Preparation:
Using a vegetable peeler, peel zucchini vertically into thin ribbons.

Toss with lemon juice and extra-virgin olive oil.

Top with parmesan curls, toasted pine nuts, and basil. Season to taste with salt and pepper. Serve immediately.

Zucchini ribbons tossed with parmesan, pine nuts, and fresh basil.

Zucchini Carpaccio with Goat Cheese and Thyme

  • Servings: 2
  • Print

Ingredients:
½ zucchini, any size
2 Tablespoon crumbled goat cheese
1 teaspoon extra-virgin olive oil
½ teaspoon lemon juice
2 teaspoons fresh thyme leaves
salt and pepper to taste

Preparation:
Using a vegetable peeler, peel zucchini vertically into thin ribbons.

Toss with lemon juice and extra-virgin olive oil.

Top with crumbled goat cheese and fresh thyme. Season to taste with salt and pepper. Serve immediately.

Zucchini ribbons tossed with goat cheese and fresh thyme.

Mixed Berry Crostata

Mixed-Berry-Crostata

Mixed-Berry-Crostata

Happy 4th of July! Time to get your red, white and blue on…

If you read my Strawberry Mascarpone Tart with Balsamic Glaze post, you already know that making pie crust causes me incredible anxiety. From the vague instructions- add ice cold water by the thimbleful until the dough just comes together- not too wet or too sticky (what does that look like? feel like?) to the actual chilling, rolling, transferring to a pie plate, and please don’t forget the decorative crimping or lattice work. And that’s only if I even get to that point. Usually in my case things start going wrong almost immediately, beginning with adding too much or too little water. After chilling, the dough rarely rolls out smoothly and evenly. The edges are dry and cracking or the center is tearing or, more often than not, I’m trying to manage both crises simultaneously! The crust becomes a patchwork quilt of botched attempts at repairs. Then the transfer, have you seen how the experts roll up their pie crust around their rolling pins, then neatly unroll the crust into the pie plate? Are you kidding me? In my kitchen it’s all hands on deck, one person lifting the pie crust (still on the wax paper on which it was rolled), another helper quickly sliding the pie plate under the elevated dough, while a third person tries to flip the wax paper over and “release” the pie crust so that it flops into the pie plate. Which undoubtedly leads to more repairs. It’s enough to make me want to eat cake. Well, maybe almost enough. I really do prefer pie, especially in the summer with all the luscious ripe fruit that is available.

raspberries-and-blackberries

Like the Mascarpone Tart, the Crostata is another user friendly dessert with crust. This crust has the added benefit of an egg, which makes rolling out a breeze. Even better, you roll directly onto your parchment paper or silicone liner. No transferring necessary; you don’t even need a pie tin! As for decorative crimping or lattice- not with a crostata, all you need to do is fold an inch of crust over the edge of your fruit. In honor of the 4th, this filling is made up of raspberries and blackberries to represent red and blue, while the white comes from vanilla ice cream served on the side. Feel free to use any fruit you want… depending on what’s in the fridge I’ve tossed strawberries and blueberries into the mix; peaches and raspberries are a classic combination, or go monochromatic and pick one of your favorite seasonal fruits to use. This recipe is so easy that experimenting is fun and delicious!

Mixed-Berry-Crostata-with-Ice-Cream

Mixed Berry Crostata

  • Servings: 6-8
  • Print

*from Country Living

Ingredients:
1 ¼ cups plus 1 Tablespoon all-purpose flour
¼ cup plus 2 Tablespoons granulated sugar
1/8 teaspoon salt
½ cup (1 stick) unsalted butter, softened
2 large eggs
1 cup raspberries
1 cup fresh blackberries
1 Tablespoon fresh lemon juice
1 Tablespoon turbinado sugar

Instructions:
Make the dough: Combine 1 ¼ cups flour, ¼ cup sugar, and salt in a large bowl. Form a well in center of the dry ingredients and place the butter and 1 lightly beaten egg in the well. Using your hands, mix the ingredients into a soft, pliable dough. Form it into a 4-inch disk and place it on a lightly flour parchment paper. Lightly dust the dough with flour and roll it into a 10-inch circle. Place the dough with parchment on a baking sheet, cover the dough with plastic wrap, and chill for 10 minutes. Preheat oven to 375°.

Make the crostata: In a small bowl, mix remaining flour and sugar and set aside. Remove the dough from the refrigerator and evenly spread the flour and sugar mixture on the dough, leaving a 1-inch-wide border around the edge. Place berries on top of the mixture and sprinkle with lemon juice. Fold the 1-inch border over the top of the berries to form a 9-inch crostata.

Bake the crostata: Lightly beat the remaining egg. Brush the top of the crostata dough with the egg wash and sprinkle with turbinado sugar. Bake on the middle rack of the oven- about 35 minutes. Remove from the oven and slide crostata with the parchment paper onto a wire rack. Cool for 1 hour. Serve warm or at room temperature.

Dry-ingredients-with-egg-and-butter
Make a well in the center of the dry ingredients and add the softened butter and one lightly beaten egg.
Crostata-mixing-dry-and-wet-ingredients
Use your fingers to mix the dry and wet ingredients together.
Crostata-dough-is-ready-to-roll
The dough has come together and is ready to roll.
Crostata-dough-on-floured-surface
Lightly flour your parchment paper or silicone liner, as well as the dough.
crostata-10-inch-crostata-crust
Roll the dough into a 10-inch round.
Crostata-berries-on-crust
Scatter berries on top of flour/sugar mixture.
Crostata-edges-folded-over
Fold a 1-inch border over the berry filling.
Crostata-edges-brushed-with-egg-and-sugar
Brush the crostata edges with lightly beaten egg and sprinkle with sugar.
Crostata-cooling-on-a-wire-rack
Transfer the crostata to a wire rack to finish cooling.

Chocolate Chunk Cookies

Chocolate-Chunk-Cookies

Chocolate-Chunk-Cookies

What more can you say about chocolate chip cookies? They have been around for over 75 years, invented by Ruth Wakefield who owned and operated the Toll House restaurant in Whitman, MA. If you’re interested in learning more, please see this New Yorker article for an interesting history of one of America’s most iconic sweets.

Today there are an infinite number of chocolate chip cookie recipes, but your  hunt for the best is over. Chocolate Chunk Cookies stand apart from the competition because of the chunks, not just any chunks, but coarsely chopped or broken pieces of bittersweet chocolate. The size of the larger pieces combined with bittersweet chocolate make all the difference. A very smart friend mentioned another bonus- these cookies are better for you because of all the antioxidants in the dark chocolate. So pour a glass of red wine milk and enjoy.

Making Chocolate Chunk Cookies is pretty straightforward. Cream butter and sugar, add an egg, some flour, baking soda, salt, vanilla, and most importantly the bittersweet chocolate. The best part is “coarsely chopping” the chocolate. And by coarsely chopping I mean whacking the wrapped bars against the countertop.  Multiple times. Of course, if you want to chop, go right ahead. But smashing those chocolate bars does feel pretty good.

After repeatedly whacking the chocolate, carefully unwrap to reveal your chunks.
Use your fingers to break any larger pieces of chocolate into more
Use your fingers to break any larger sections of chocolate into more “bite sized” pieces.

My favorite tool to use for scooping cookie dough, muffin or cupcake batters is an ice-cream scoop. Everything comes out perfectly uniform and I don’t have to spend time scraping spoons to get the dough or batter to drop.

Use an ice-cream scoop to drop perfectly portioned and even cookie dough rounds.
Use an ice-cream scoop to drop perfectly formed and portioned cookie dough rounds.

The other tool I get quite a bit of use out of is a reusable silicone liner. Nothing sticks- from candied nuts to cookies. Parchment paper works just as well, though cannot be reused.

Cookie dough about to go into the oven.
Fresh out of the oven and cooling on a wire rack.

Chocolate Chunk Cookies

  • Servings: approximately 30 cookies
  • Print

*adapted from Lee Bailey’s Country Desserts

Ingredients:
2 cups all-purpose flour
1 teaspoon baking soda
½ teaspoon salt
½ cup (1 stick) plus 2 Tablespoons (1/4 stick) unsalted butter, softened
½ cup firmly packed light brown sugar
½ cup firmly packed dark brown sugar
¼ cup granulated sugar
1 large egg
1 ½ teaspoons vanilla extract
¾ cup coarsely chopped walnuts**
8 ounces bittersweet chocolate (such as Ghiradelli or Guittard), coarsely chopped or broken

Instructions:
Preheat oven to 375°.

Sift together the flour, baking soda, and salt. Set aside.

Cream the butter and sugars until smooth, about 4 minutes. Add the egg and mix well. Add the flour mixture and beat thoroughly. Stir in the vanilla, then fold in the nuts and chocolate chunks.

Drop in 2 Tablespoon clumps onto an ungreased cookie sheet, leaving several inches between for expansion.

Bake for 10-12 minutes, or until the bottoms are lightly browned. Let cool for a minute or two on the cookie sheet, then remove to a wire rack to finish cooling. Repeat with remaining batter until used up.

**The walnuts are terrific, adding even more chunks (and antioxidants) to this delicious cookie.  However, because this particular batch was for a school function the cookies had to be nut free, and were just as tasty without them.

Serve with milk... or red wine... or even whiskey according to the New Yorker article.
Serve with milk… or red wine… or even whiskey according to the New Yorker article.

Pizza

Sunday night is pizza night at White House Red Door. This is different than when I grew up; back then Friday night was pizza night. Our go to pizzeria was right next to the train station, which meant my mom could call in the order, timing it perfectly with dad’s commute home from NYC. He’d hop off the train, grab the pizza (Sicilian style for him, regular pie for us), and head home. Toppings varied from week to week based on who was eating with us, but the general drill stayed the same. Friday night was pizza.

Out of the oven, the pizza is resting before we dig in!

Just two towns over, my husband’s family (though I didn’t know him at the time) grew up with Sunday night pizza night. His mom deserved a much needed break from the daily ritual of dinner making (my husband is one of six kids!), and they had their own favorite local pizza place.

Years later, after a move to a rural town without good pizza, my mother-in-law took matters into her own hands, literally! She had an oven dedicated to pizza making installed. Lucky for me I was on hand one Sunday evening. I had never had “homemade” pizza. Well, I take that back… the only homemade pizza I had growing up was English muffin pizza. Not that there is anything wrong with that! Delicious in its own right, a personal pizza I could bake and customize all by myself. My taste memories of English muffin pizzas rank right up there with the frozen individual pot pies we had when my parents were going out for the night, leaving a babysitter in charge. Ahh… the culinary pleasures of growing up in the 70s and 80s! But I digress!

Back to my mother-in-law, homemade pizza made in a dedicated pizza oven?! Homemade dough, too?! It was an eye-opening experience; she had complete control of the dough to sauce to cheese ratios and it was faster than ordering and picking up (or waiting for delivery). But most importantly the taste was amazing! That Sunday night was a game changer for me.

The dough is ready to roll out...
The dough is ready to roll out…

But how do you make pizza without a dedicated pizza oven? The answer for us (and you) is a baking stone, a flat baking surface made of ceramic or stone, easily found in kitchen or home stores, as well as online. Our stone has been well loved; every Sunday night for the past 17 years it has been pulled out from its normal resting place among sheet pans and cutting boards and called into service. The stone is placed on a rack about 6-7 inches from the top of the oven and preheated for at least 45 minutes at the highest temperature the oven will go, for us, 550°. Adding the stone and preheating for an extended period of time allows your oven to mimic the clay or brick oven your favorite pizza place uses. Because the stone has preheated for so long, thoroughly absorbing and radiating all that heat, your crust will start cooking as soon as it hits the stone. And because you have set the stone in the upper part of the oven, the top will immediately start cooking as well. The crust and the top cooking simultaneously is key. No one wants to eat burnt cheese on raw dough, or vice versa, burnt crust under cheese that hasn’t completely melted.

After rolling, the dough is transferred to a well floured pizza peel.

My husband is terrific in the kitchen, and Sunday night is his night. Earlier in the day, I make the dough- it only takes 20 minutes- and set it aside to rise, at least 2 hours. Don’t let the thought of making dough intimidate you! No special equipment or talent is needed. If that doesn’t suit you, go buy some dough. Most grocery stores carry it; I’ve even bought dough from a nearby pizza place in a pinch.

Use your favorite store bought sauce or make your own.

But please, do try making homemade pizza. It’s fun, tasty, and may even leave you with the feeling that you don’t have to reach for the phone every time you want to have a pizza night. Finally, a special hats off to our favorite childhood pizza places, Sunrise Pizzeria and Pizza Post, upon which every slice we eat is compared.

Topped with fresh and shredded mozzarella, dried herbs, and a sprinkle of salt.

Let me know how it goes… I’d love to hear from you!

With a quick flick of the wrist the pizza is moved from the peel to pizza stone.
With a quick flick of the wrist the pizza is moved from the peel to pizza stone. Dinner will be ready in 8-10 minutes.

Basic Pizza Dough

  • Servings: 2 round pizzas, about 12 inches wide, depending upon how thin you make them
  • Print

*adapted from Essentials of Italian Cooking by Marcella Hazen

According to Marcella Hazen, “the recipes for pizza dough are beyond numbering. Although some formulas are certainly better than others, none may credibly claim to be the ultimate one. What matters is knowing what you are looking for. I like pizza that is neither too brittle and thin nor too thick and spongy, a firm chewy pizza with crunch to its crust. The dough that has satisfied my expectations most consistently is the single-rising one given below. I have never succeeded in getting the texture I like from pizza baked in pans, so I prefer to do mine directly on a baking stone.”

Ingredients:
1 ½ teaspoons active dry yeast
1 cup lukewarm water
3 ¼ cups unbleached flour
extra virgin olive oil
1 Tablespoon for the dough,
1 teaspoon for the bowl,
and some for the finished pizza
½ Tablespoon salt
A baking stone
A baker’s peel (paddle)
Cornmeal and/or flour

Instructions:
Dissolve the yeast completely in a large bowl by stirring it into ¼ cup lukewarm water. When dissolved, in 10 minutes or less, add 1 cup flour and mix thoroughly with a wooden spoon. Then, as you continue to stir, gradually add 1 Tablespoon olive oil, ½ Tablespoon salt, ¼ cup lukewarm water, and 1 cup more flour. When putting in flour and water for the last time, hold back some of both and add only as much of either as you need to make the dough manageable, soft, but not too sticky.

Starting the dough... all you need is flour, yeast, water, olive oil and salt
Starting the dough… all you need is flour, yeast, water, olive oil and salt

Take dough out of the bowl, and slap it down very hard against the work counter several times, until it is stretched out to a length of about 10 inches. Reach for the far end of the dough, fold it a short distance toward you, push it away with the heel of your palm, flexing your wrist, fold it, and push it away again, gradually rolling it up and bringing it close to you. Rotate the dough a one-quarter turn, pick it up and slap it down hard, repeating the entire previous operation. Give it another one-quarter in the same direction and repeat the procedure for about 10 minutes. Pat the kneaded dough into a round shape.

Slap the dough on the work counter until you have a 10

Starting at the end furthest from you, fold it towards you, then push it away with the heel of your palm. Continue folding and pushing it away until you have rolled it up. Turn the dough one-quarter and start the procedure over again.

After about 10 minutes of kneading, the dough will be smooth and elastic. It is ready to rise.

Film the inside of a clean bowl with 1 teaspoon olive oil, put in the dough, cover with plastic wrap, and put the bowl in a protected, warm corner. Let the dough rise until it has double in volume, about 3 hours. It can also sit a while longer.

The dough has doubled in bulk and is done rising.

At least 45 minutes before you are ready to bake, put the baking stone in the oven and preheat oven to at least 500°. The stone should be placed on a rack that is about 6-7” from the top of the oven.

Sprinkle your work surface generously with flour. Take the risen dough out the bowl and divide in half. Set one half aside and cover while you roll out the other half. Put that half on your work surface and flatten it as thin as you can, opening it out into a circular shape, using a rolling pin, but finishing the job with your fingers. Leave the edges somewhat higher than the rest. Carefully transfer the dough to a pizza peel generously dusted with flour or cornmeal.

Put the topping of your choice on the dough, and slide it, jerking the peel sharply away, onto the preheated baking stone. Bake for 8-10 minutes, but watch carefully! Each oven‘s cooking time will vary. As soon as it is done, drizzle lightly with olive oil. Follow the same procedure with the other half of dough, or freeze it for another day.

Devil’s Food Cake with Marshmallow Frosting

You can’t have a birthday without a cake! Though no one knows for sure, there is some consensus among food historians about how our current tradition of celebrating birthdays with a candle topped cake evolved through the millennia.

It all began with the Ancient Egyptians who believed that a pharaoh’s coronation marked his “birth” as a god, and he should be honored as such. The Ancient Greeks continued the tradition of honoring gods and goddesses, offering moon shaped cakes glowing with candles to Artemis, the goddess of the moon. The burning candles symbolized the luminosity of both the moon and Artemis’ beauty. The Ancient Romans joined the party when they decided that mere mortals should also be honored, as long as the mortals were male. Friends’ and family members’ birthdays were acknowledged, while the government even created holidays to commemorate its most famous citizens’ birthdays. By the 18th century, Germans were celebrating Kinderfest, a birthday party for children. A cake would be topped with one candle for each year of life, plus one more for the next year. The candles were lit, a wish made and the candles blown out. Perhaps the smoke carried the guest of honor’s wish or prayer to Heaven? This German tradition of observing children’s birthdays made it to America by the late 1890s, with the “icing on the cake” arriving around 1910 in the form of a song still sung today, “Happy Birthday to You…”

A huge cake for a two year old!  And those flowers!
A huge cake for a two year old! And those flowers!

Flash forward to the 1970s and birthdays in my childhood home. The oldest of four, my youngest sibling was born when I was 6yrs old. My parents had 4 children in 6 years- needless to say, life was busy! Birthdays were always celebrated with parties. As an infant or toddler, it meant just family, but by nursery school it meant having friends to our house for cake and party games… think BINGO, Pin the Tail on the Donkey, and Hide and Seek. Mom did it all, but usually outsourced the cake. For my sister and me, a buttercream frosted confection covered with pink flowers was ordered from an Italian bakery. For my brothers, a Carvel ice cream cake was arranged. Carvel could turn Fudgie the Whale into anything, Santa, a leprechaun, or for my youngest brother, a very memorable “Jaws” cake.

Demonstrating knife skills at an early age.

One bakery cake that often graced our table was an absolute stunner! Its only downfall, the sides coated in sliced almonds. Not exactly standard party fare for the elementary school set that was more accustomed to Duncan Hines cake with coordinating Duncan Hines frosting. It wasn’t until well into adulthood that I confessed to my mom that I had never really liked the almond covered cake, and instead had dreamed of boxed cake mix and frosting from a tub. That is until one year when I actually did a not so scientific side-by-side comparison- boxed vs homemade and in a blind taste test, everyone (including me) chose homemade.

Ahh, the cake with the fancy almond coated sides.
Ahh, the cake with the fancy almond coated sides. My expression says it all.

Today, birthdays mean getting together with family and friends, as well as the honoree deciding the birthday dinner and dessert. Everyone has his or her favorites… ice cream pie to ice cream cake to traditional cake, even cheesecake. Whatever the birthday person wants, I will happily make. Recently in our house, we celebrated a 13th birthday. My son went back and forth planning the perfect menu for himself, finally deciding on take out from our favorite Mexican place followed by Chocolate Cake with Marshmallow Frosting for dessert. This chocolate cake has been a hit for years! Sometimes slathered in cream cheese frosting, but more often than not, swoopy fluffy Marshmallow Frosting is the request. The chocolate cake is moist, tender, and deep flavored. The frosting isn’t really made from marshmallows, it’s actually a Seven Minute Frosting, but the taste and look is so reminiscent of a marshmallow that’s what my kids have named it. And don’t just save this cake for birthdays- it is excellent any time!

Happy 13th Birthday!

Devil’s Food Cake

  • Servings: 12-16
  • Print

*adapted from Kathleen’s Bake Shop by Kathleen King

Ingredients:
2 ¼ cups all-purpose flour
2 teaspoons baking soda
½ teaspoon salt
1 cup unsalted butter, softened
2 ¼ cups firmly packed dark-brown sugar
3 eggs
3 squares (3 ounces) unsweetened chocolate, melted
½ cup buttermilk
1 cup boiling water
2 teaspoons vanilla extract

Instructions:
Preheat oven to 350°. Grease and flour two 9-inch pans or three 8-inch round pans.

In a large bowl, sift together flour, baking soda, and salt.

In another large bowl, cream butter and sugar with an electric mixer. Add eggs one at a time, mixing well after each addition. Stir in melted chocolate.

Beginning and ending with the dry ingredients, add flour mixture and buttermilk alternately to the butter mixture in three stages. Add boiling water and vanilla. Mix well, but don’t overmix. The batter will be very thin and soupy at this point; don’t be alarmed!

Pour batter into prepared pans and bake for 30 minutes, or until a cake tester (toothpick or bamboo skewer) inserted in center comes out clean. Remove pans to wire rack. Cool 5 to 10 minutes before removing cake from pans; finish cooling on rack.

Frost or dust with confectioners sugar and serve with ice-cream.

Makes one 9-inch, 2 layer cake or one 8-inch, 3-layer cake.

Happy Birthday!
Happy Birthday!

Marshmallow Frosting

  • Servings: enough to frost one 9-inch layer cake
  • Print

*adapted from The Martha Stewart Cookbook by Martha Stewart

Ingredients:
3 egg whites
1 ¾ cups of sugar
5 Tablespoons cold water
¼ teaspoon cream of tartar
1 teaspoon vanilla extract

Instructions:
Place egg whites, sugar, water, and cream of tartar in the top of a double boiler over but not touching rapidly boiling water.

Beat with an electric hand mixer for 7 minutes. Remove from heat, add the vanilla, and continue beating until fluffy and glossy.

Spread the frosting between the layers and over the exterior of the cake with an off set spatula or knife.

This frosting is best served the day it is made.

Simple Roast Chicken and Vegetables

Growing up, my mom’s mom often came for extended visits. A widow by the time I was born, Nanny grew up in Belfast, Ireland and moved to Brooklyn, New York in her 20s. She relied on walking and public transportation her entire life, and never felt the need to learn how to drive on her own. My dad would drive the hour or so to collect and bring her to us, and she would stay for a week or two at a time until dad drove her back home. My memories of those visits are very special. We walked everywhere… to our little town center where we’d sit at Woolworth’s counter sipping ice-cream sodas; to the beach, boardwalk, or park where she would find a spot in the shade (to protect her gorgeous Irish skin), content to watch her grandchildren romp around.

The memories of her visits that influenced me most are the taste memories. Nanny would take over the kitchen, giving my mom a well deserved break from feeding a family of six. Nanny’s dinners were simple, learned during her very humble childhood… shepherd’s pie, Irish stew, and roast chicken. The house would smell divine, luring all of us in… onions, carrots, celery, and potatoes roasting alongside a chicken; mingling with flavorful juices; crisping and browning on the outside, yet everything remaining tender inside. Family lore has it that Nanny’s parents kept chickens in Belfast- urban farmers a century ago! She didn’t continue the homesteading in Brooklyn, so I have no doubt she learned how to cook a chicken properly before she left Ireland.

Ready for the oven.
Ready for the oven.

Roast chicken and veggies are one of the best one dish dinners to have in your rotation. It only takes a little forethought- you must have a chicken on hand, but the other ingredients are probably already in your fridge and pantry. No need to stand in front of the stove stirring, or browning first, then transferring to another pan. Simply put the chicken in the oven, and walk away. An hour later, add the veggies to the same roasting pan, and again- walk away. Depending on the size of your bird, about 30 minutes later start checking the chicken. You’ll know the bird is done when the juices run clear when you cut between a leg and thigh. The rule of thumb is 20-30 minutes/pound. Please check for yourself as cooking times can vary depending on your oven, as well as the temperature of the chicken when it went into the oven. The veggies should be fork tender, and golden brown in spots.

Adding the vegetables.

Put everything on a platter and bring to the table to serve family style. You’ll be creating taste memories for your own family. It doesn’t get any easier!

Ready for the table.

One of the bonuses of a roast chicken and veggie dinner are the leftovers… think burritos, tacos, stir fry, chicken salad or throw some shredded chicken into marinara sauce destined for pasta, adding a bit of protein.

Simple Roast Chicken and Vegetables

  • Servings: 4-6
  • Print

Chicken:
1 3-4lb chicken
1 lemon
5 cloves of garlic, skin on
salt and freshly ground black pepper

Vegetables:
4 large carrots, chopped into 1½-2” pieces
4 celery stalks, chopped into 1½-2” pieces
5 small red or yellow (Yukon gold) potatoes, halved
1 large yellow onion, quartered
salt and freshly ground black pepper
1 T olive oil

Instructions:
Preheat oven to 375°.

Put chicken into a roasting pan. Sprinkle generously with salt and pepper all over chicken, inside and out.

Wash lemon in cold water and dry. Cut in half.

Put lemon in cavity, along with garlic cloves.

Place chicken in the middle of oven to roast for an hour.

In the meantime, toss the veggies with salt, pepper and olive oil. After chicken has roasted for an hour, remove from the oven and scatter vegetables all around, tucking some underneath the chicken if possible.

Place chicken and vegetables back in the oven. Continue roasting for at least 30 more minutes or until juices between leg and thigh run clear when cut.* Remove chicken to platter and tent with foil. If necessary continue roasting vegetables until tender when pierced with a knife.

*General rule when roasting chicken is 20-30 minutes/pound at 375°.