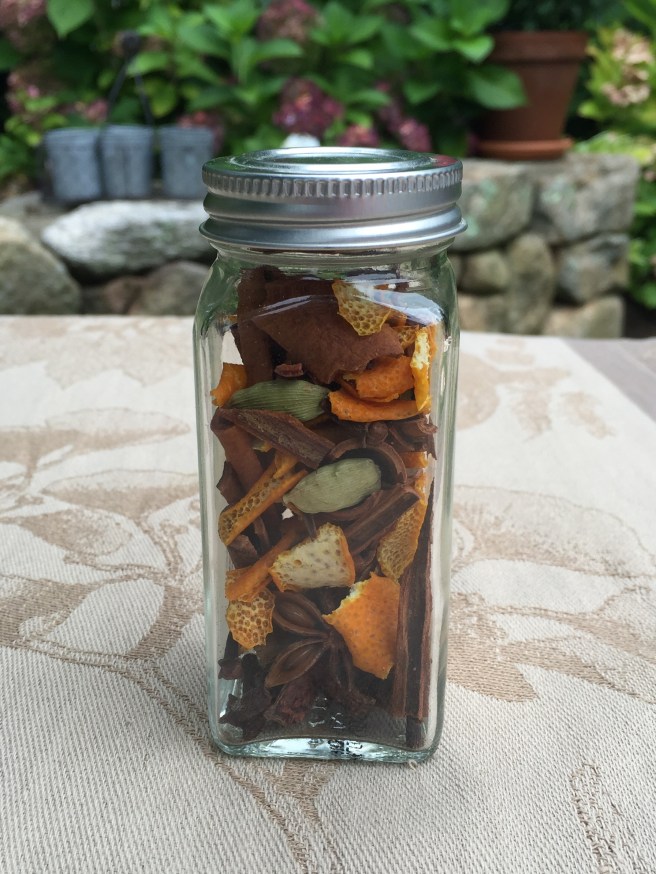
We are all so busy nowadays and quickly grabbing something from the store is an efficient and easy way to tick the boxes off your gift giving to do list; you’ll get no argument from me! But that’s what makes homemade gifts so special, taking the time to make something from scratch and presenting it to someone who also has a lot on their plate (no pun intended!). Think about teachers, neighbors, friends, hostesses, as well as those who help keep our worlds moving smoothly, like school bus drivers and postmen. Those people (and their families) will appreciate the time spent creating thoughtful gifts for them.
Christmas is naturally a wonderful season to share homemade presents with those around us. But these gifts work well all year round, anytime you would like to say “thank you” or just brighten someone’s day. My passion lies in the kitchen, so baking gifts is where I turn. Your strength may lie in photography, flower arranging, knitting, crafting, gardening, etc. If you’re able to, please consider sharing your talents!
Below are some of my favorite homemade gifts to give… nothing exotic, over the top, or containing hard to find ingredients. But, they are all heartfelt and give me great joy to share.
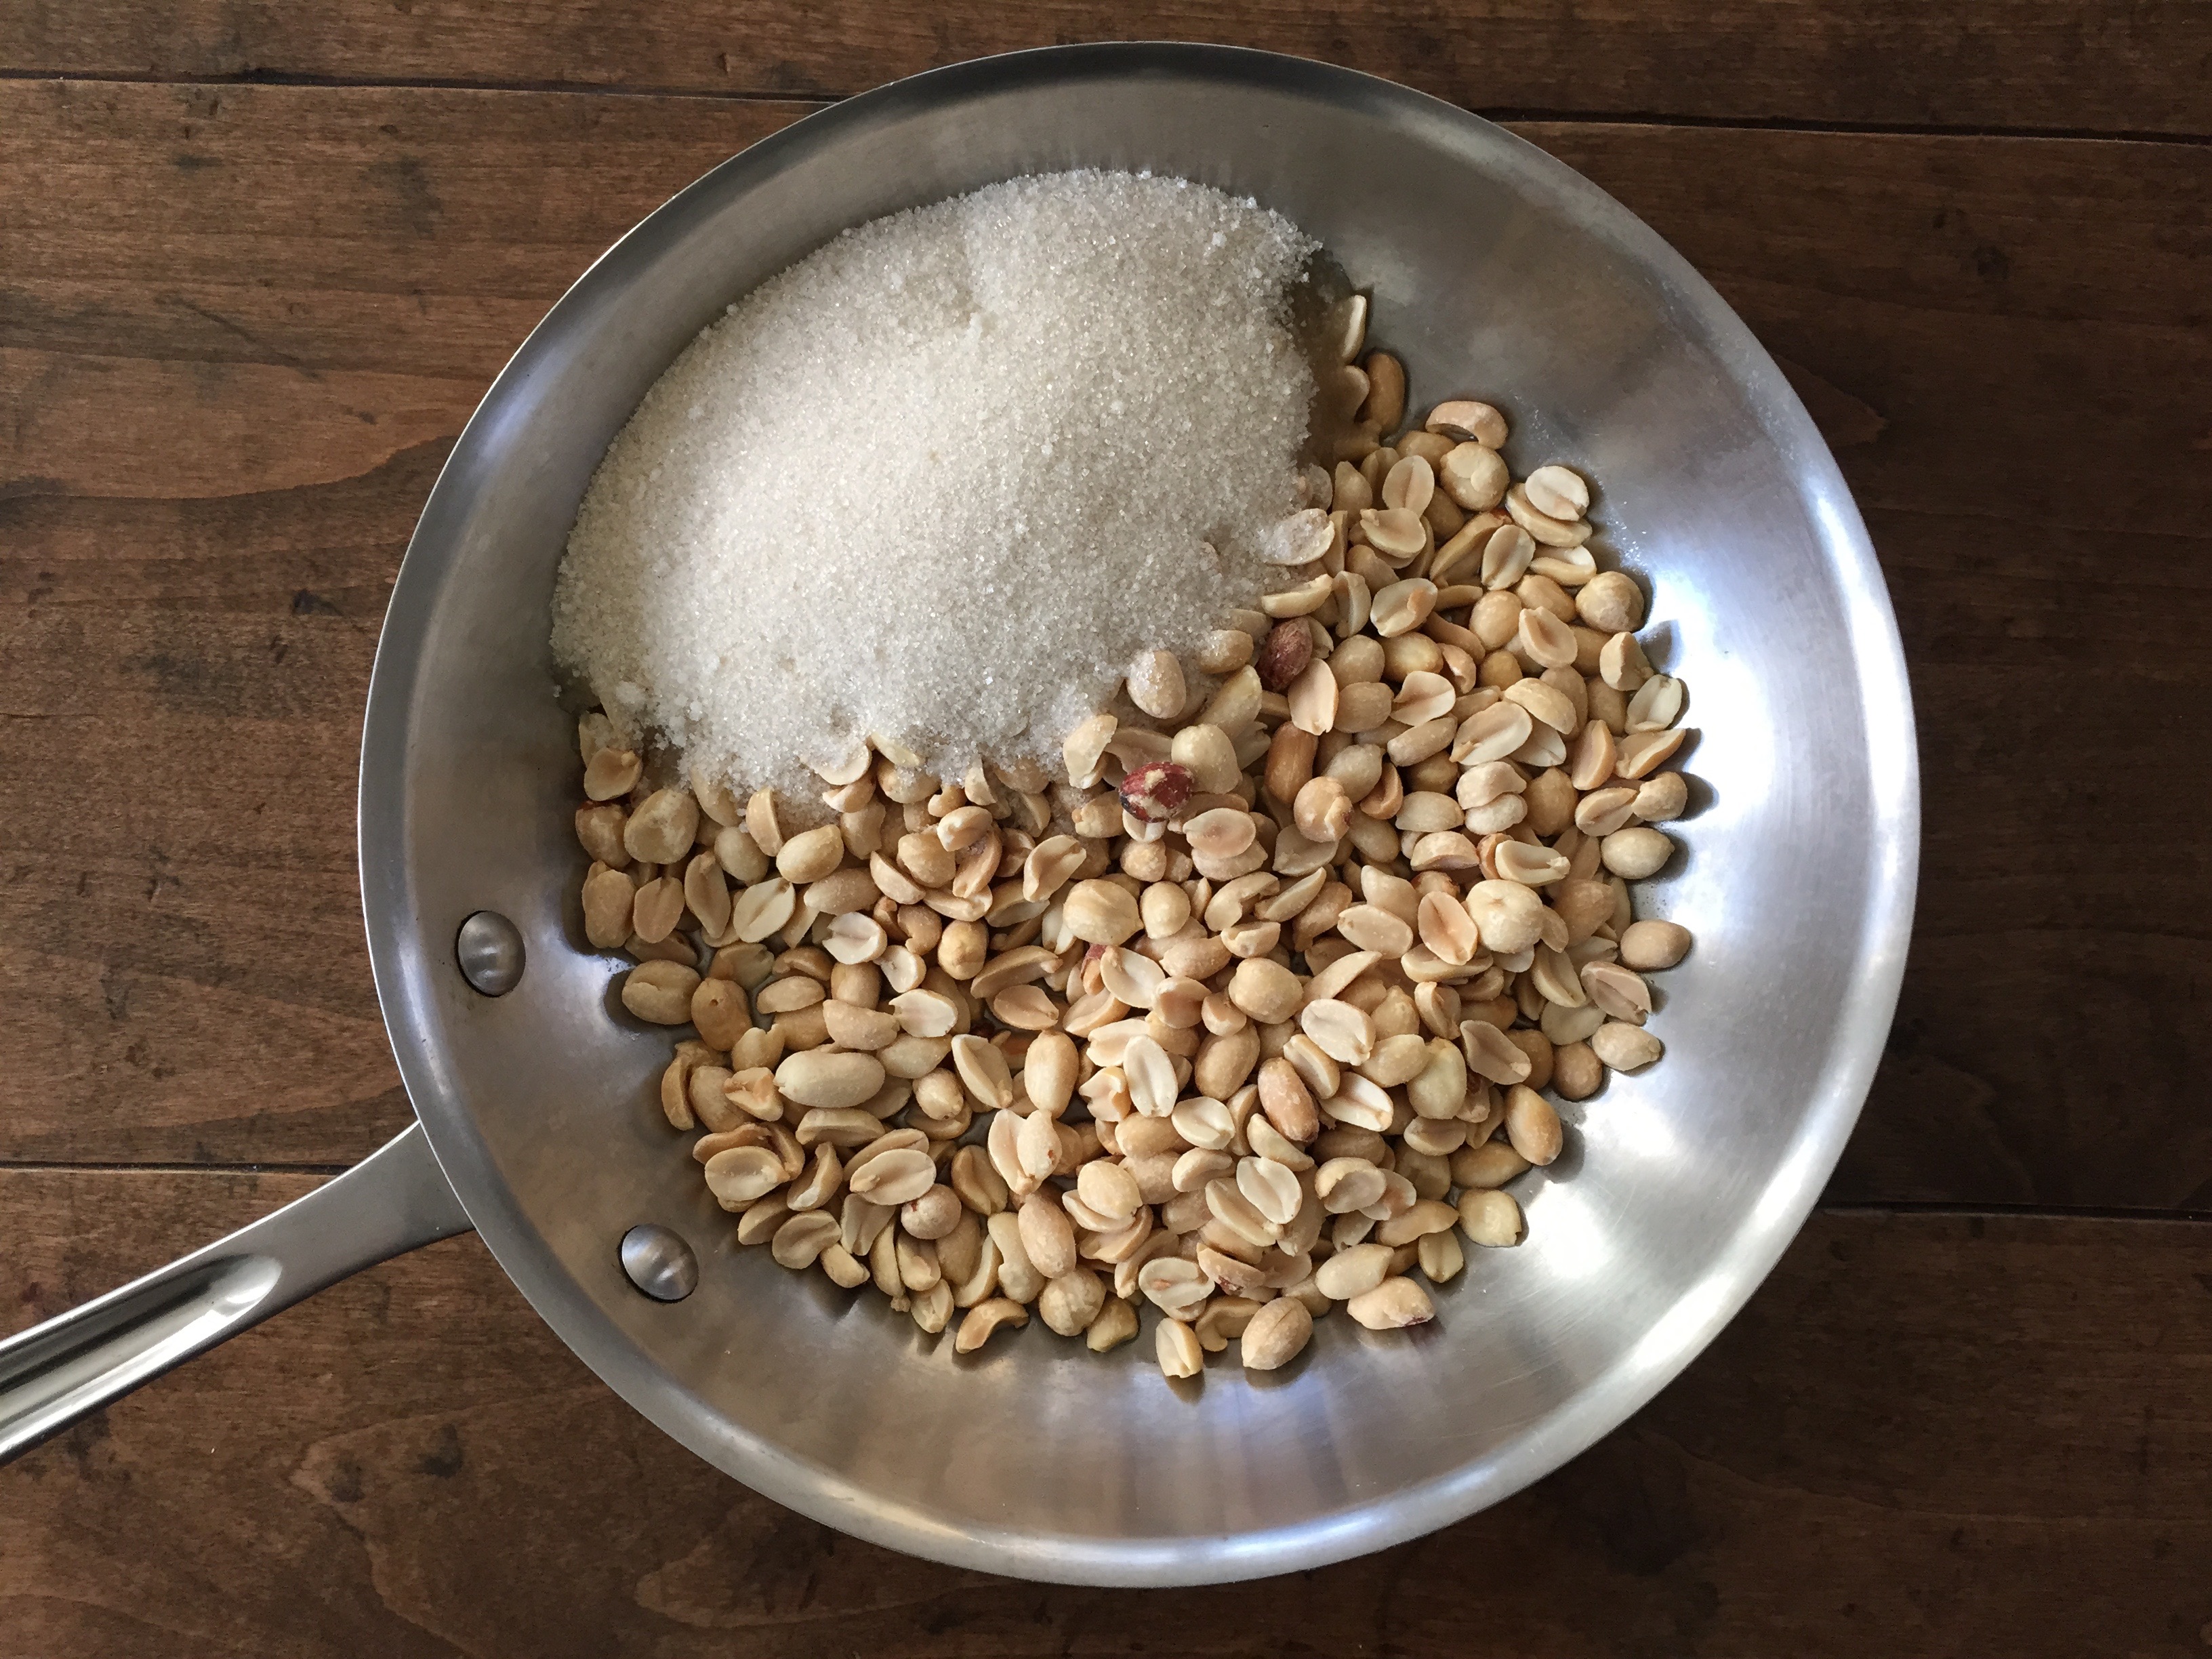
These candied peanuts have been in heavy rotation at our house for years. The recipe is my go to for cocktail hour, teacher and hostess gifts, bake sales, and late night snacks. Beyond simple, the nuts are made on top of the stove, in one pan, with 5 ingredients, and done in 10 minutes. It doesn’t get any easier!
The recipe is adapted from one by David Leibovitz. An expat living in Paris, David shares his talents with the world as a blogger, cookbook author, and former pastry chef at Chez Panisse. The original recipe calls for raw peanuts which I have yet to find at my local store, so instead, I substitute roasted (or blanched) and unsalted peanuts.* These are found in the bulk section of the grocery store.
I feel compelled to warn you… the nuts are highly addictive and sought after. Friends have described them as “crack,” but my favorite nickname is Dirty Nuts. A year or so ago, I shared the recipe with my niece, who wanted to make them for a holiday party. Though Emily told everyone they were “Candied Peanuts” one of her friends, after pulling himself away from the bowl, promptly announced the peanuts were so amazing, they were “dirty.” And the name Dirty Nuts stuck.
Whatever you call them, know that you will create uncontrollable cravings in your friends and family. Gentle appeals may turn into begging, and finally outright demands. You’ll have to keep up, satisfying their needs as well as keeping your own stash topped off. Thankfully, because the recipe is so quick and easy, the task should be manageable… or just start sharing the recipe (that’s what I did!).
*I have used roasted and salted peanuts, but the recipe doesn’t work as well. I’m not sure why, but the sugar doesn’t seize the same way. The results have been best and most consistent with unsalted peanuts.
Ingredients:
2 cups raw peanuts (or almonds)
1 cup sugar
1/3 cup water
1 teaspoon chili powder (or to taste)
½ teaspoon cinnamon (or to taste)
sprinkle of coarse sea salt
Instructions:
In a wide, heavy-duty skillet, mix the peanuts with the sugar and water. Cook the ingredients over moderate heat, stirring frequently, until the liquid seizes up. It will take a few minutes. The peanuts will get crusty and the sugar will crystallize; they will appear dry and sandy.
Lower the heat and keep stirring. The crystalized sugar will begin to liquefy again. Stir the peanuts into any syrup forming in the bottom of the pan, coating them as much as possible.
Continue stirring and coating the peanuts in the syrup as it darkens without burning the peanuts or the syrup. If the mixture starts to smoke, remove it from heat and stir. The peanuts are done when they are as dark as you’d like them to be.
Right before they’re done, remove from heat and sprinkle the peanuts with the chili powder, cinnamon, and sizable pinch of flaky salt. Stir them a couple of times, then immediately spread the peanuts onto a silicone mat or parchment lined baking sheet.
Allow the peanuts to cool completely, and then break up any clumps. Enjoy watching them disappear! If you have any leftovers, store in an airtight container.
Just five ingredients… peanuts, sugar, water, spices, and salt.Peanuts, sugar, and water are combined in a heavy duty skillet.Over moderate heat, stir peanuts, sugar and water to dissolve sugar.After several minutes, the sugar begins to crystalize.The sugar has crystalized and the nuts appear sandy and dry. Don’t worry!!! This is normal… lower the heat and just keep stirring.The crystalized sugar begins to liquefy forming a deep brown sugar in the bottom of the pan. Continue to stir over low heat to coat all the peanuts in any syrup that forms. Remove from heat if the syrup starts to smoke.Just before the nuts are done stir in spices and sprinkle of salt.Spread the candied peanuts onto silicone mat or parchment lined baking sheet. Allow to cool, and then break up any clumps.If, by chance, you have any leftovers, store them in an airtight container.
November 2017Update: It’s been a long while since I posted. Life is busy, good busy, but busy; we have two in high school, one in middle school and a 77lb puppy who thinks she’s a lap dog. My passion for cooking and all things food related still runs strong (not to worry- we are eating over here at White House Red Door!), but finding the time to sit down to document recipes and edit photos seems to be elusive at the moment. I’m hoping to make carving out time for the blog a priority in the new year.
As I was wrapping my head around Thanksgiving prep, I pulled up this blog post. Immediately, a feeling a calm enveloped me… the day to day planning, core recipes, and to do list set my mind at ease. I’m reposting in the hope that it helps you too.
Wishing you and your loved ones a very Happy Thanksgiving! ~Jean
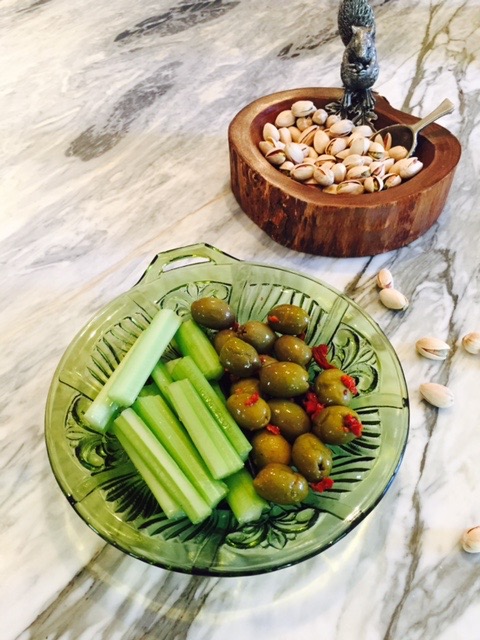
Throughout November, I’ve posted some of our traditional family Thanksgiving recipes. You may have noticed that there are no appetizers. This is not without thought, we have so much food for dinner, that I don’t want people to fill up beforehand! We’ll have a few nibbles out… nuts and a “relish tray.” It wouldn’t be Thanksgiving without one.
At our house, a relish tray is simply a small platter of olives and celery sticks lying side by side; the celery sticks bathing in the salty brine of the olives. Every year my mom would set the tray on the dining room table before anything else. The grown-ups would walk by in passing and grab an olive or celery stick.
Cranberry Pineapple Sauce
As a child I thought this was incredibly sophisticated, and by default, if I ate the olives and celery I, too, would be incredibly sophisticated- braces and all. I willed myself to eat the green olives stuffed with pimento, chasing them down with celery. A fake grin pasted on my face, I proudly showed my younger sister and brothers that I was well on my to adulthood. It wasn’t until I was an adult that I actually enjoyed the relish tray, the crunch of the celery alongside the saltiness of the chilled olives is terrific and definitely whets the appetite. So I will continue the tradition, setting out a tray of my own. The kids will reach for it when they’re ready, a culinary right of passage.
Chestnut and Sausage Stuffing
Do you set out appetizers? Or, is it all about the main event and desserts?
Ingredients:
Turkey- this year my husband will be cooking the bird on his Big Green Egg. In previous years the turkey has been fried or roasted in the oven. This is the first time doing the turkey on the Egg, I’ll let you know how it goes! Chestnut and Sausage Stuffing
Mashed Potatoes
Candied Yams
Green Beans with Almonds
Peas with Sautéed Mushrooms and Roasted Red Peppers
Creamed Onions Cranberry Pineapple Sauce Apple Cream Pie Sweet Potato Pie with Maple Meringue
Instructions: Monday:
* Make cranberry pineapple sauce Tuesday:
* Cube bread for stuffing and allow to dry overnight. Wednesday:
* Brine turkey
* Make stuffing
* Make pecan graham cracker crust for sweet potato pie
* Roast sweet potatoes for pie and puree
* Roast sweet potatoes for candied yams and slice
* Prepare topping for candied yams- chopped pecans, brown sugar, and butter
* Sauté mushrooms and dice roasted red peppers for peas
* Toast silvered almonds for green beans
* Set table
* Organize and label serving platters/pieces Thursday:
* Cook turkey
* Make apple cream pie (morning)
* Finish sweet potato pie (morning)
* Make creamed onions (morning- stove top)
* Make mashed potatoes (afternoon-stove top)
* Finish candied yams (afternoon- oven)
*Finish green beans and peas (afternoon- stove top)
* Have a drink!
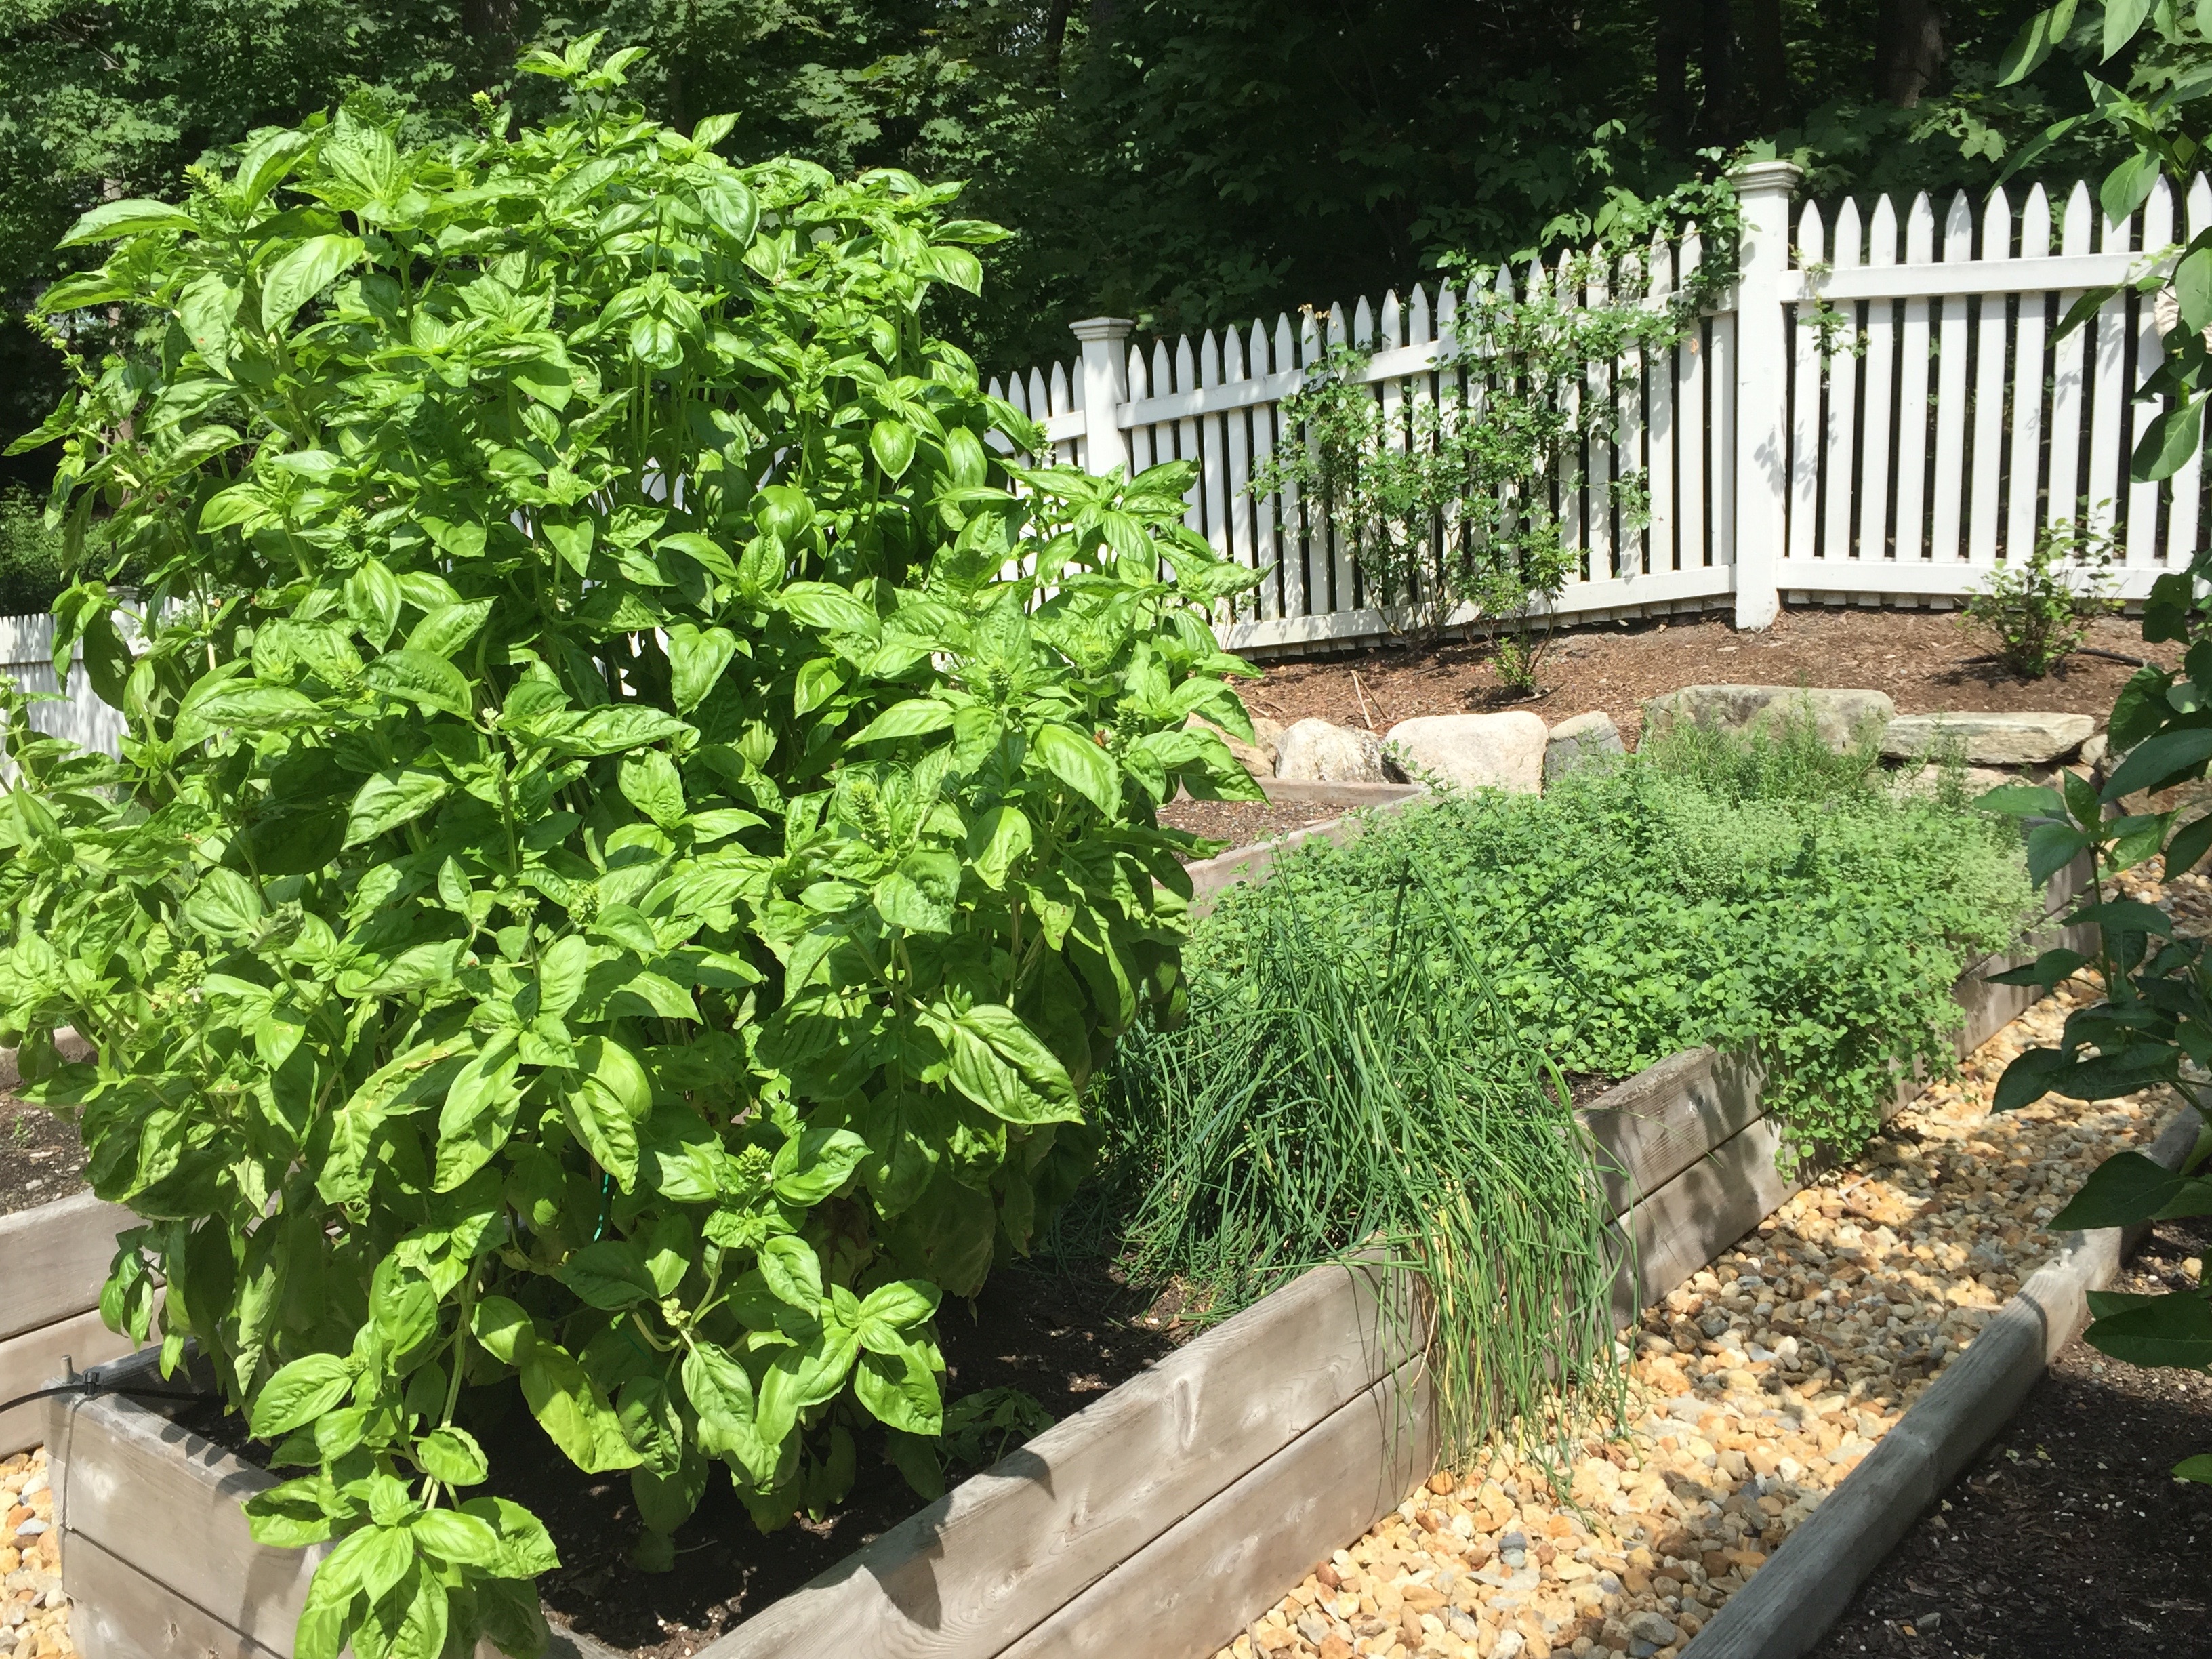
You know how each summer there is THE song of the summer, the one that puts smiles on faces, gets toes tapping, and windows rolled down while everyone sings along? Well, this summer I have THE herb of the summer growing in my garden… basil. The three or four small plants that went into the ground in late spring have grown into a mighty basil forest, extraordinarily tall and lush. We cannot keep up with it; despite our best efforts, that is an enormous amount of caprese salad to eat!
This basil is out of control.
As the days grow shorter, I am only too aware of the cool weather that is sure to follow. Feeling a bit like the ant preparing for winter in Aesop’s The Grasshopper and the Ant, I’ve gone on a pesto making binge; not only preserving basil’s quintessential summer flavor at its best, but capturing a sunny moment in time. These green gems, pulled from the depths of the freezer, will bring warm memories to cold snowy nights sometime in the (not too distant) future.
Pesto is from the Italian word pestare which means to pound or crush. The English word for pestle shares the same Latin root. Traditionally, pesto is made by hand with a mortar and pestle, but in the quantities I’m dealing with the food processor is helping. No shame in that.
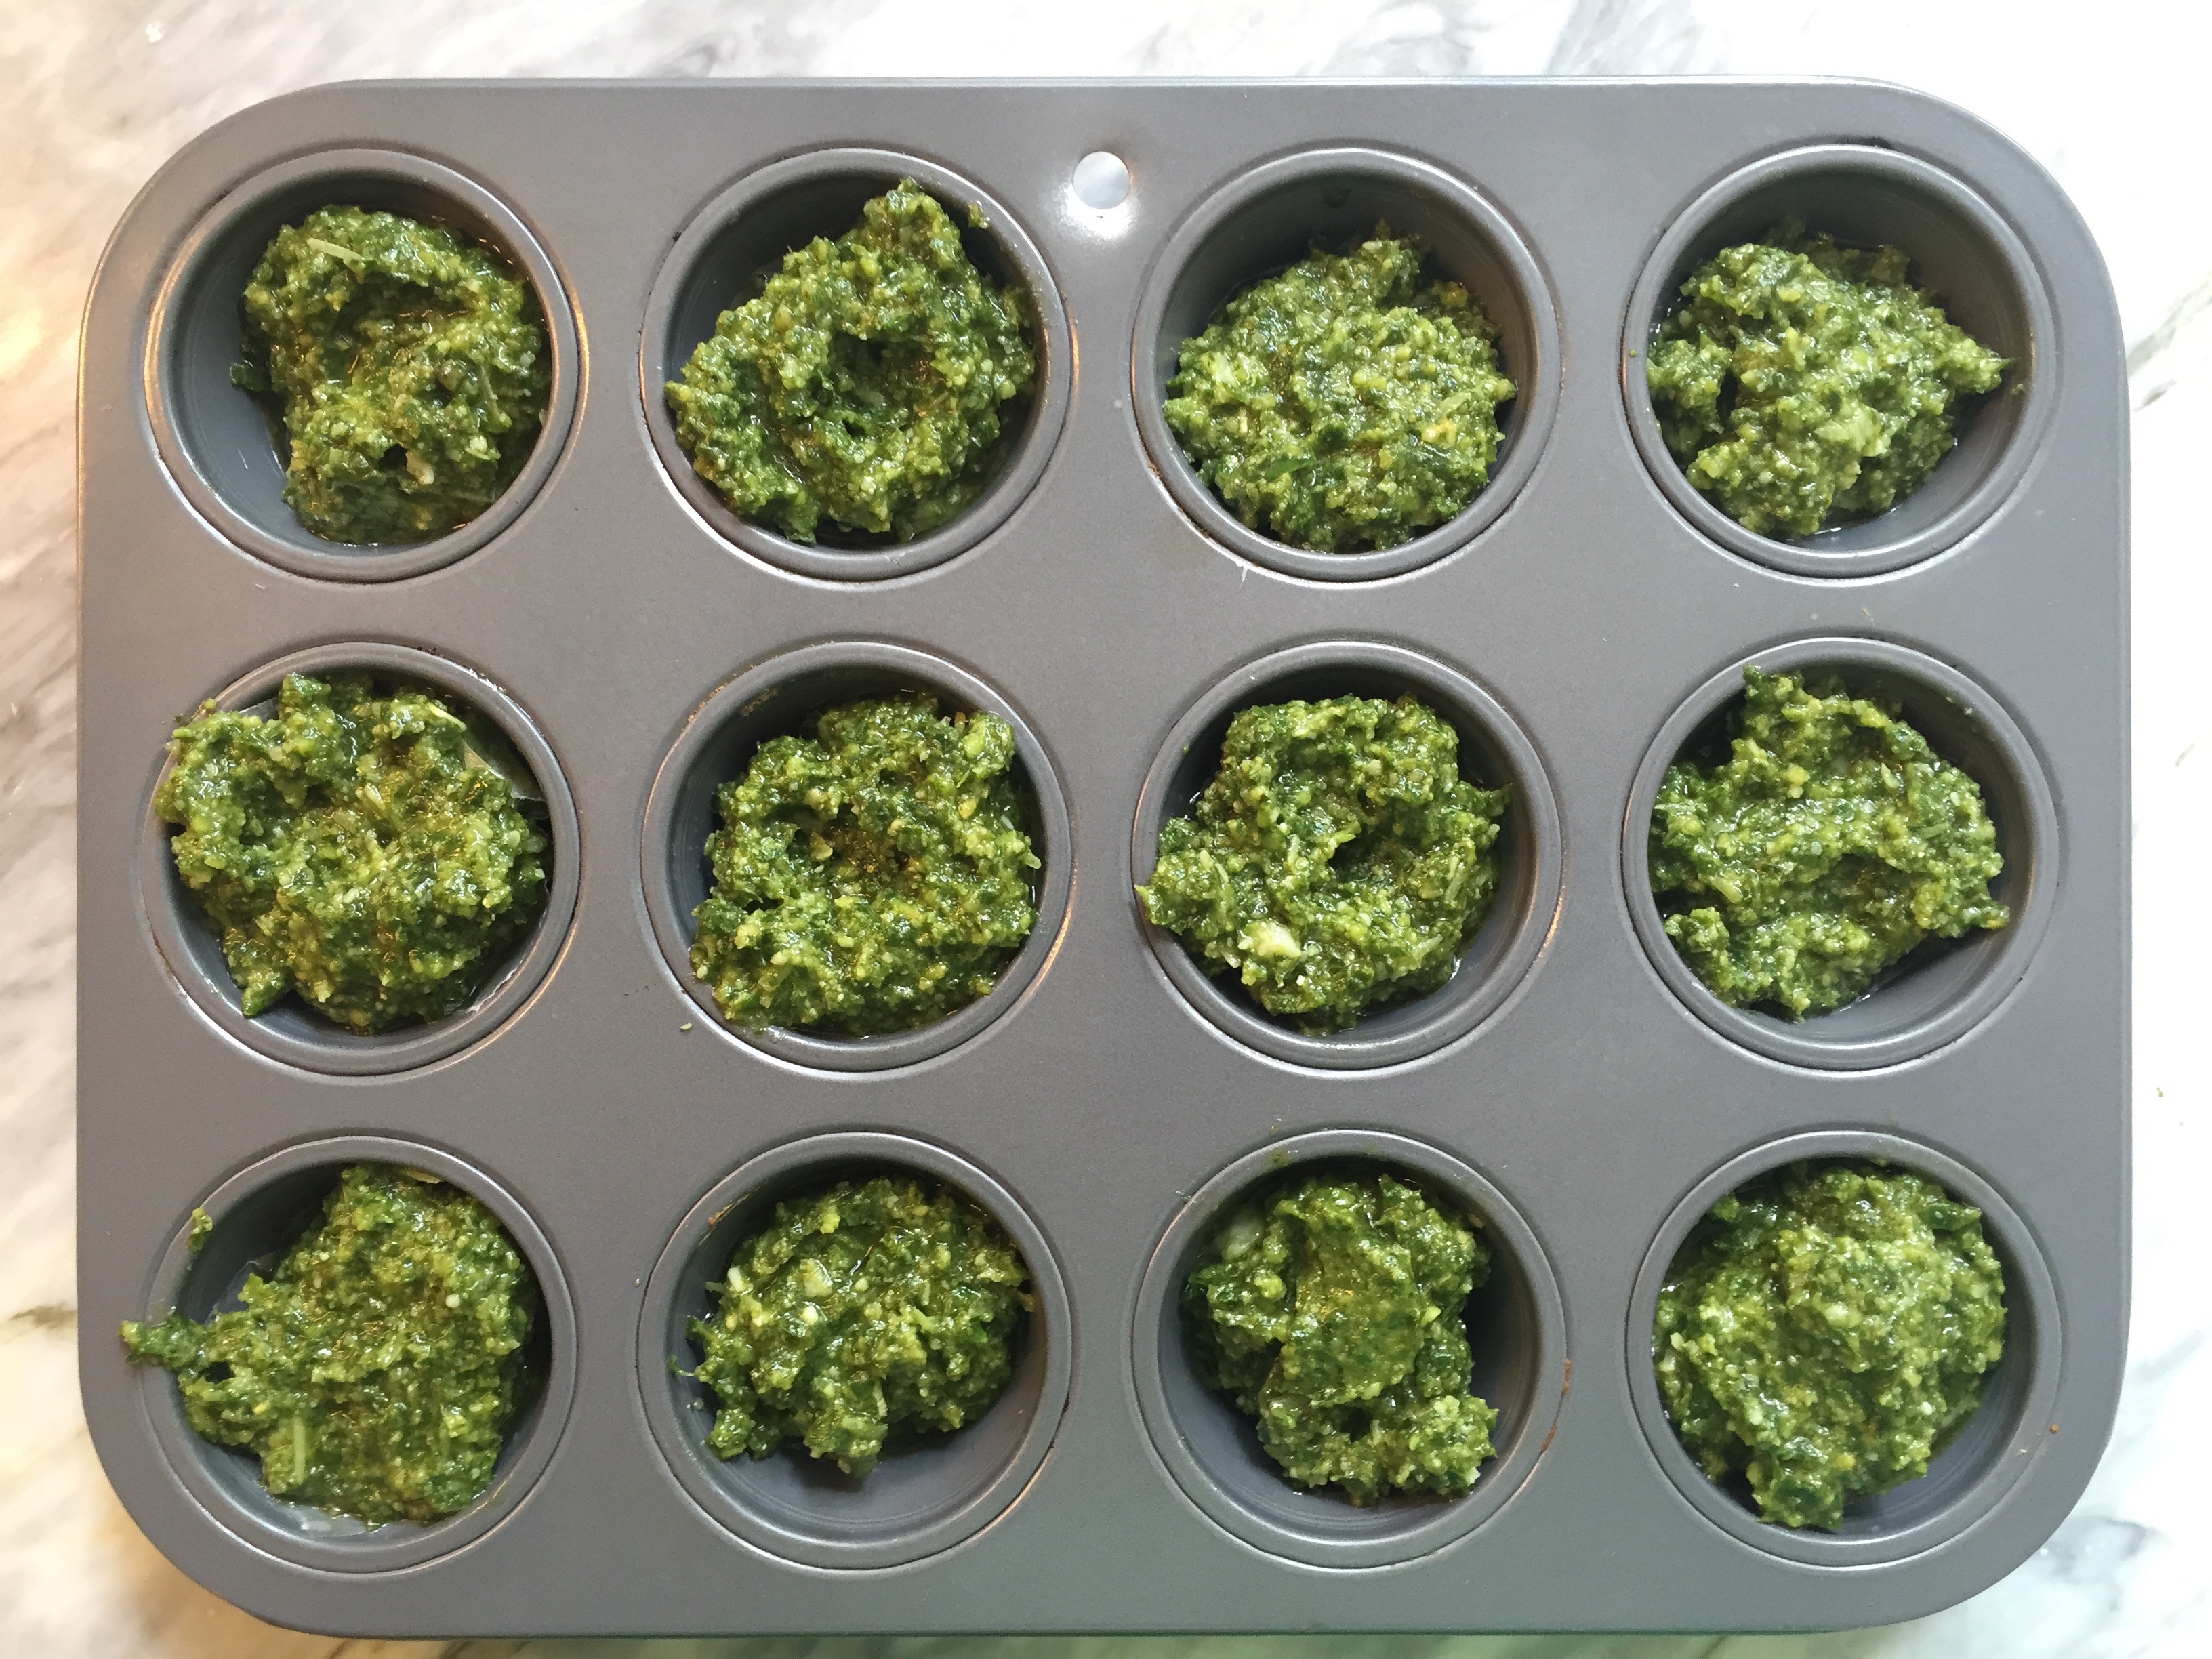
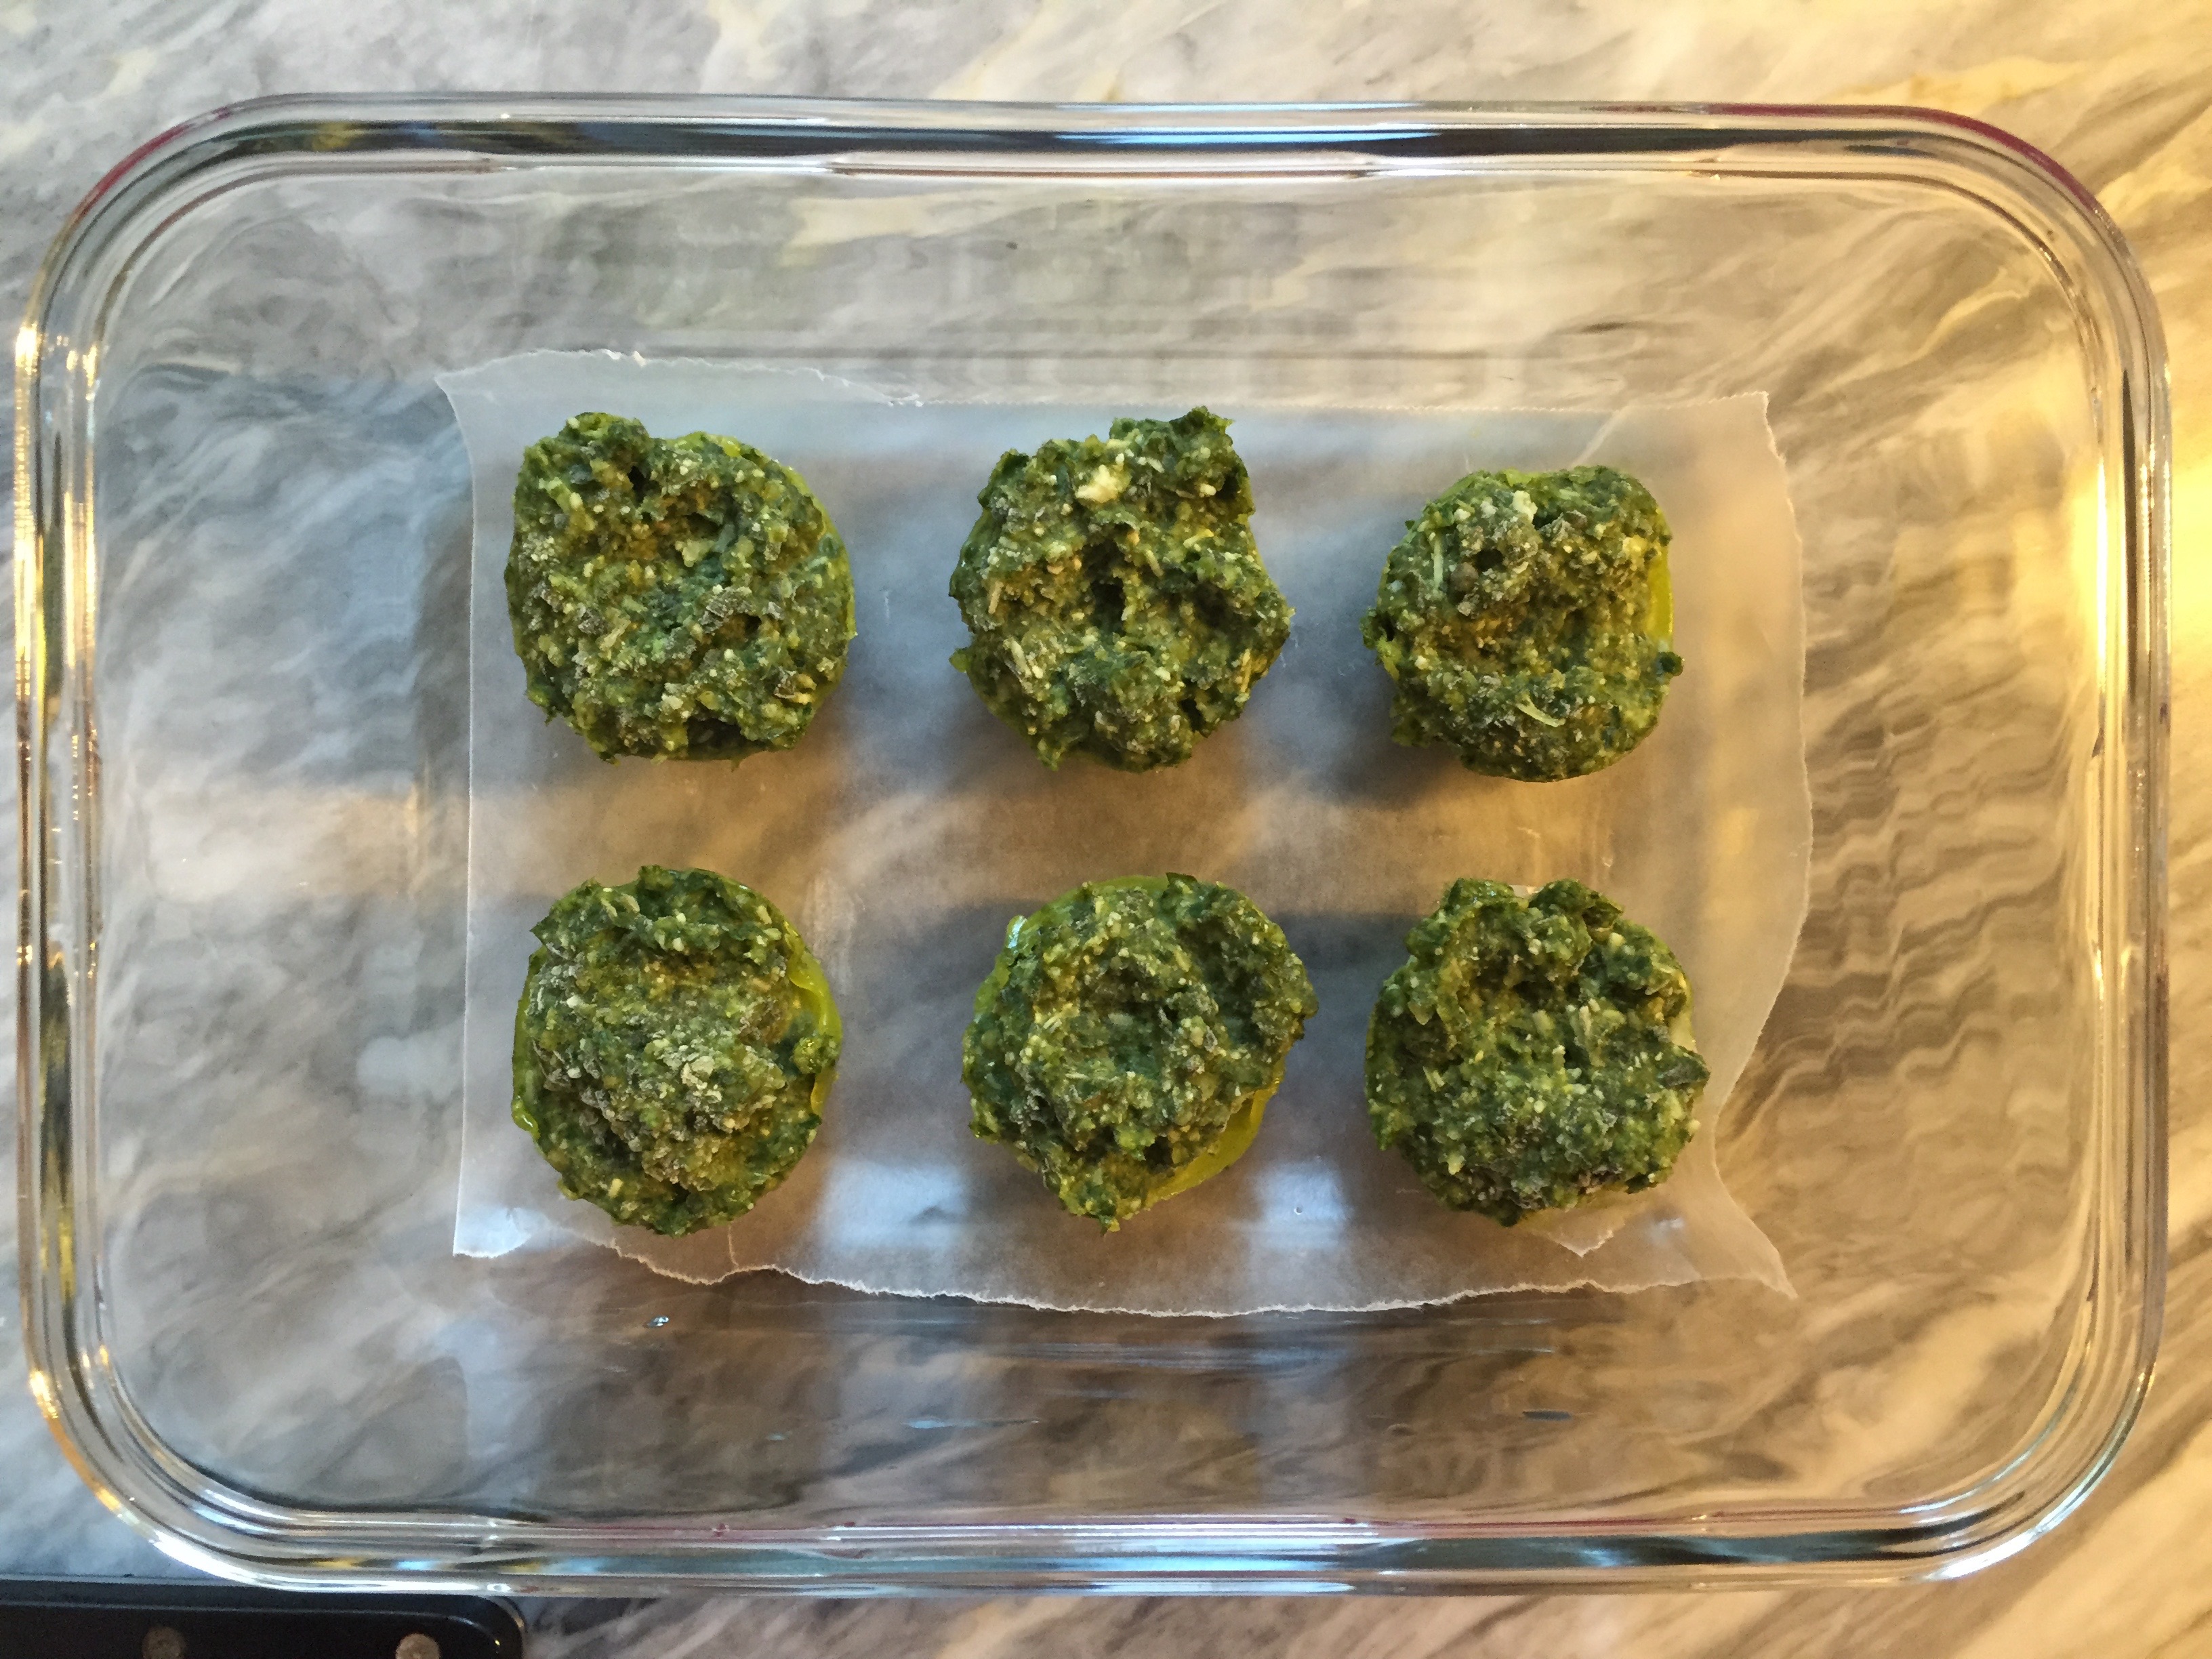
Some of the pesto is for enjoying now, but the majority is getting scooped into mini muffin tins, frozen, then transferred into storage containers for the freezer. The mini pesto “muffins” are just the right size to add to dishes all winter long.
And pesto isn’t just for pasta… here are some others ways to savor it.
• Potatoes- pesto and potatoes are a wonderful pair. Gently stir a spoonful of pesto into freshly boiled potatoes or mix a spoonful into mashed potatoes.
• Marinara Sauce- add pesto to your regular marinara sauce
• Dip- mix pesto into greek yogurt, crème fraiche, or sour cream for a dip
• Pizza- use pesto instead of pizza sauce on your next homemade pizza
• Sandwiches- spread pesto on your favorite crusty sandwich bread, top with sliced chicken and roasted red peppers
Those are just some of my suggestions. I’d love to hear from you… what are your favorite ways to use pesto?
Ingredients:
For the food processor-
2 cups tightly packed fresh basil leaves
1/3 cup extra virgin olive oil
3 Tablespoons lightly toasted pine nuts
2 garlic cloves, chopped fine
salt
For completion by hand-
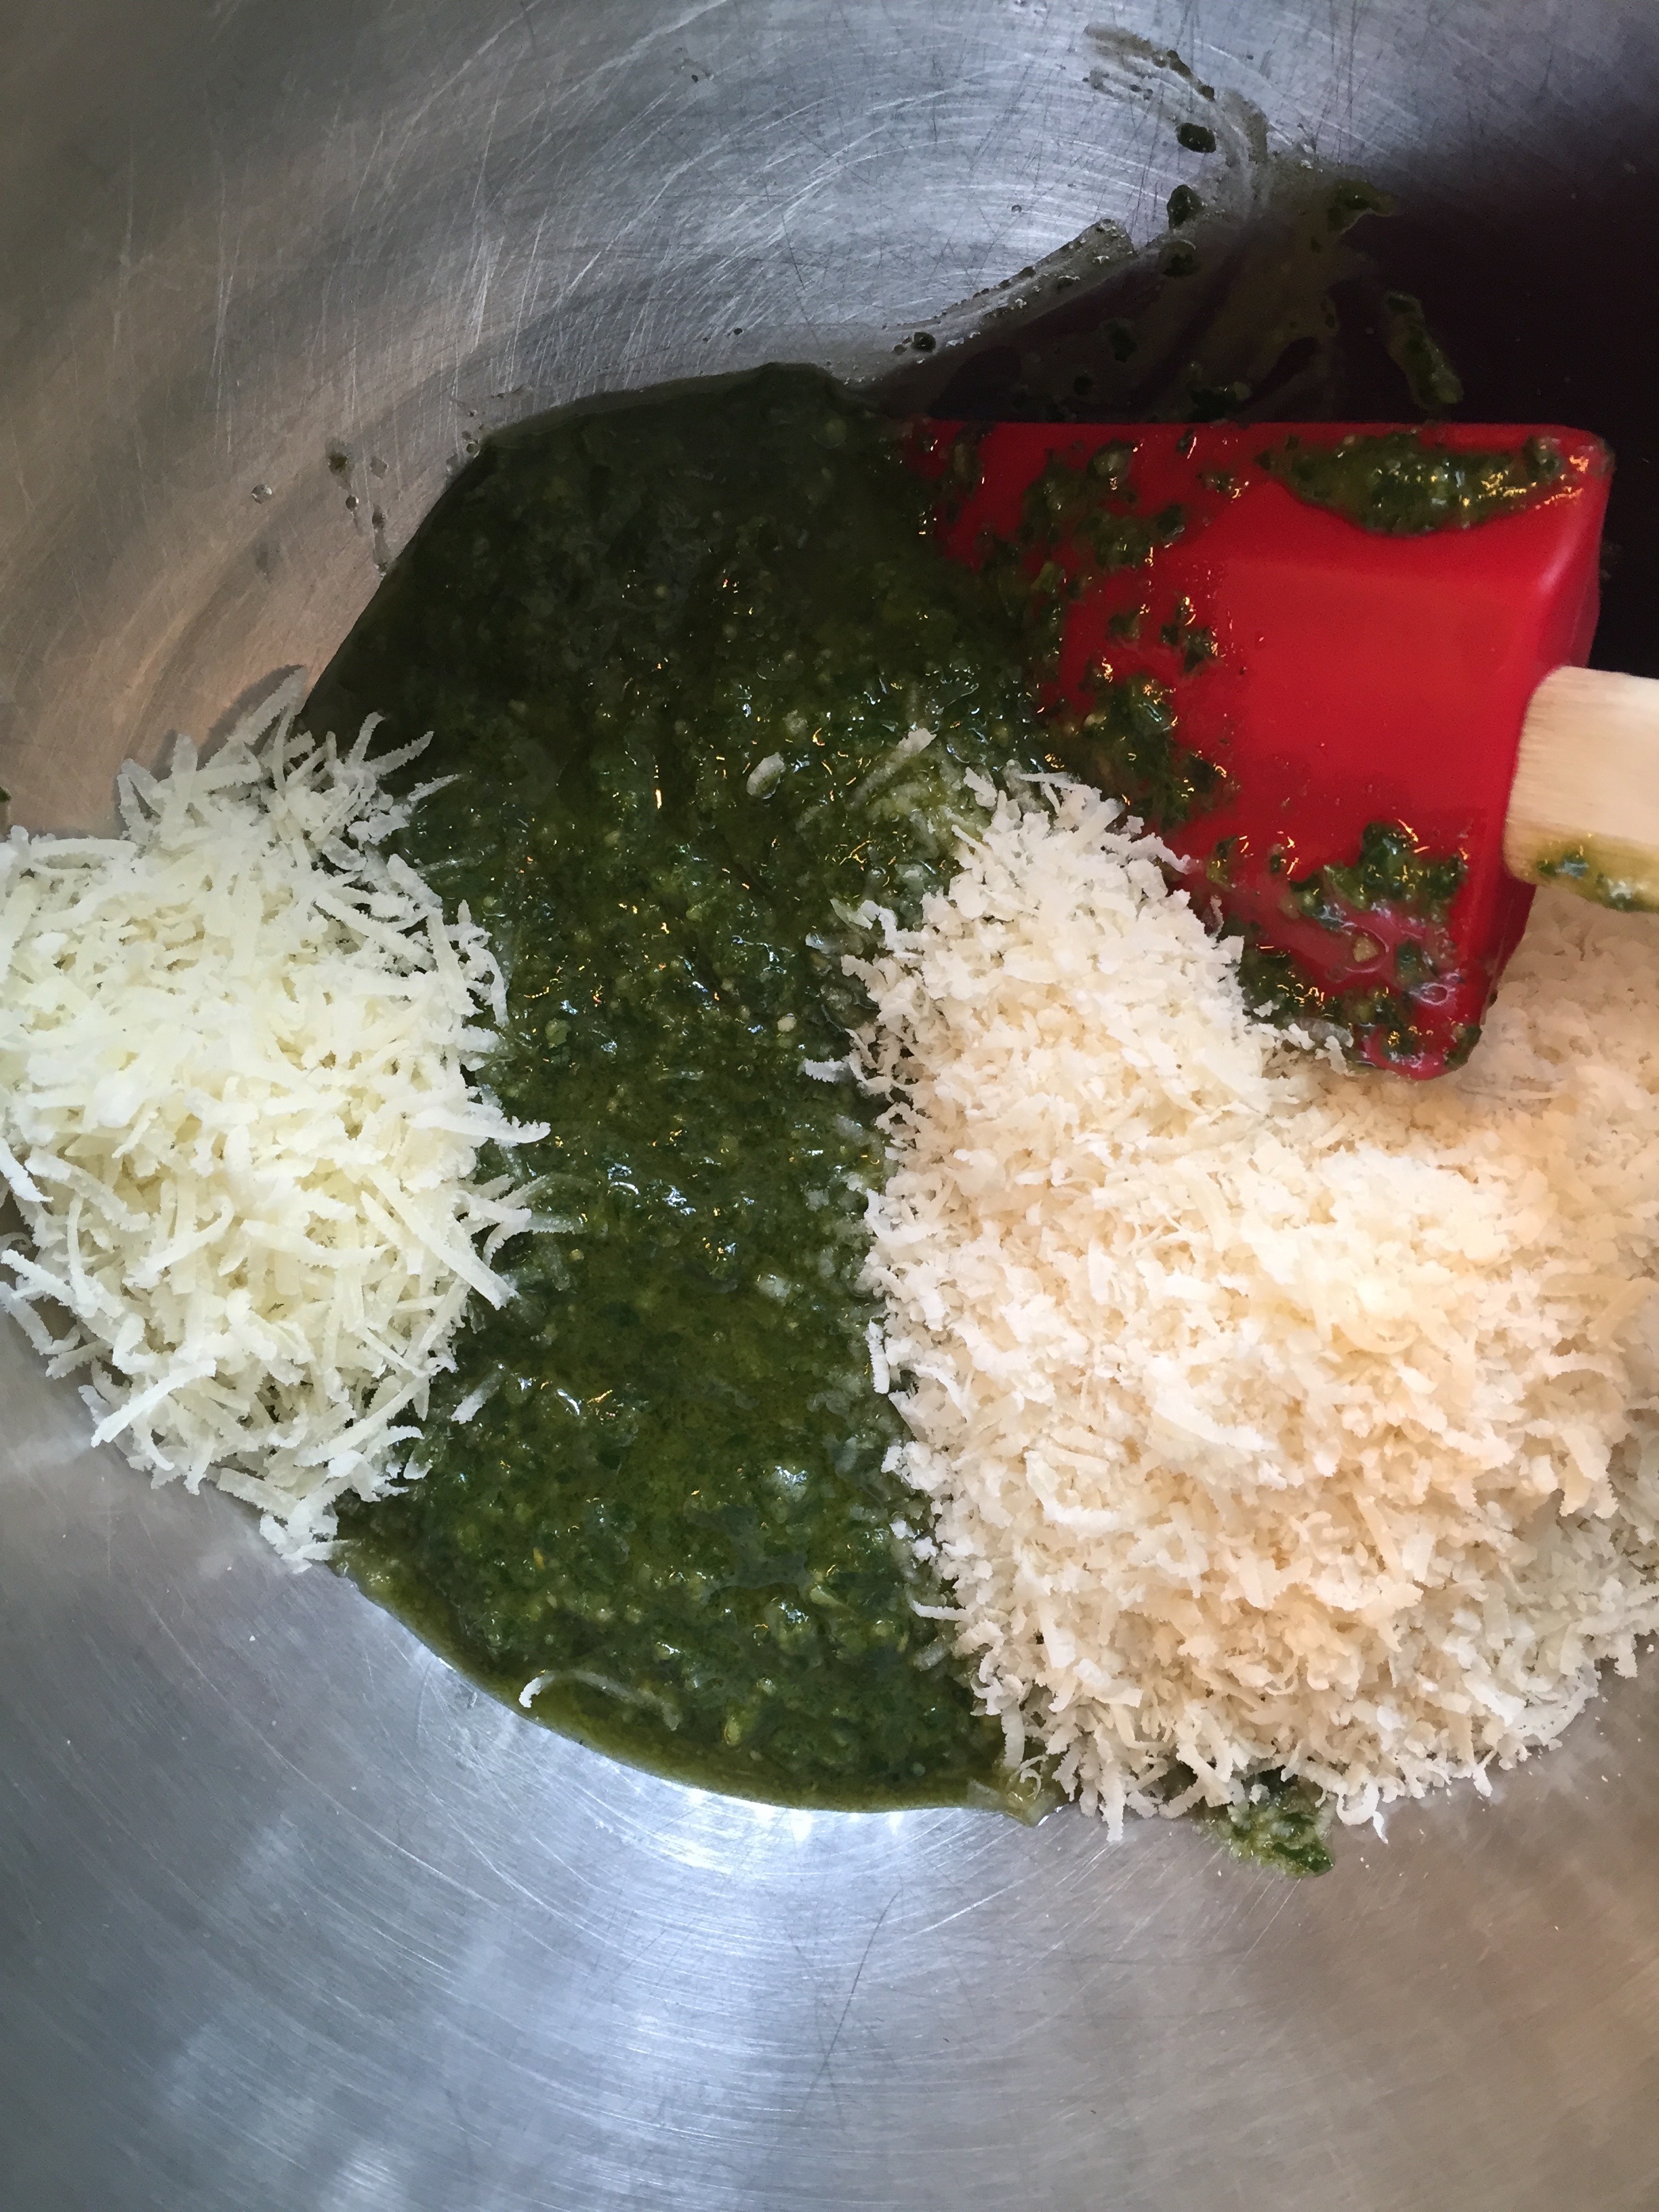
½ cup freshly grated parmesan cheese
2 Tablespoons freshly grated romano cheese
Instructions:
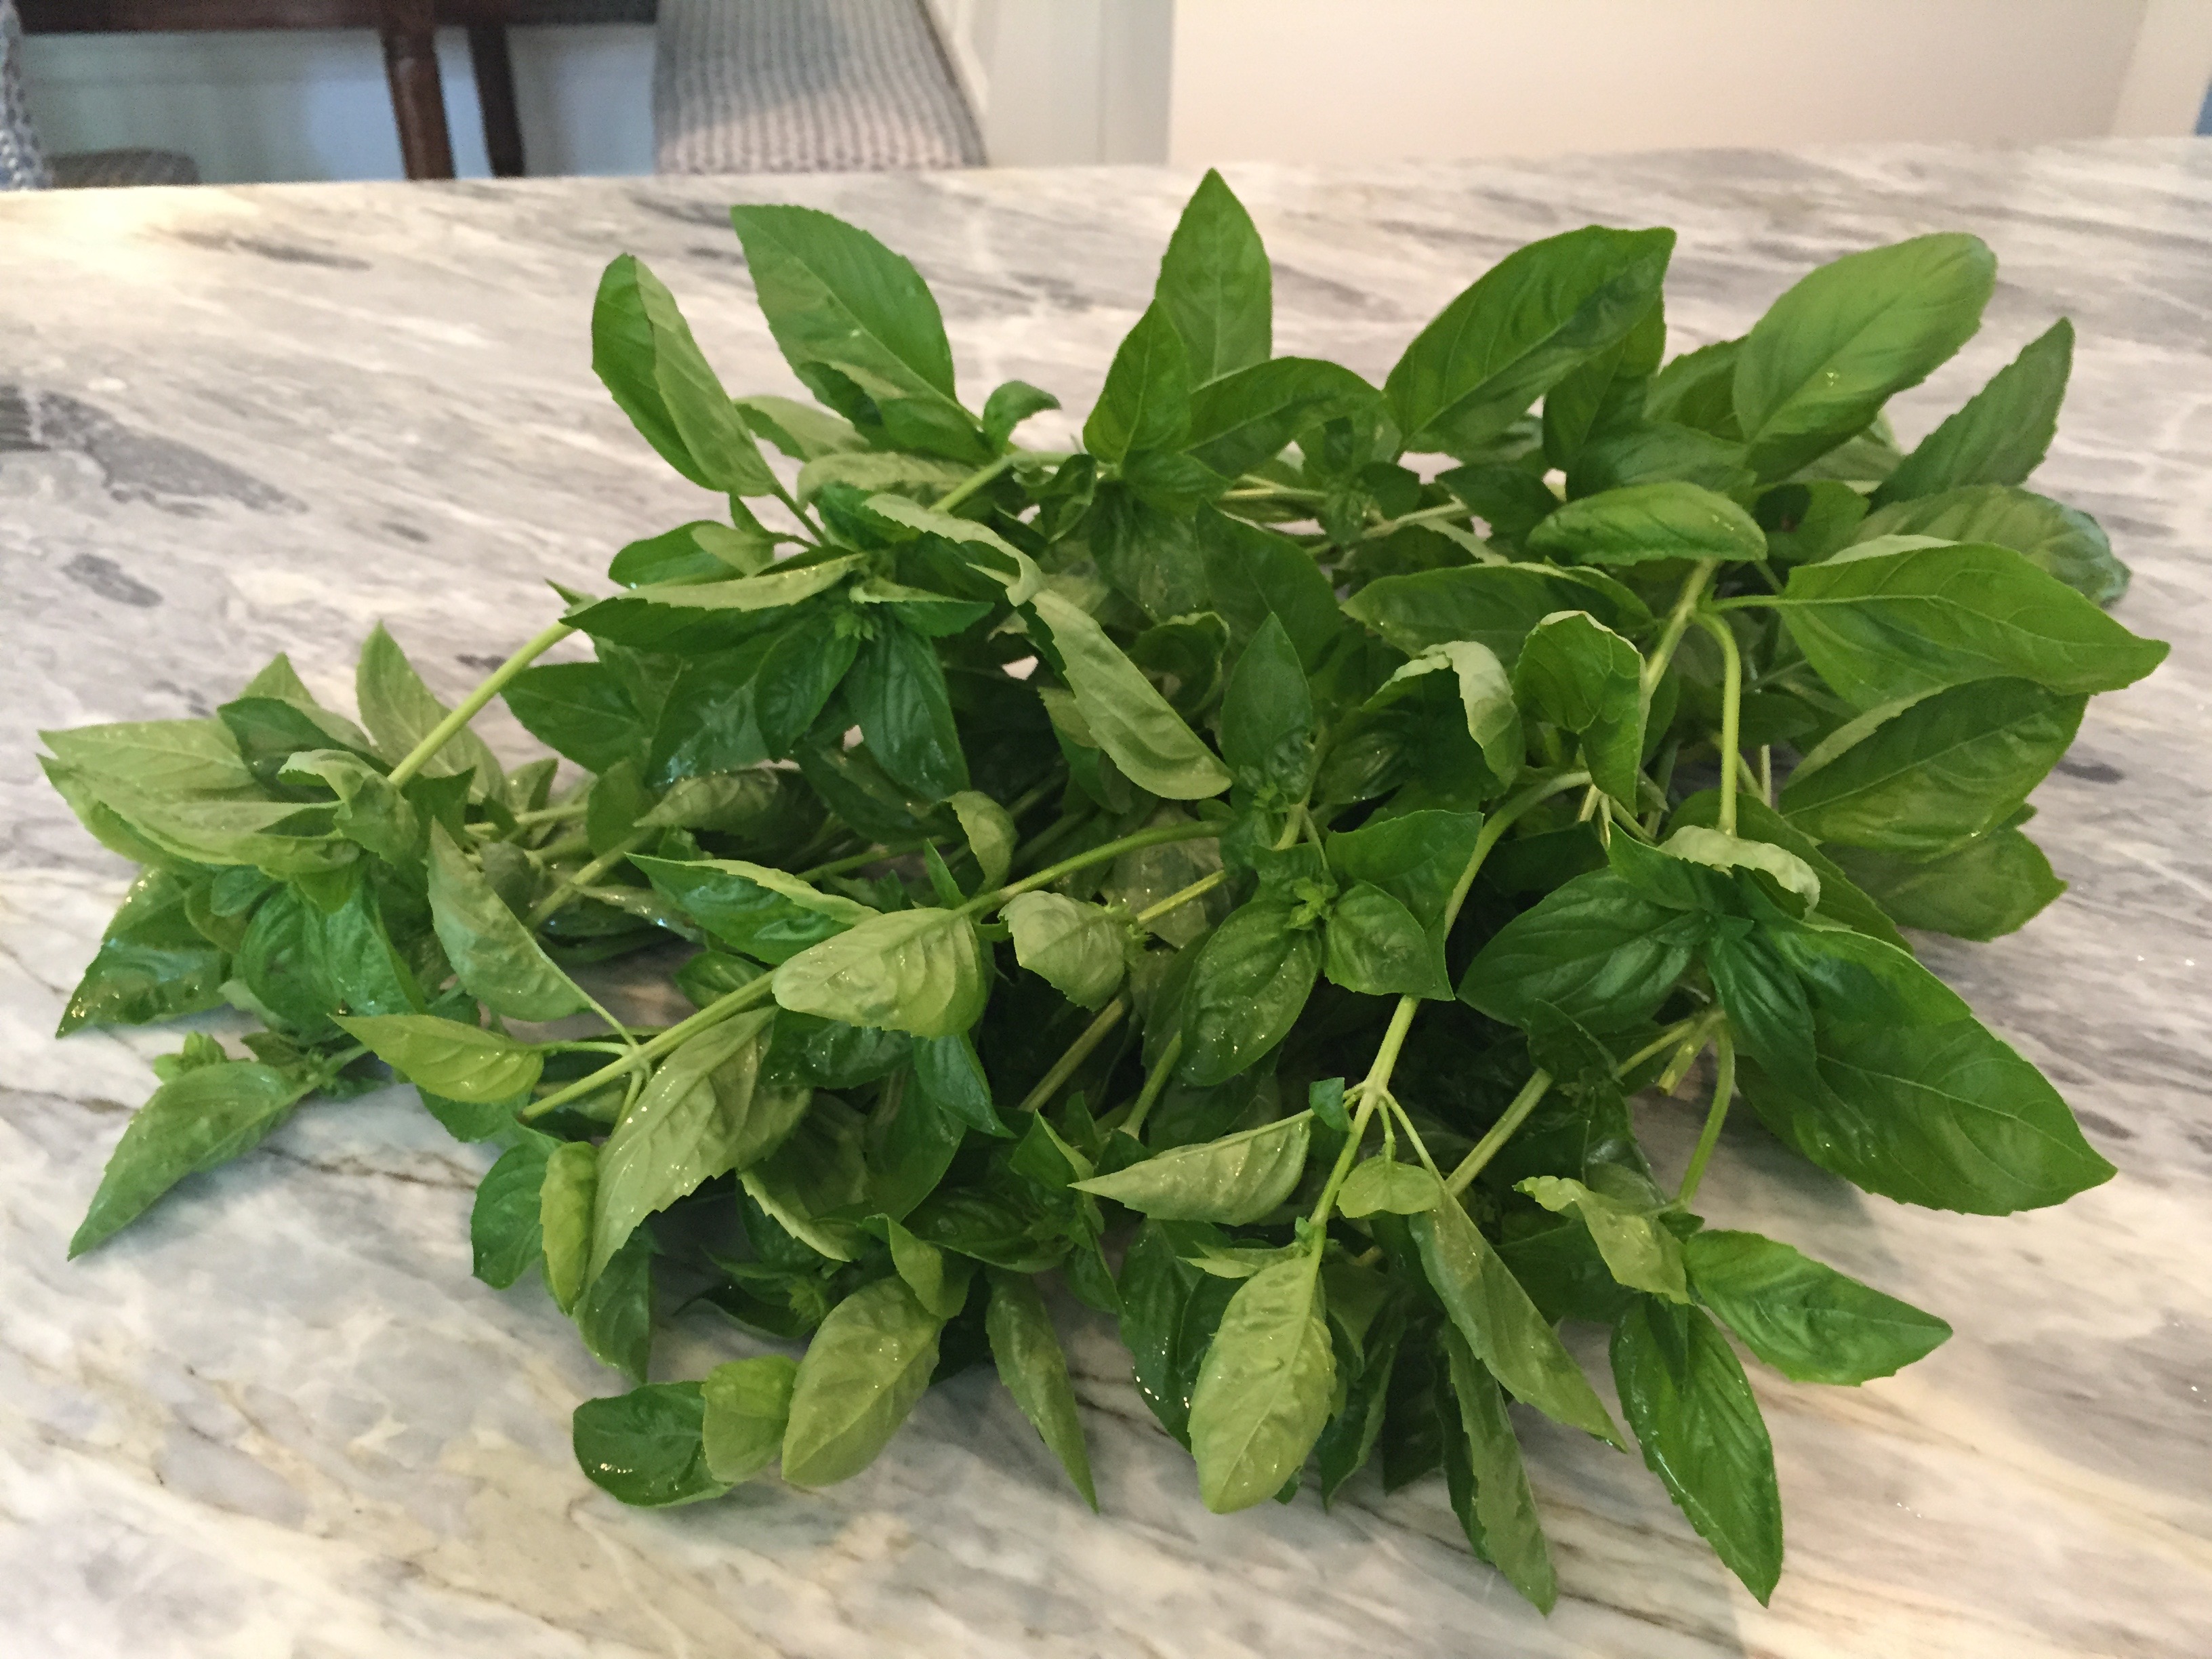
Briefly rinse basil under cold water and pat dry.
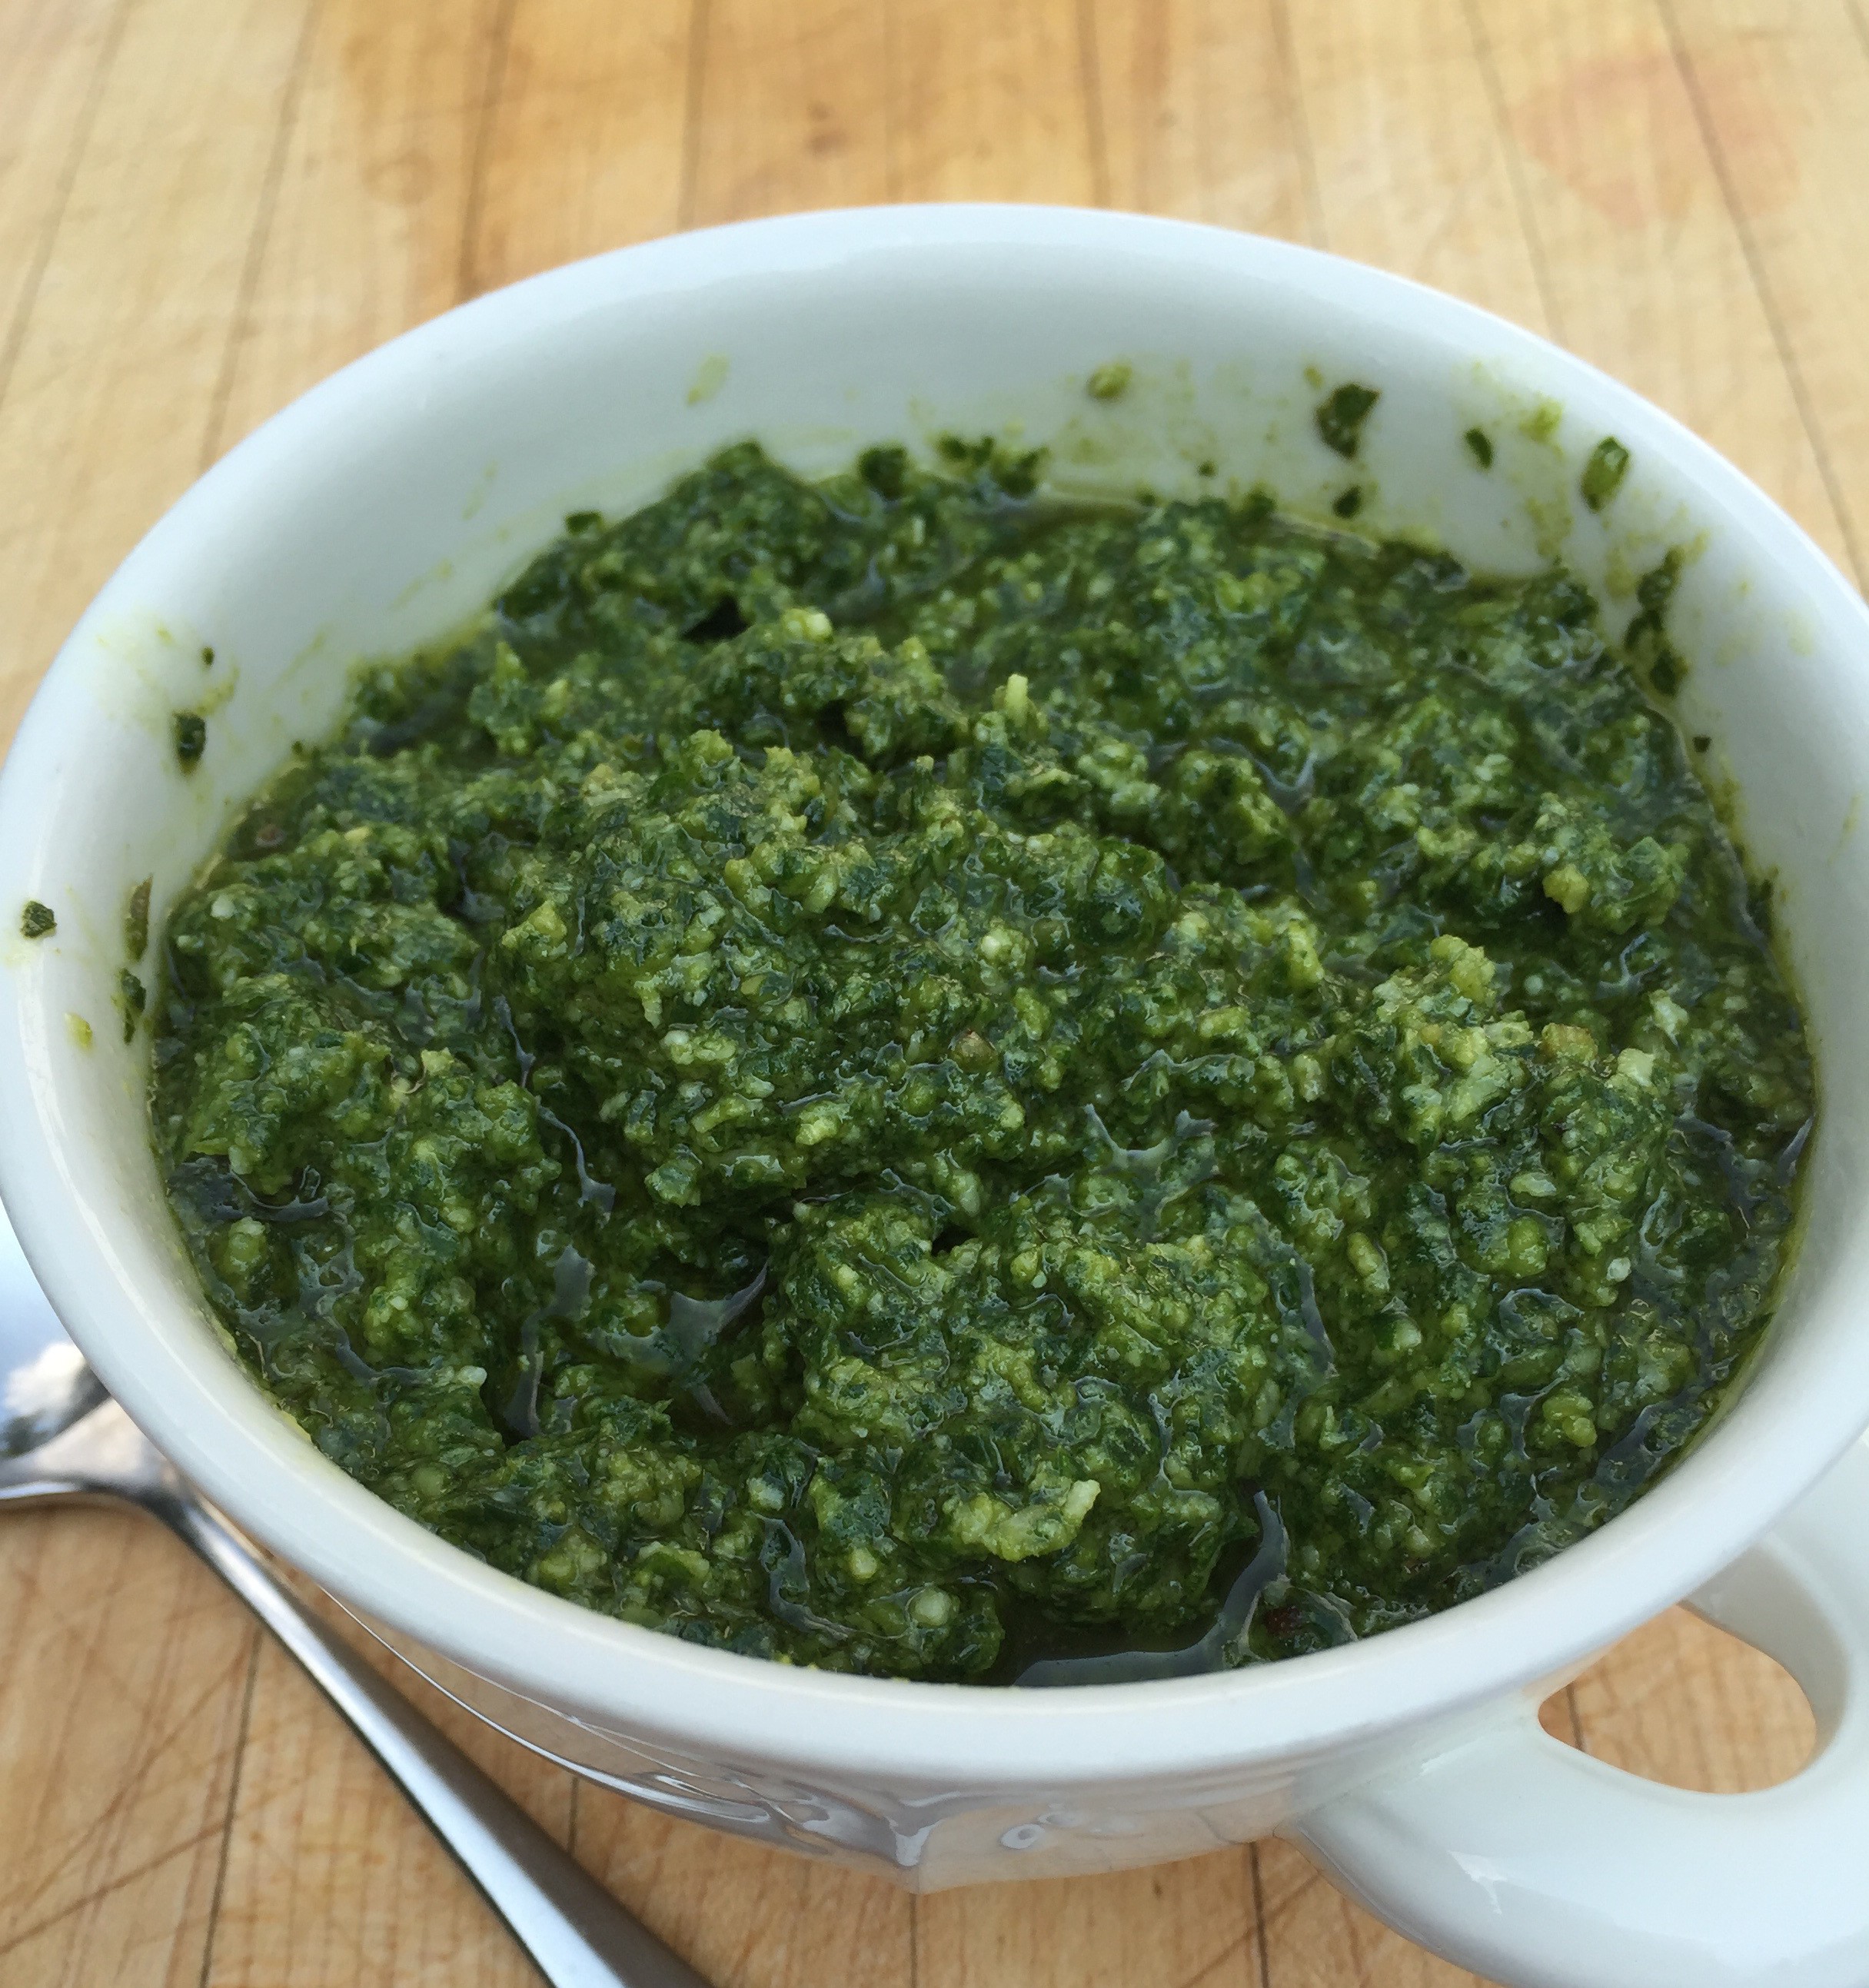
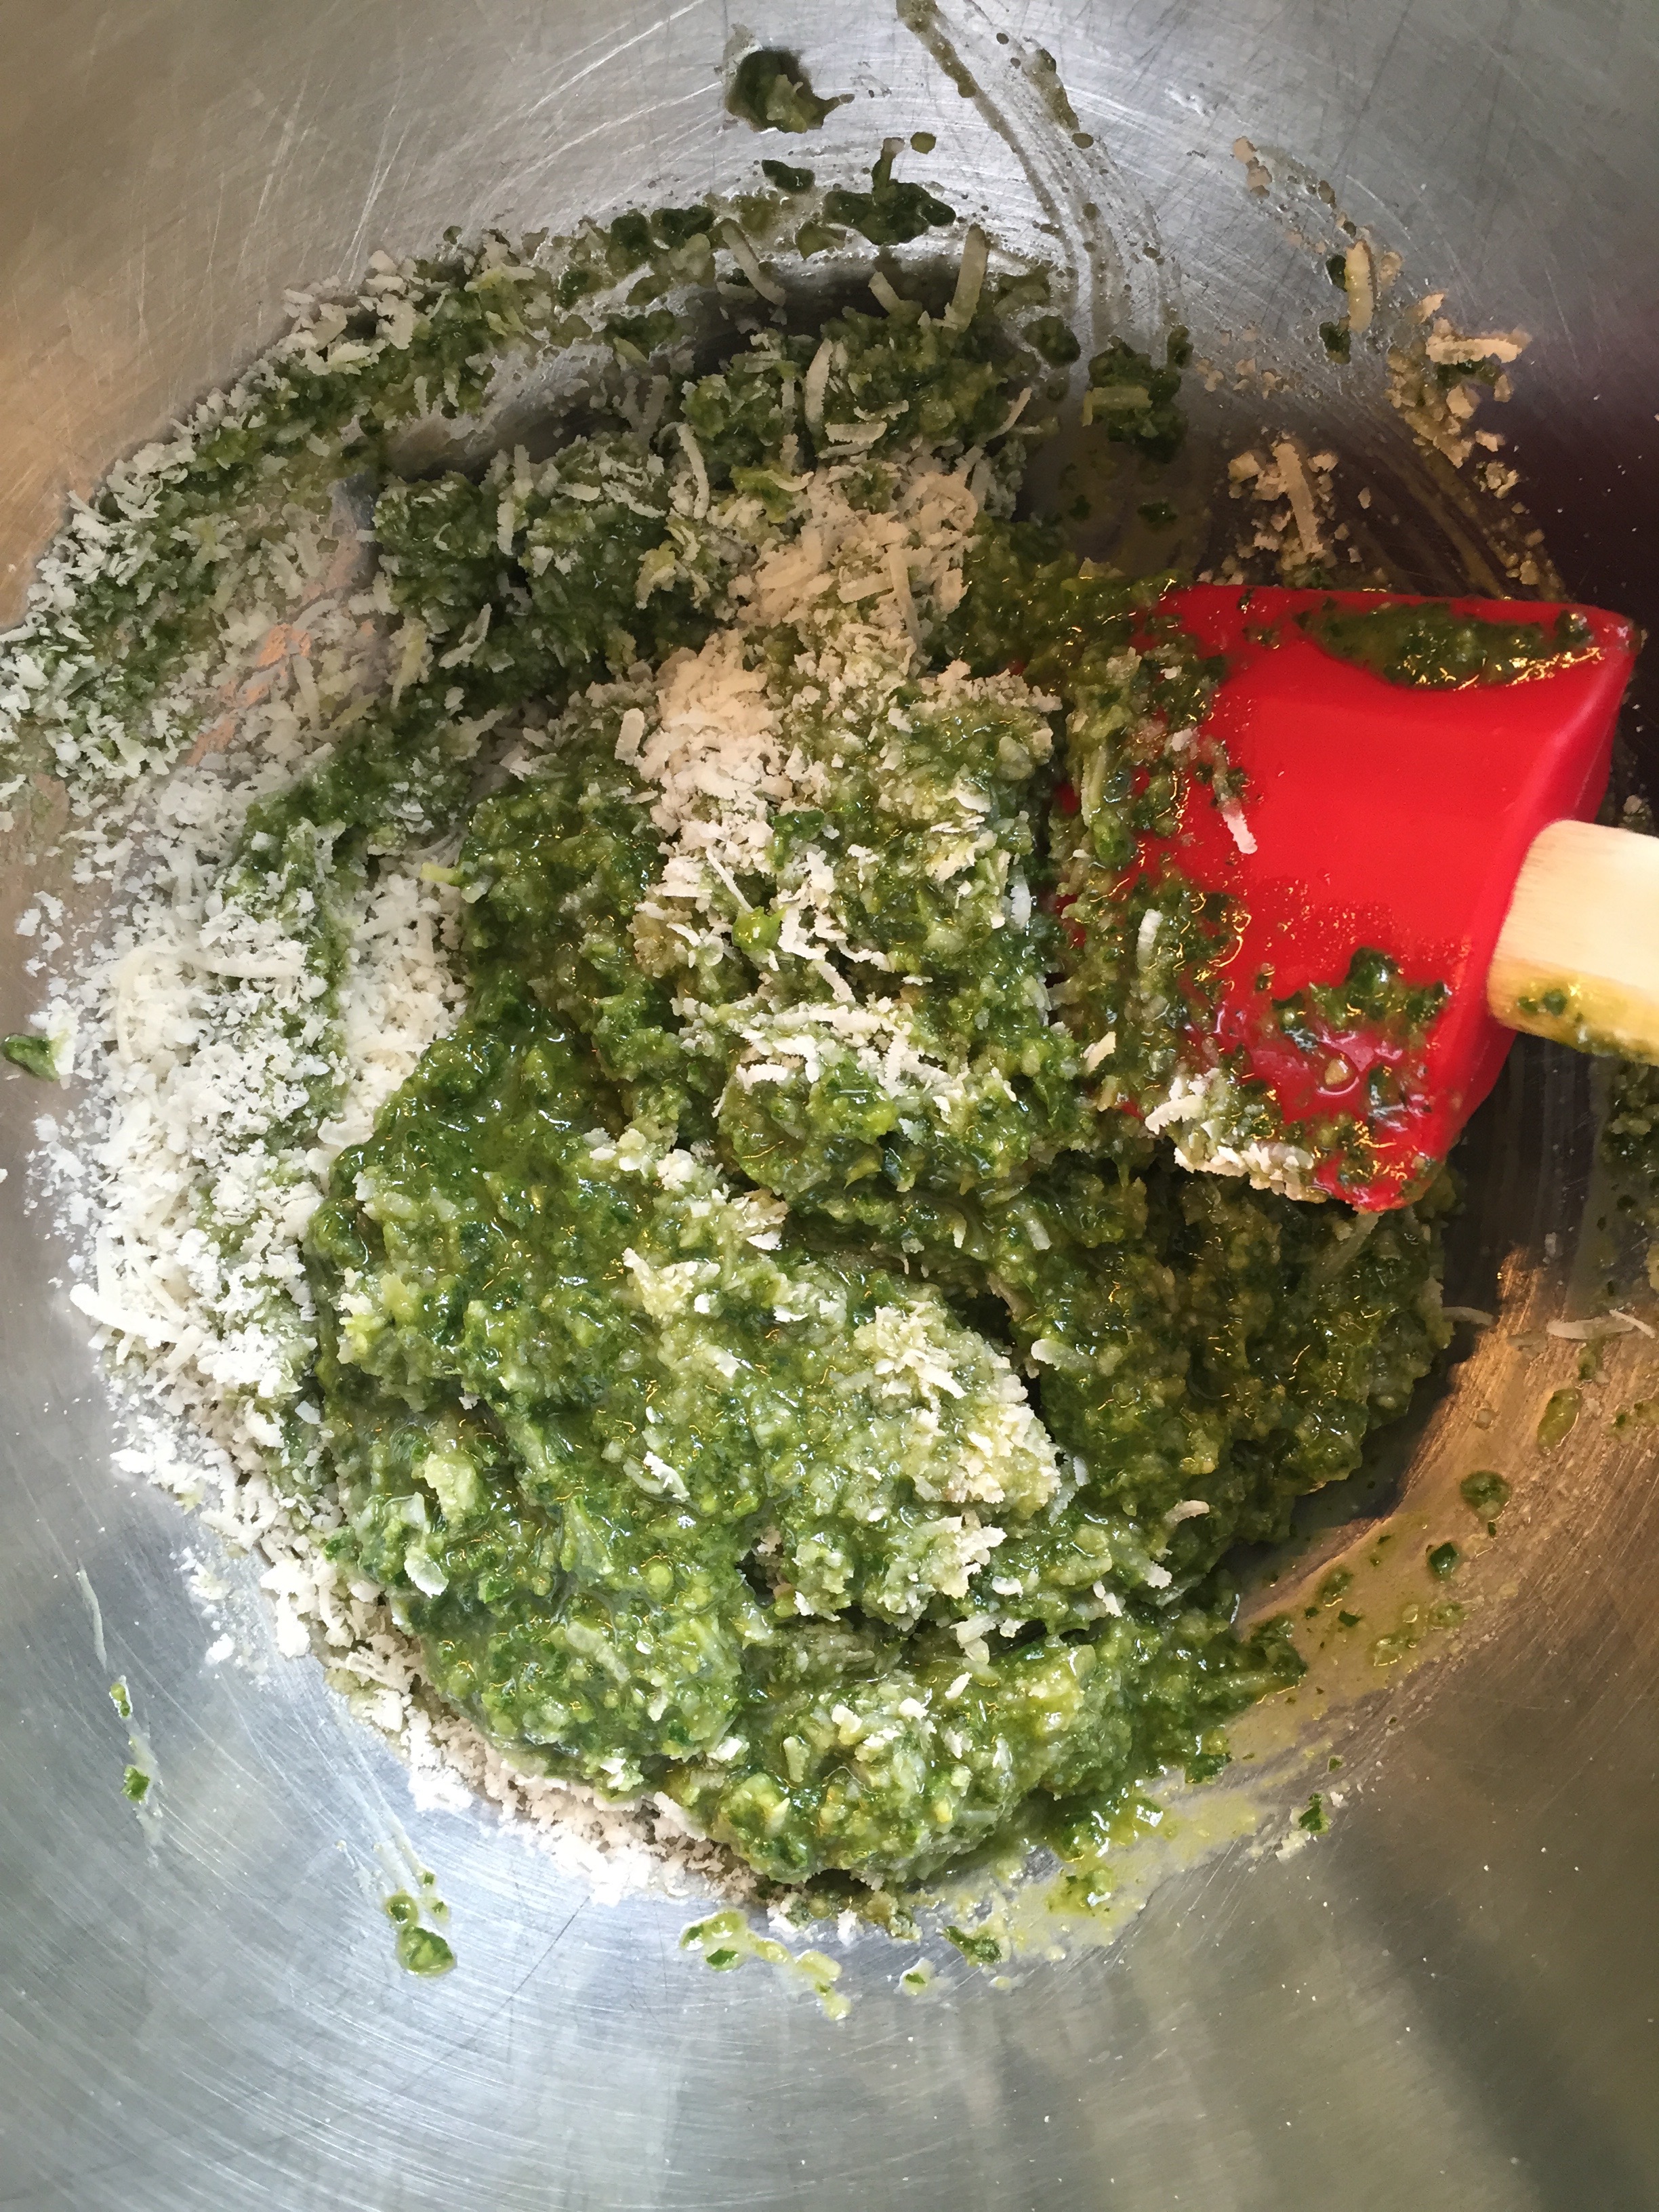
Place basil, olive oil, pine nuts, chopped garlic, and a pinch of salt into the bowl of a food processor. Process to a uniform creamy consistency.
Transfer to a bowl, and mix in the two grated cheeses by hand.
The pesto can be frozen in pre-portioned amounts to be pulled from the freezer whenever you want a taste of summer.
Place the basil, extra virgin olive oil, pine nuts, garlic, and salt into a food processor and blend.Blend the basil, extra virgin olive oil, pine nuts, garlic, and salt to a creamy consistency.Transfer the basil mixture to a bowl. Add the parmesan and romano cheeses.Mix the parmesan and romano cheeses by hand.The parmesan and romano cheeses have been thoroughly incorporated.Using a mini muffin tin, small portions of pesto are ready for the freezer. After freezing, transfer them to a container for long term freezer storage.Wax paper separates layers of frozen pesto “muffins” for long term storage in the freezer.
This summer, we had a phenomenal family trip to London and Ireland.
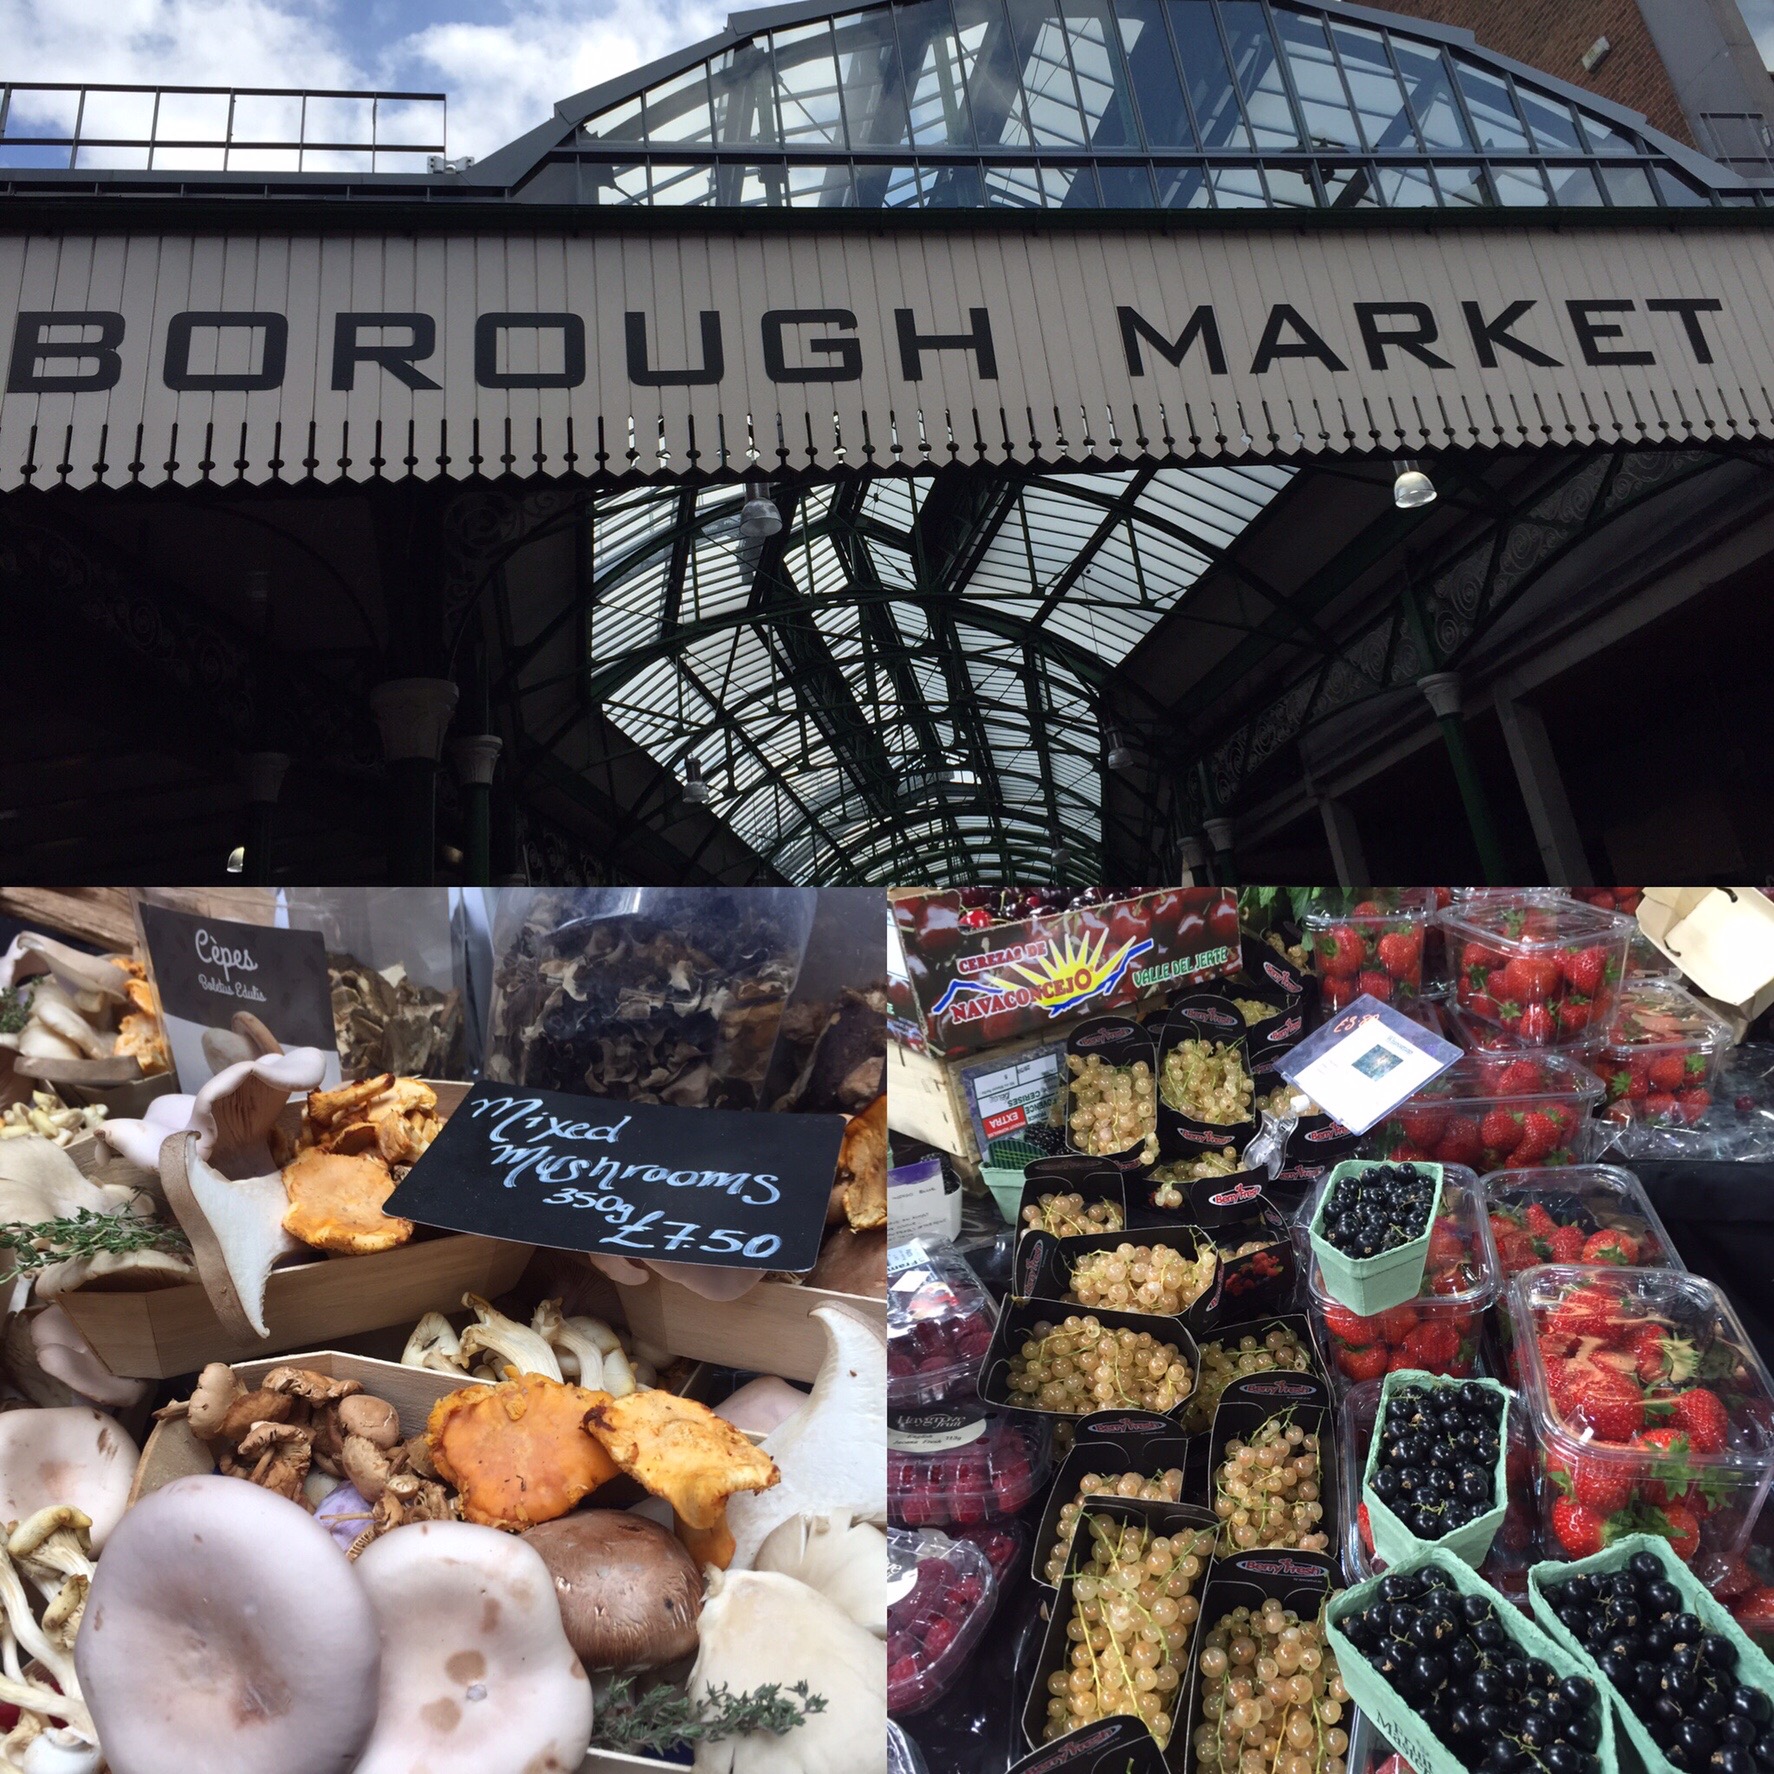
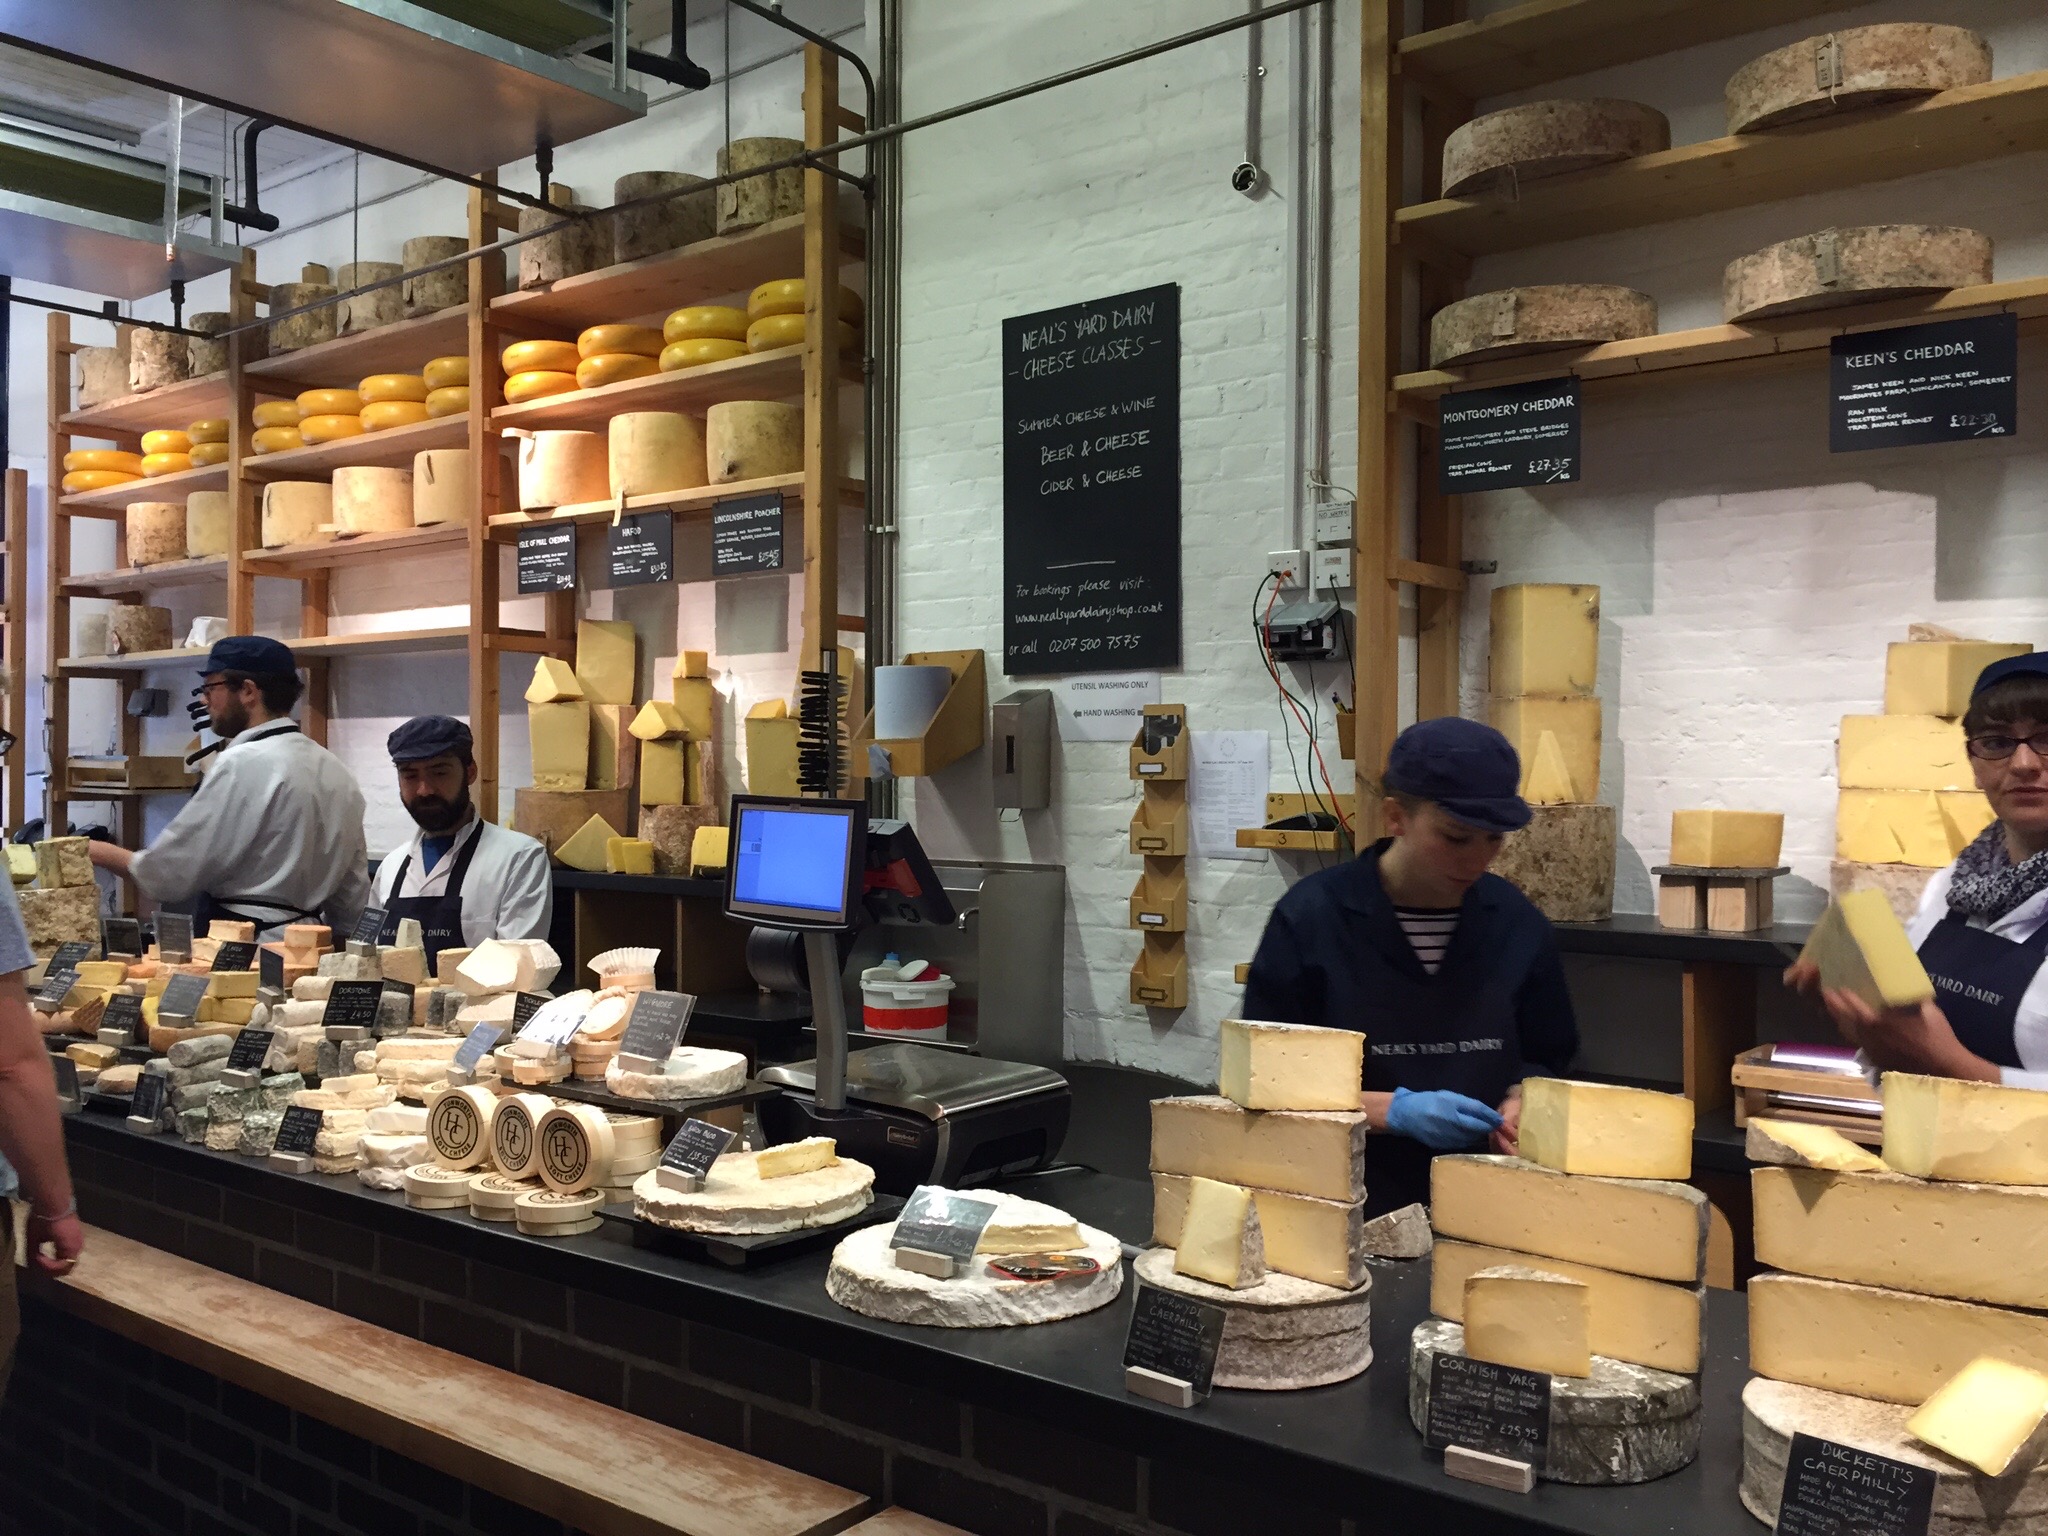
While we explored the British Museum, Hyde Park, the Churchill War Rooms and the Tower of London, observed the Changing of the Horse Guard and took a spin on the London Eye, my thoughts were never too far from food. In fact, we kicked our trip off with a tour of Borough Market (I highly recommend Context Travel).
Tasting our way down the counter…
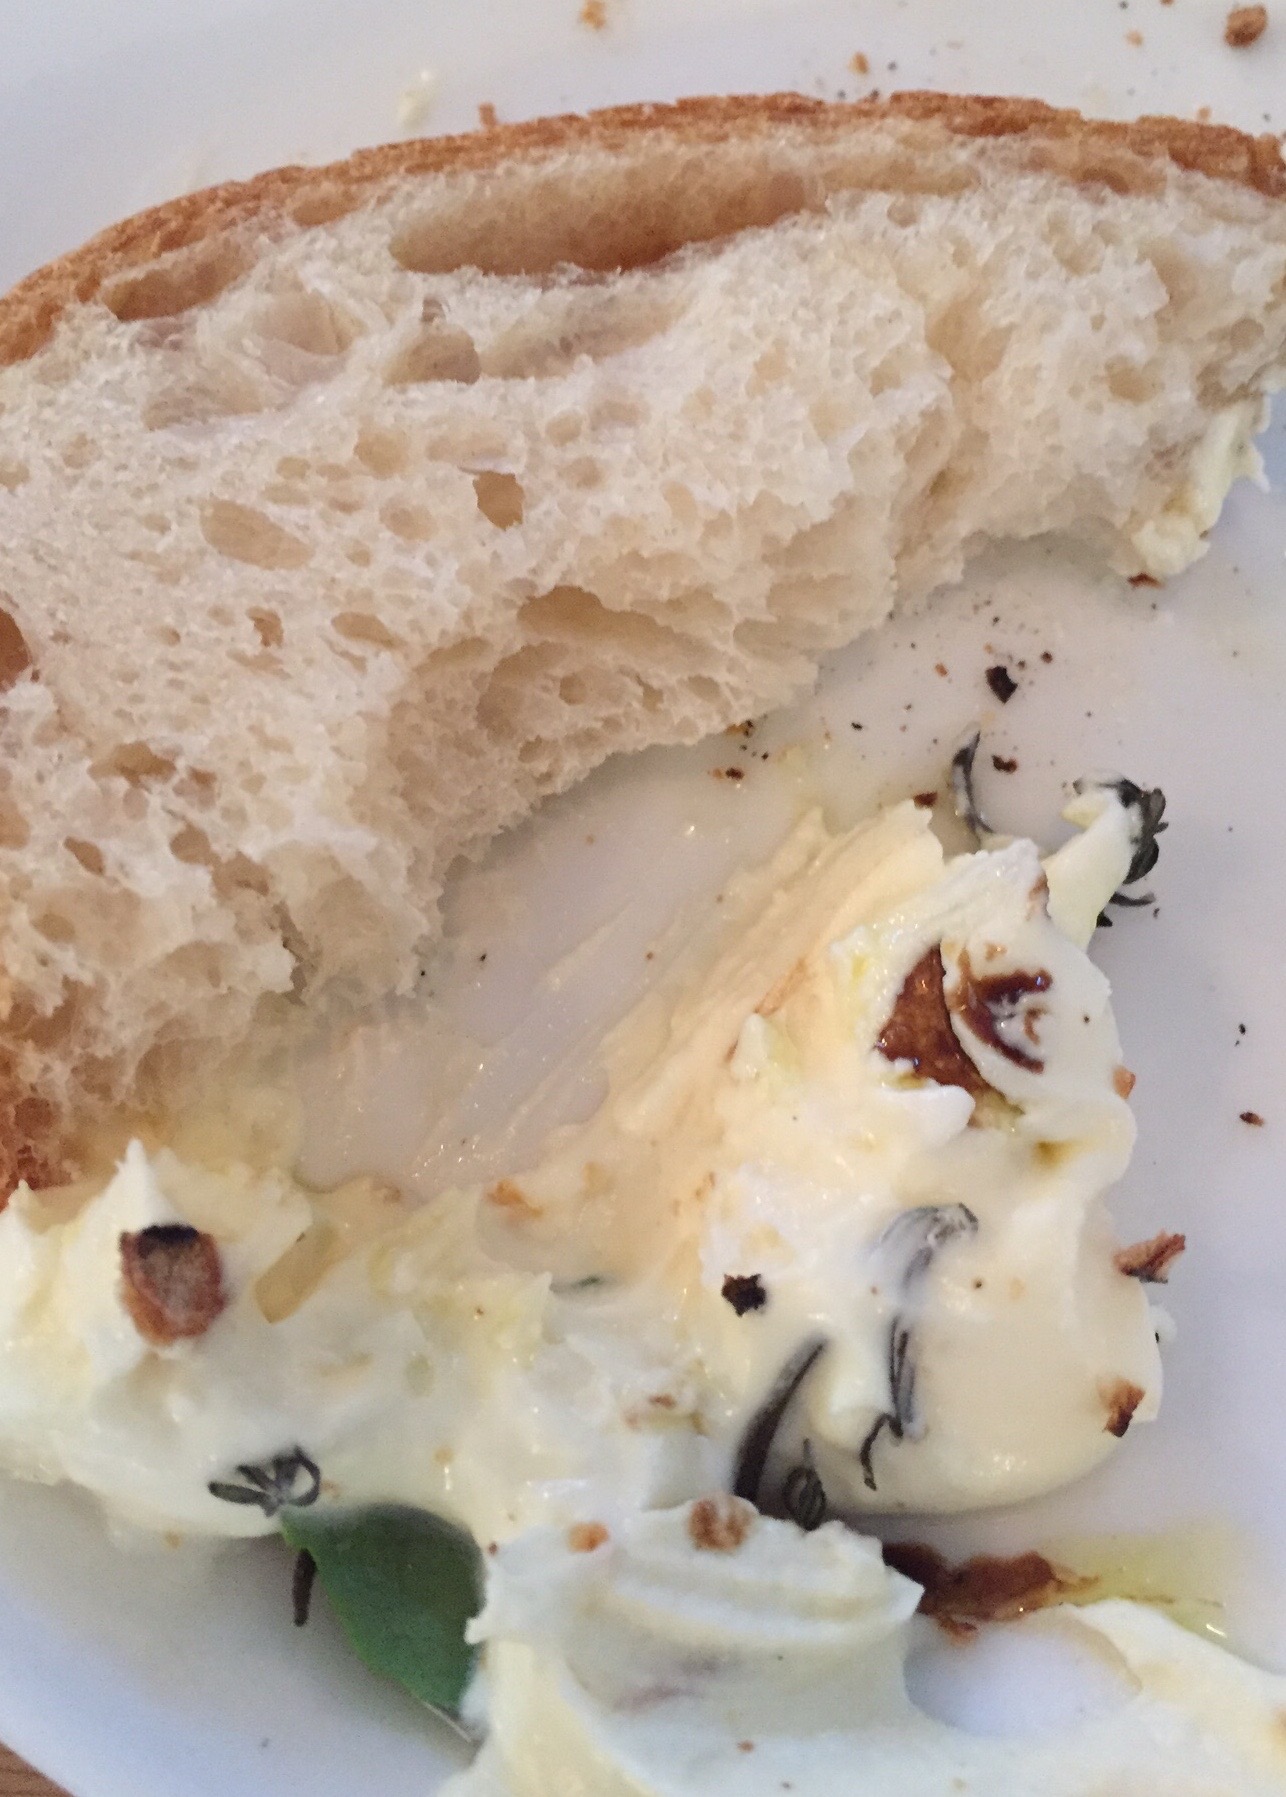
Celebrating and tasting your way through artisanal British and Irish cheeses at Neal’s Yard Dairy is a wonderful beginning to any day. Meeting and sharing ideas with farmers, spice vendors, and even a tea importer helped us connect to London in a very real way. Continuing the unofficial theme of local foods, we planned our dinners at restaurants that embrace a farm to table philosophy, locally sourcing their products based on seasonal availability. We enjoyed delicious meals at St. John, The Harwood Arms, and Tom’s Kitchen. An absolute standout at Tom’s Kitchen was the “Homemade Ricotta [with] balsamic glaze, dried herbs, grilled sourdough.” Oh. My. Goodness. This ricotta was so incredibly luscious, smooth, and creamy- yet light and airy, that only the fear of public humiliation kept me from stealing the entire dish, huddling in a remote corner, and licking the bowl clean.
The inspiration- Homemade Ricotta starter from Tom’s Kitchen.
Since our return home, that ricotta has been on my mind. We have a fairly wide selection of ricotta cheese at the grocery store, but it seems unfair to compare them to what I had in London. Even the best that I can get here is good, but not Tom’s Kitchen Homemade Ricotta good. What to do? The kitchen gods spoke. Challenged accepted. I learned to make my own.
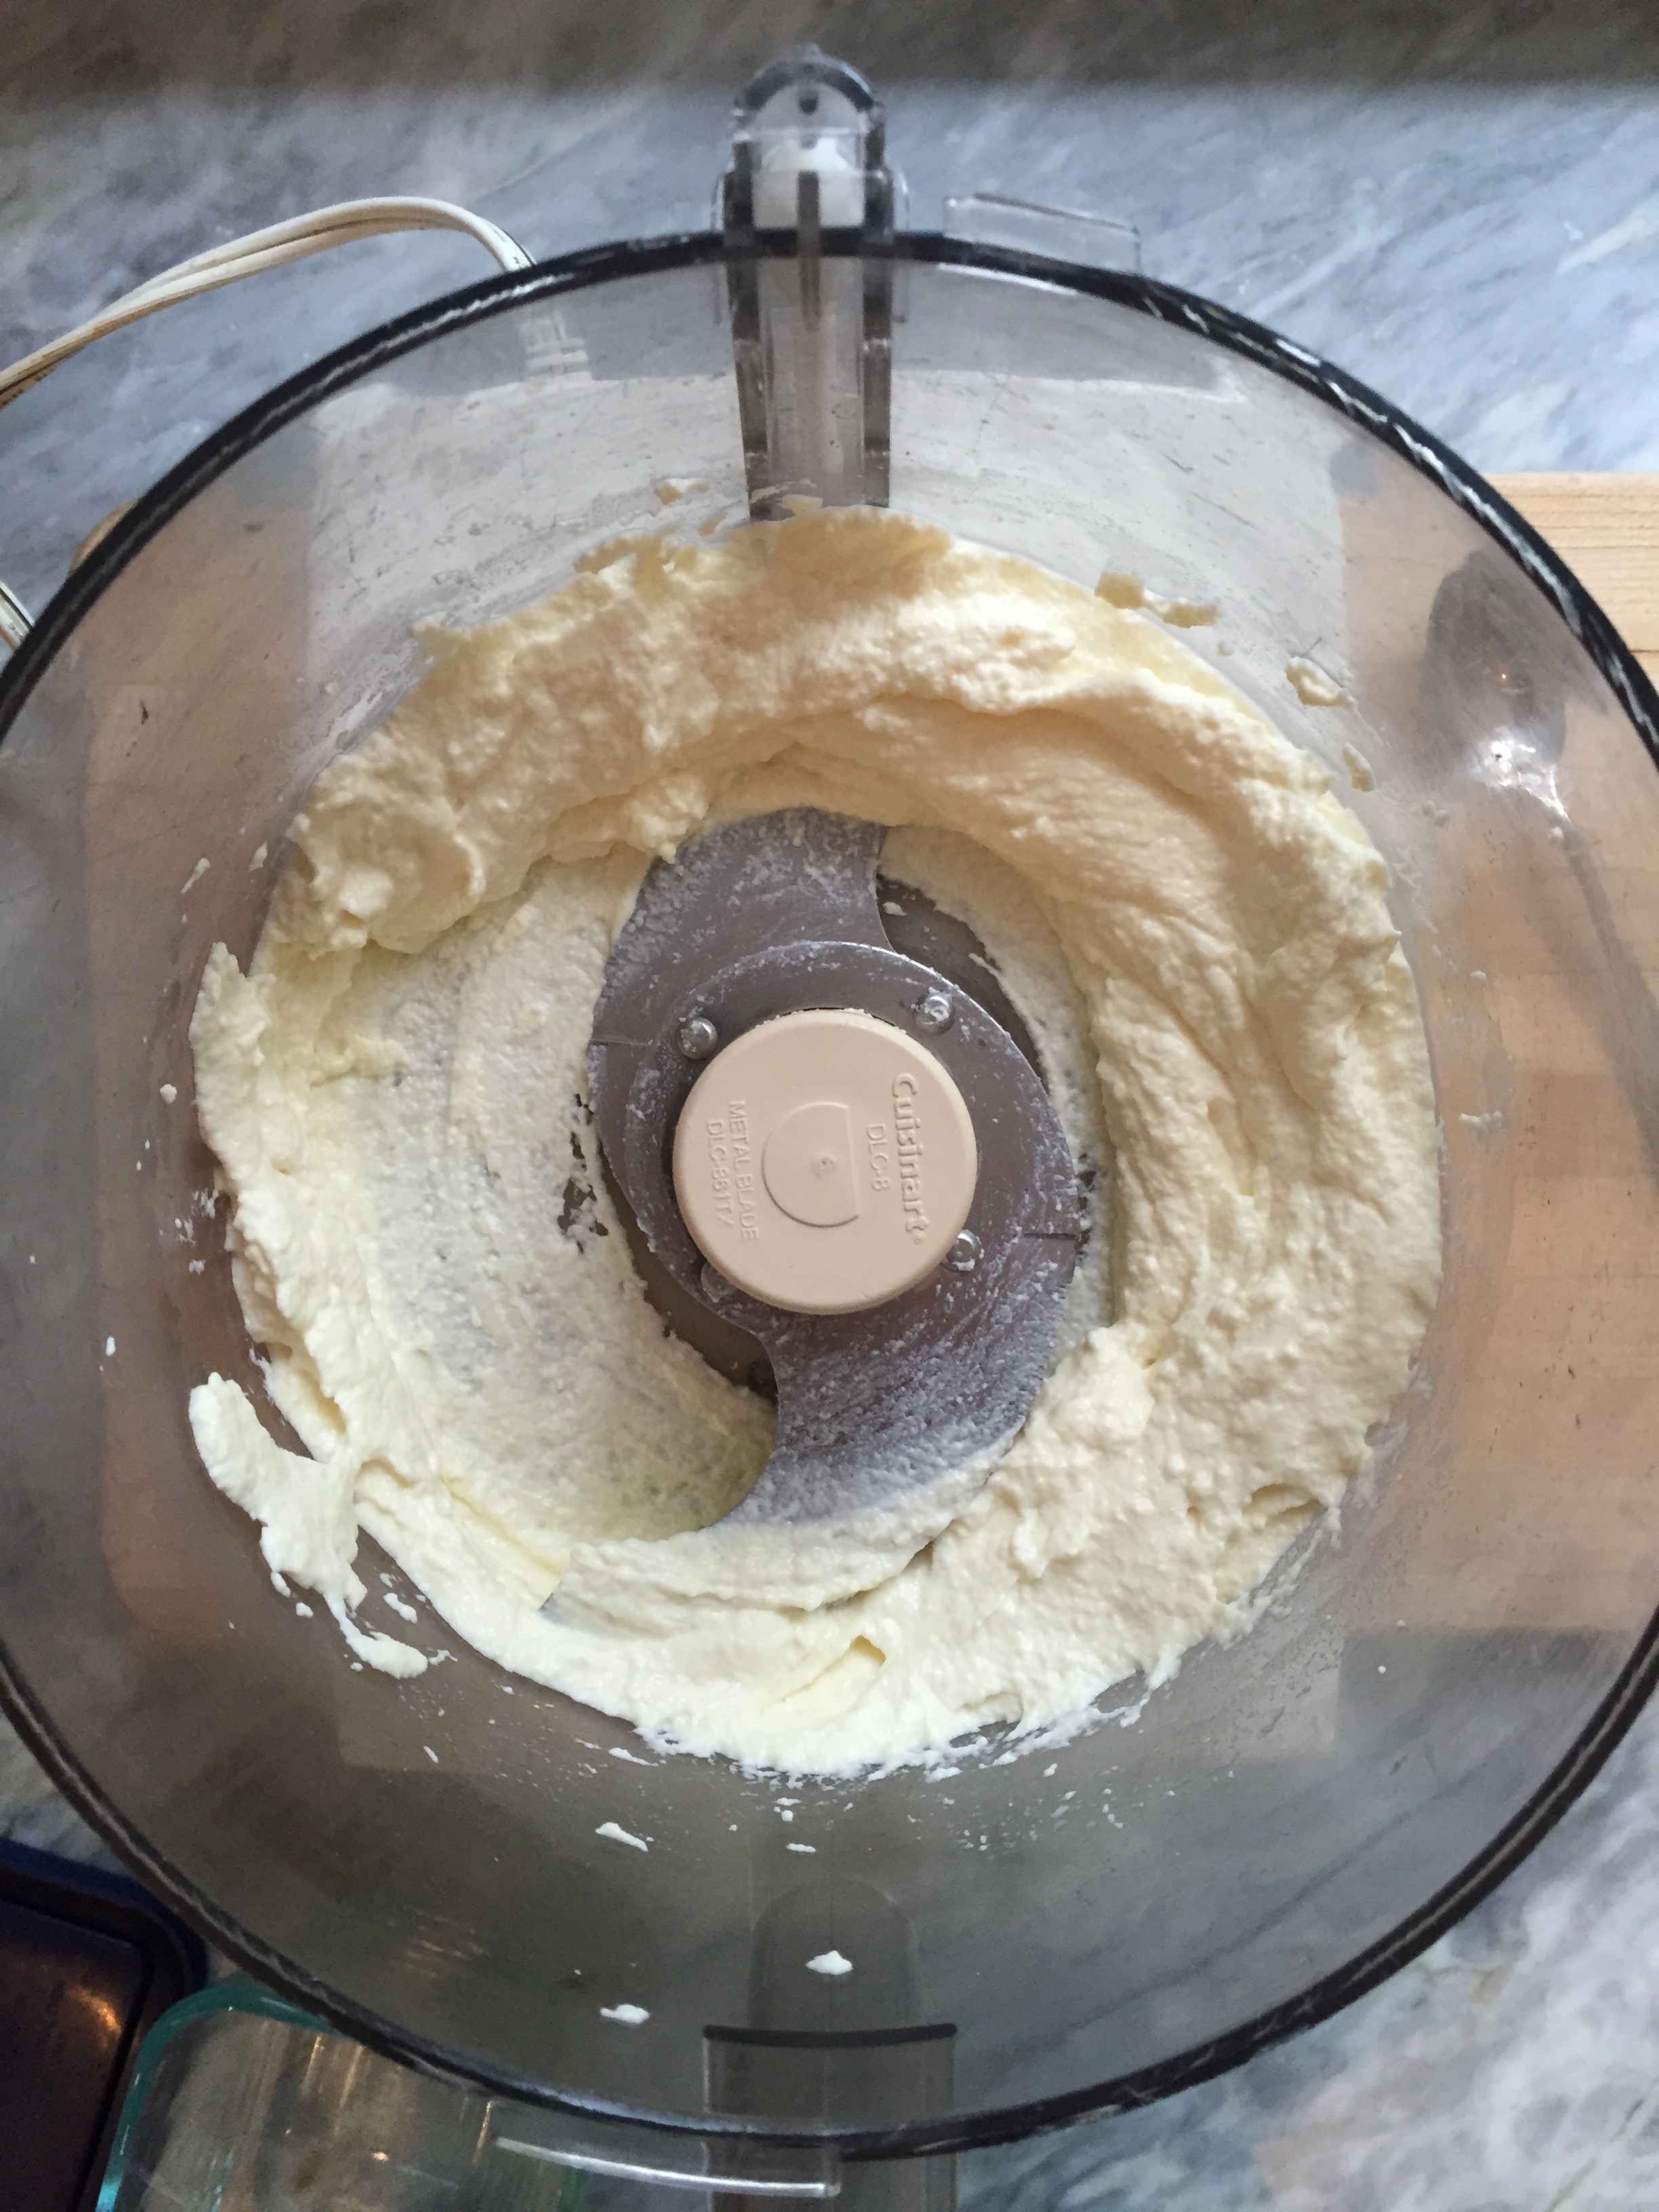
It turns out, homemade ricotta is not hard to make. In 30 minutes you can be sitting down with your own bowl of lusciousness, ready to devour, spoon in hand. Even better, you control the ingredients. No fillers, thickeners, or stabilizers needed, just four simple ingredients- milk, cream, white vinegar and salt. It’s a bit like a science experiment, so if you have kids they are going to love this. But please don’t let “science experiment” intimidate you. My nine year old is now making the ricotta on a weekly basis.
The final texture depends on how long you leave the ricotta to drain. Ten minutes yields warm, soft curds perfect for enjoying by the spoonful; twenty minutes yields still soft but slightly more spreadable ricotta, while thirty minutes or more will leave you with a firmer, drier, ricotta that holds it shape. Between 10-20 minutes of draining is my favorite for spreading on grilled bread- savory with a drizzle of extra virgin olive oil, sprinkle of fresh herbs and a pinch of salt, or sweet with a drizzle of honey and topping of sliced berries. The ricotta that sits longer is perfect to dollop on warm pasta or pizza, either before or after it comes out of the oven.
PS- What about the whey? From 4 cups of milk/cream you will have about 1 cup of ricotta and 3 cups of whey. That is a lot of whey. Before you toss it down the drain you could…
• Replace the water with whey in pizza or bread dough recipes
• Add the whey to soups and stews
• Feed it to your chickens, pigs, etc.
Ingredients:
3 ½ cups whole milk (NOT Ultra High–Temperature (UHT) pasteurized)
½ cup heavy cream
¼ cup white vinegar
½ teaspoon salt
Instructions:
Line a sieve with cheesecloth and place in a bowl. Set aside.
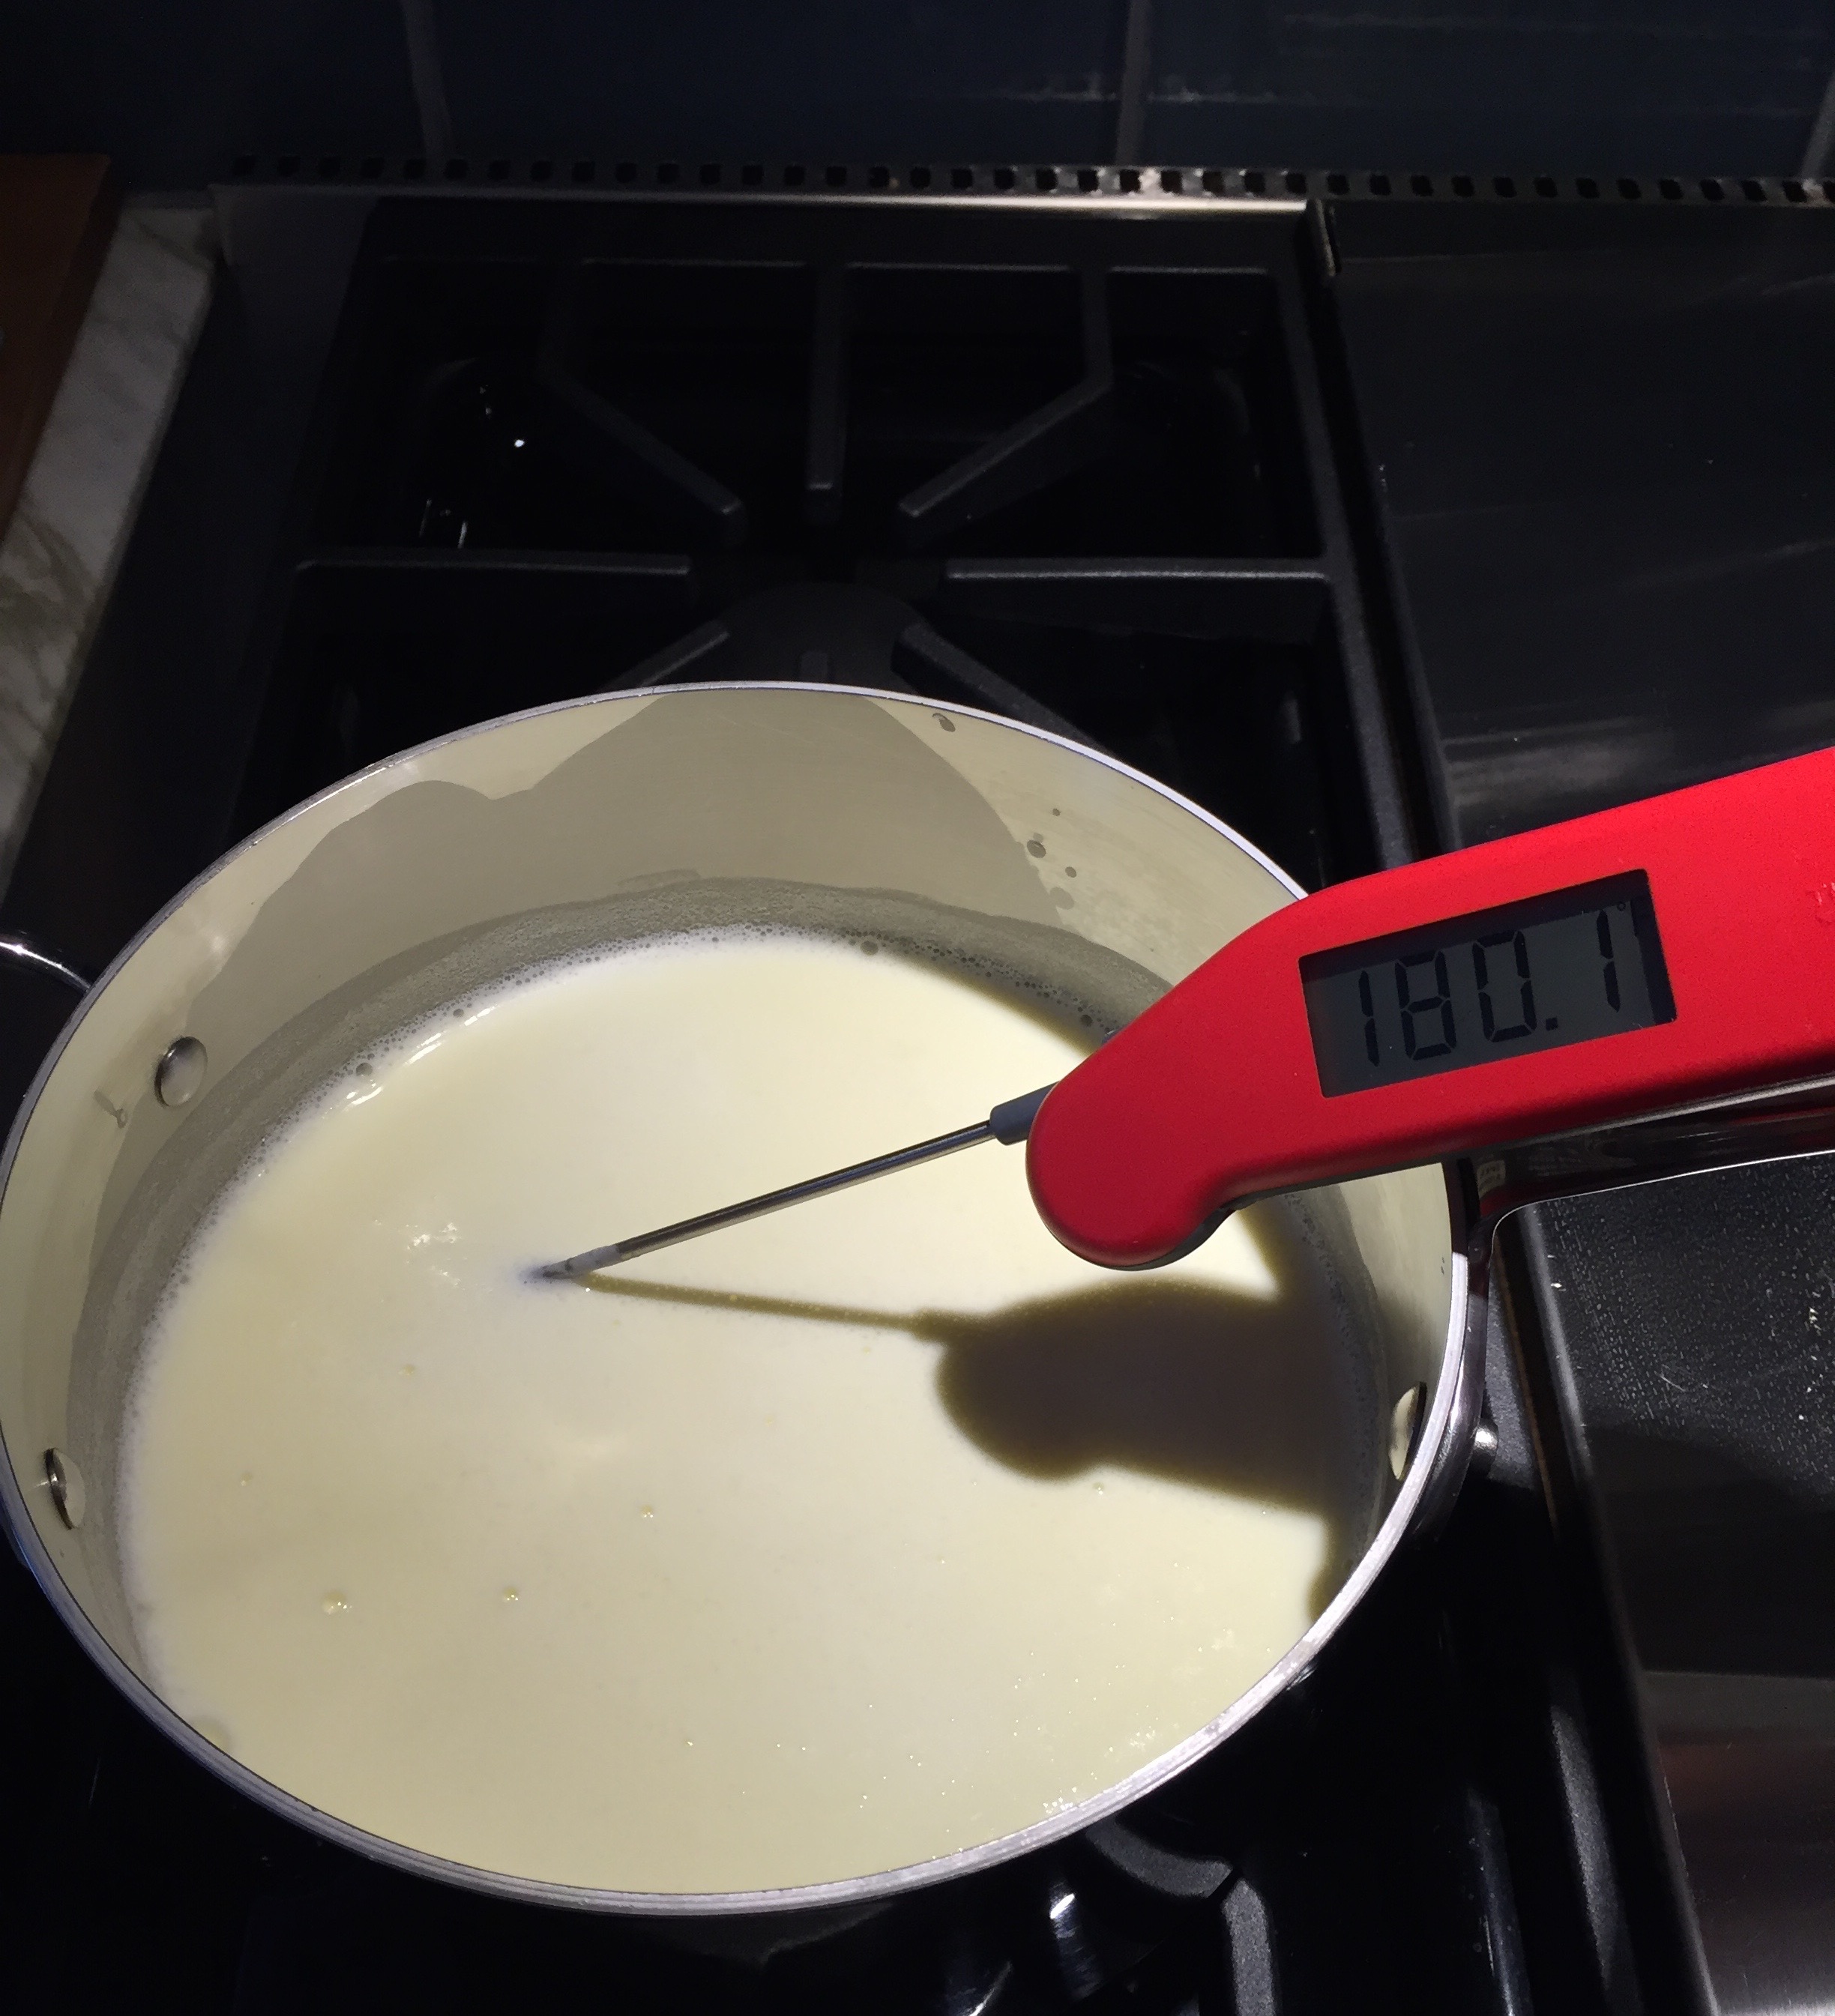
Combine milk and heavy cream in a saucepan. Gently warm the milk mixture over medium heat until it reaches 180°. Remove from heat.
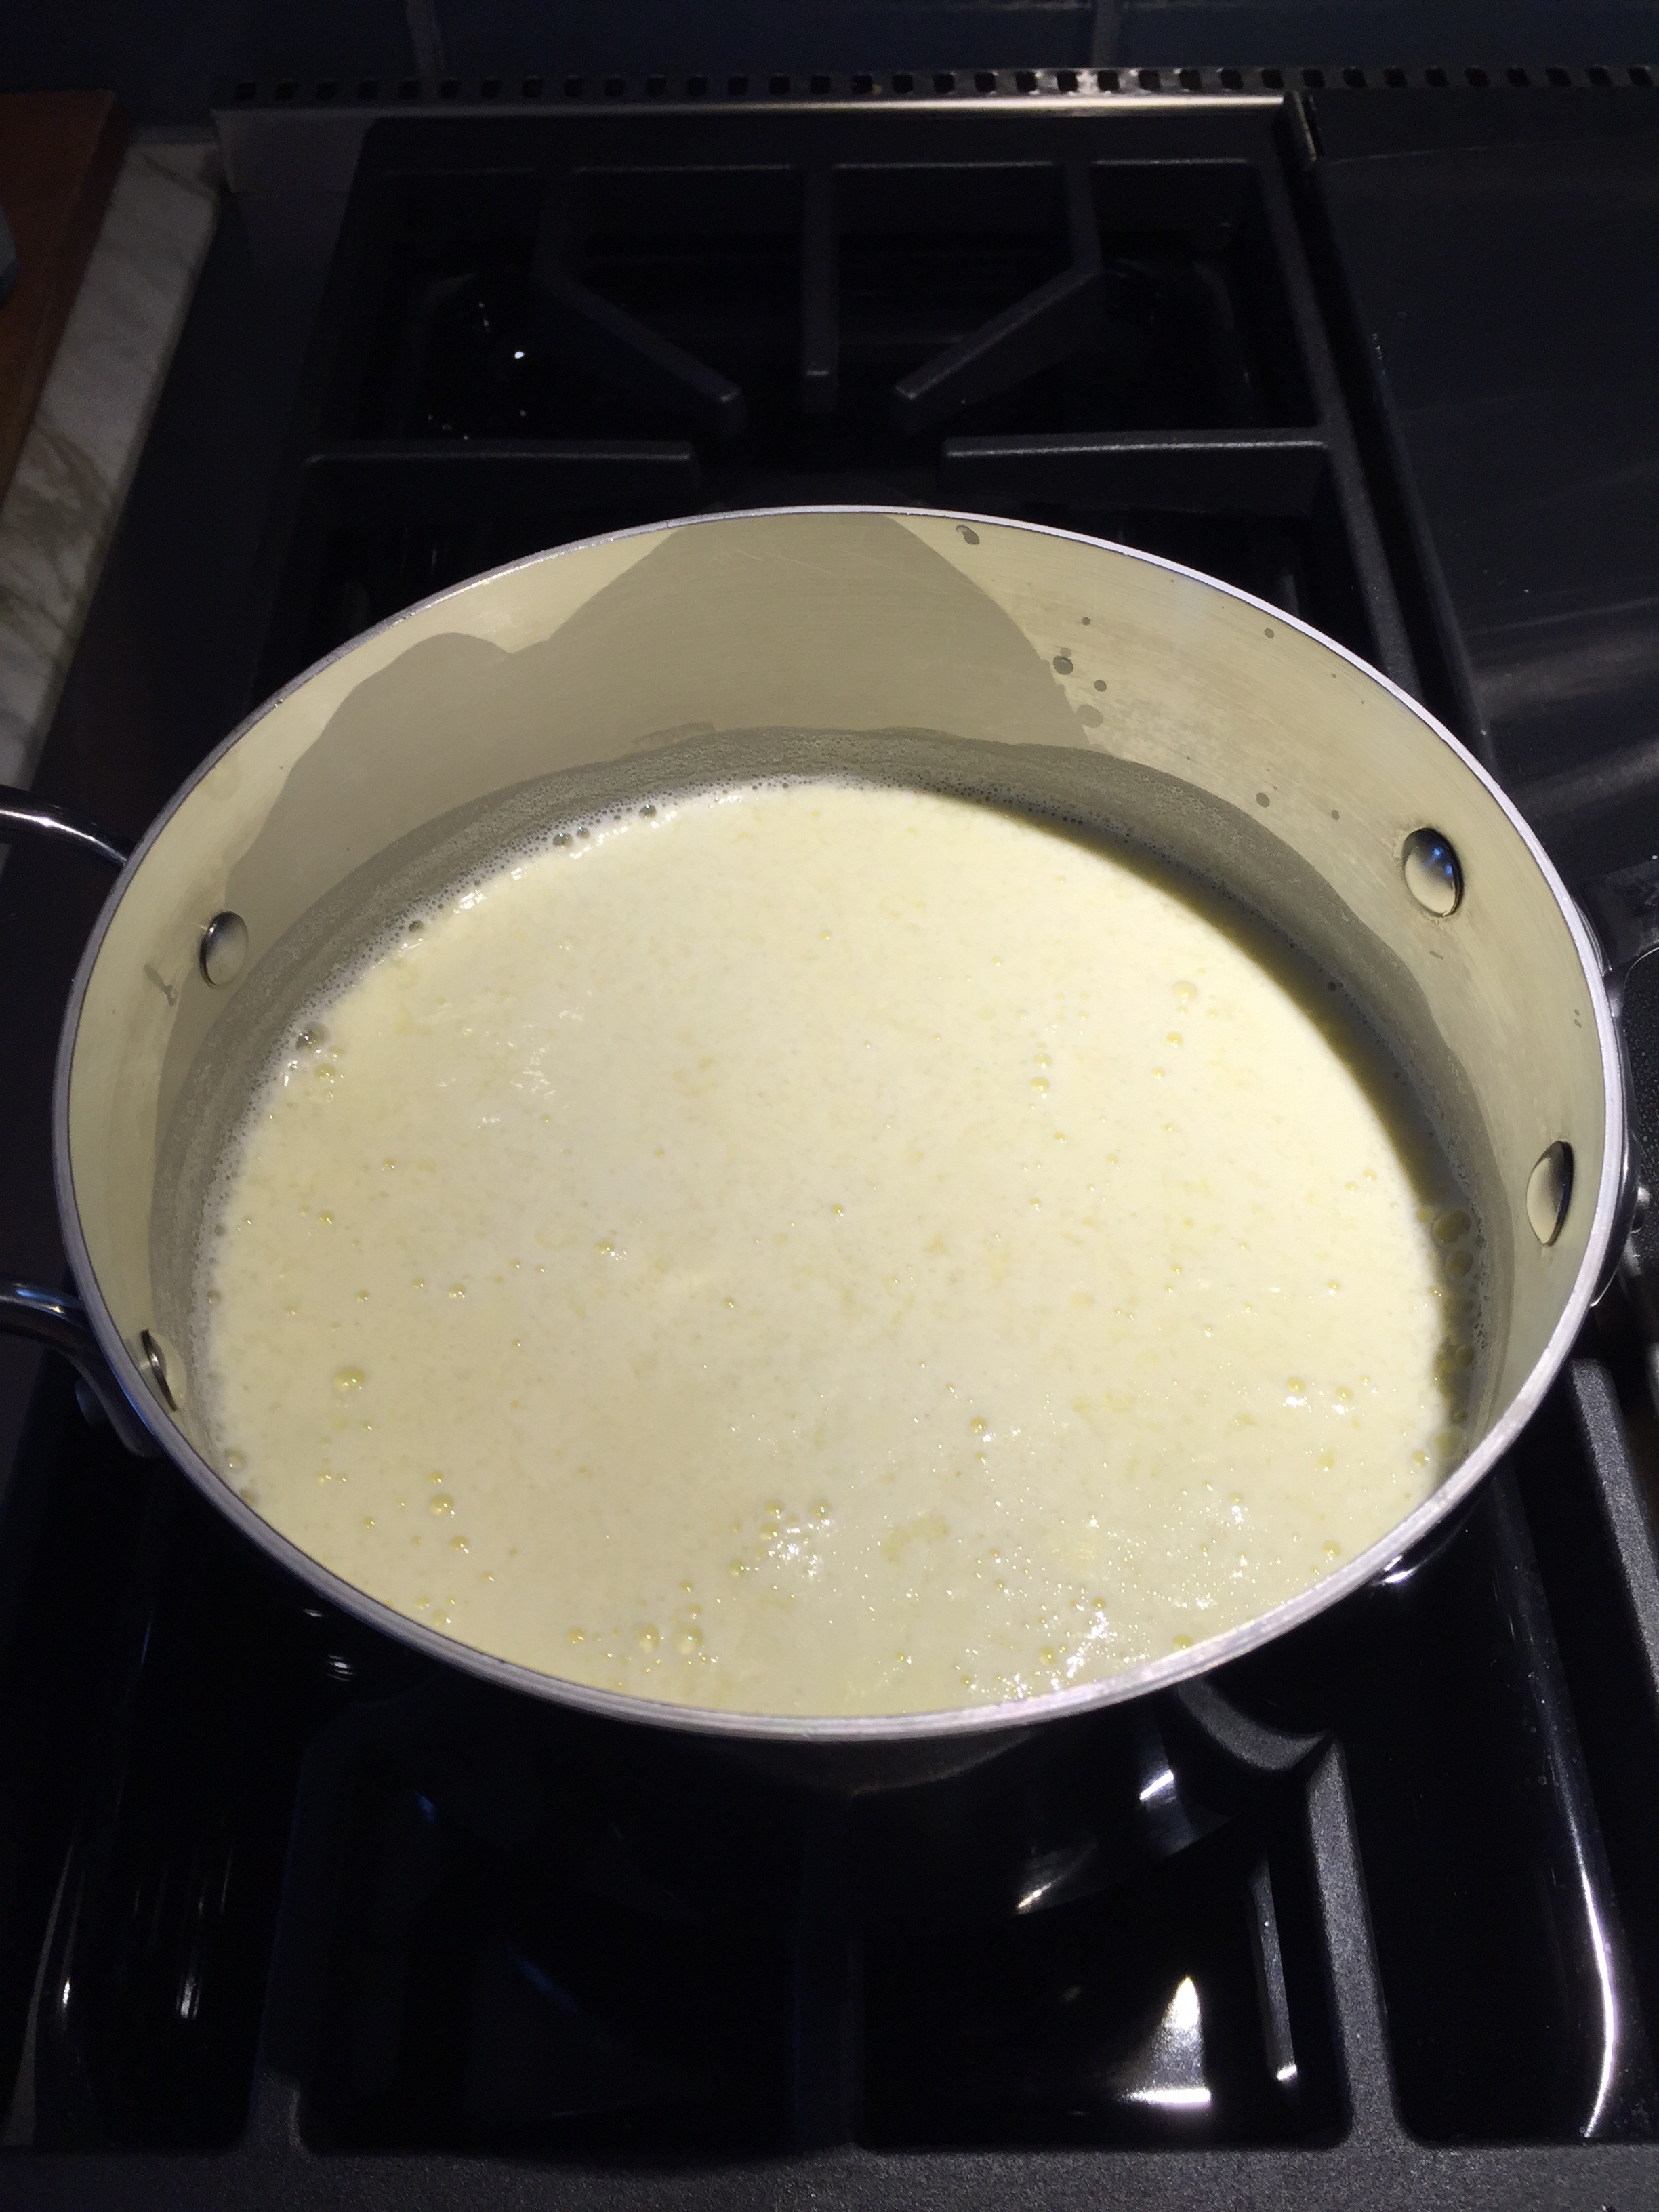
Add the white vinegar and salt, stirring gently once or twice to distribute evenly. Leave the milk mixture undisturbed for 10 minutes while the curds and whey form.
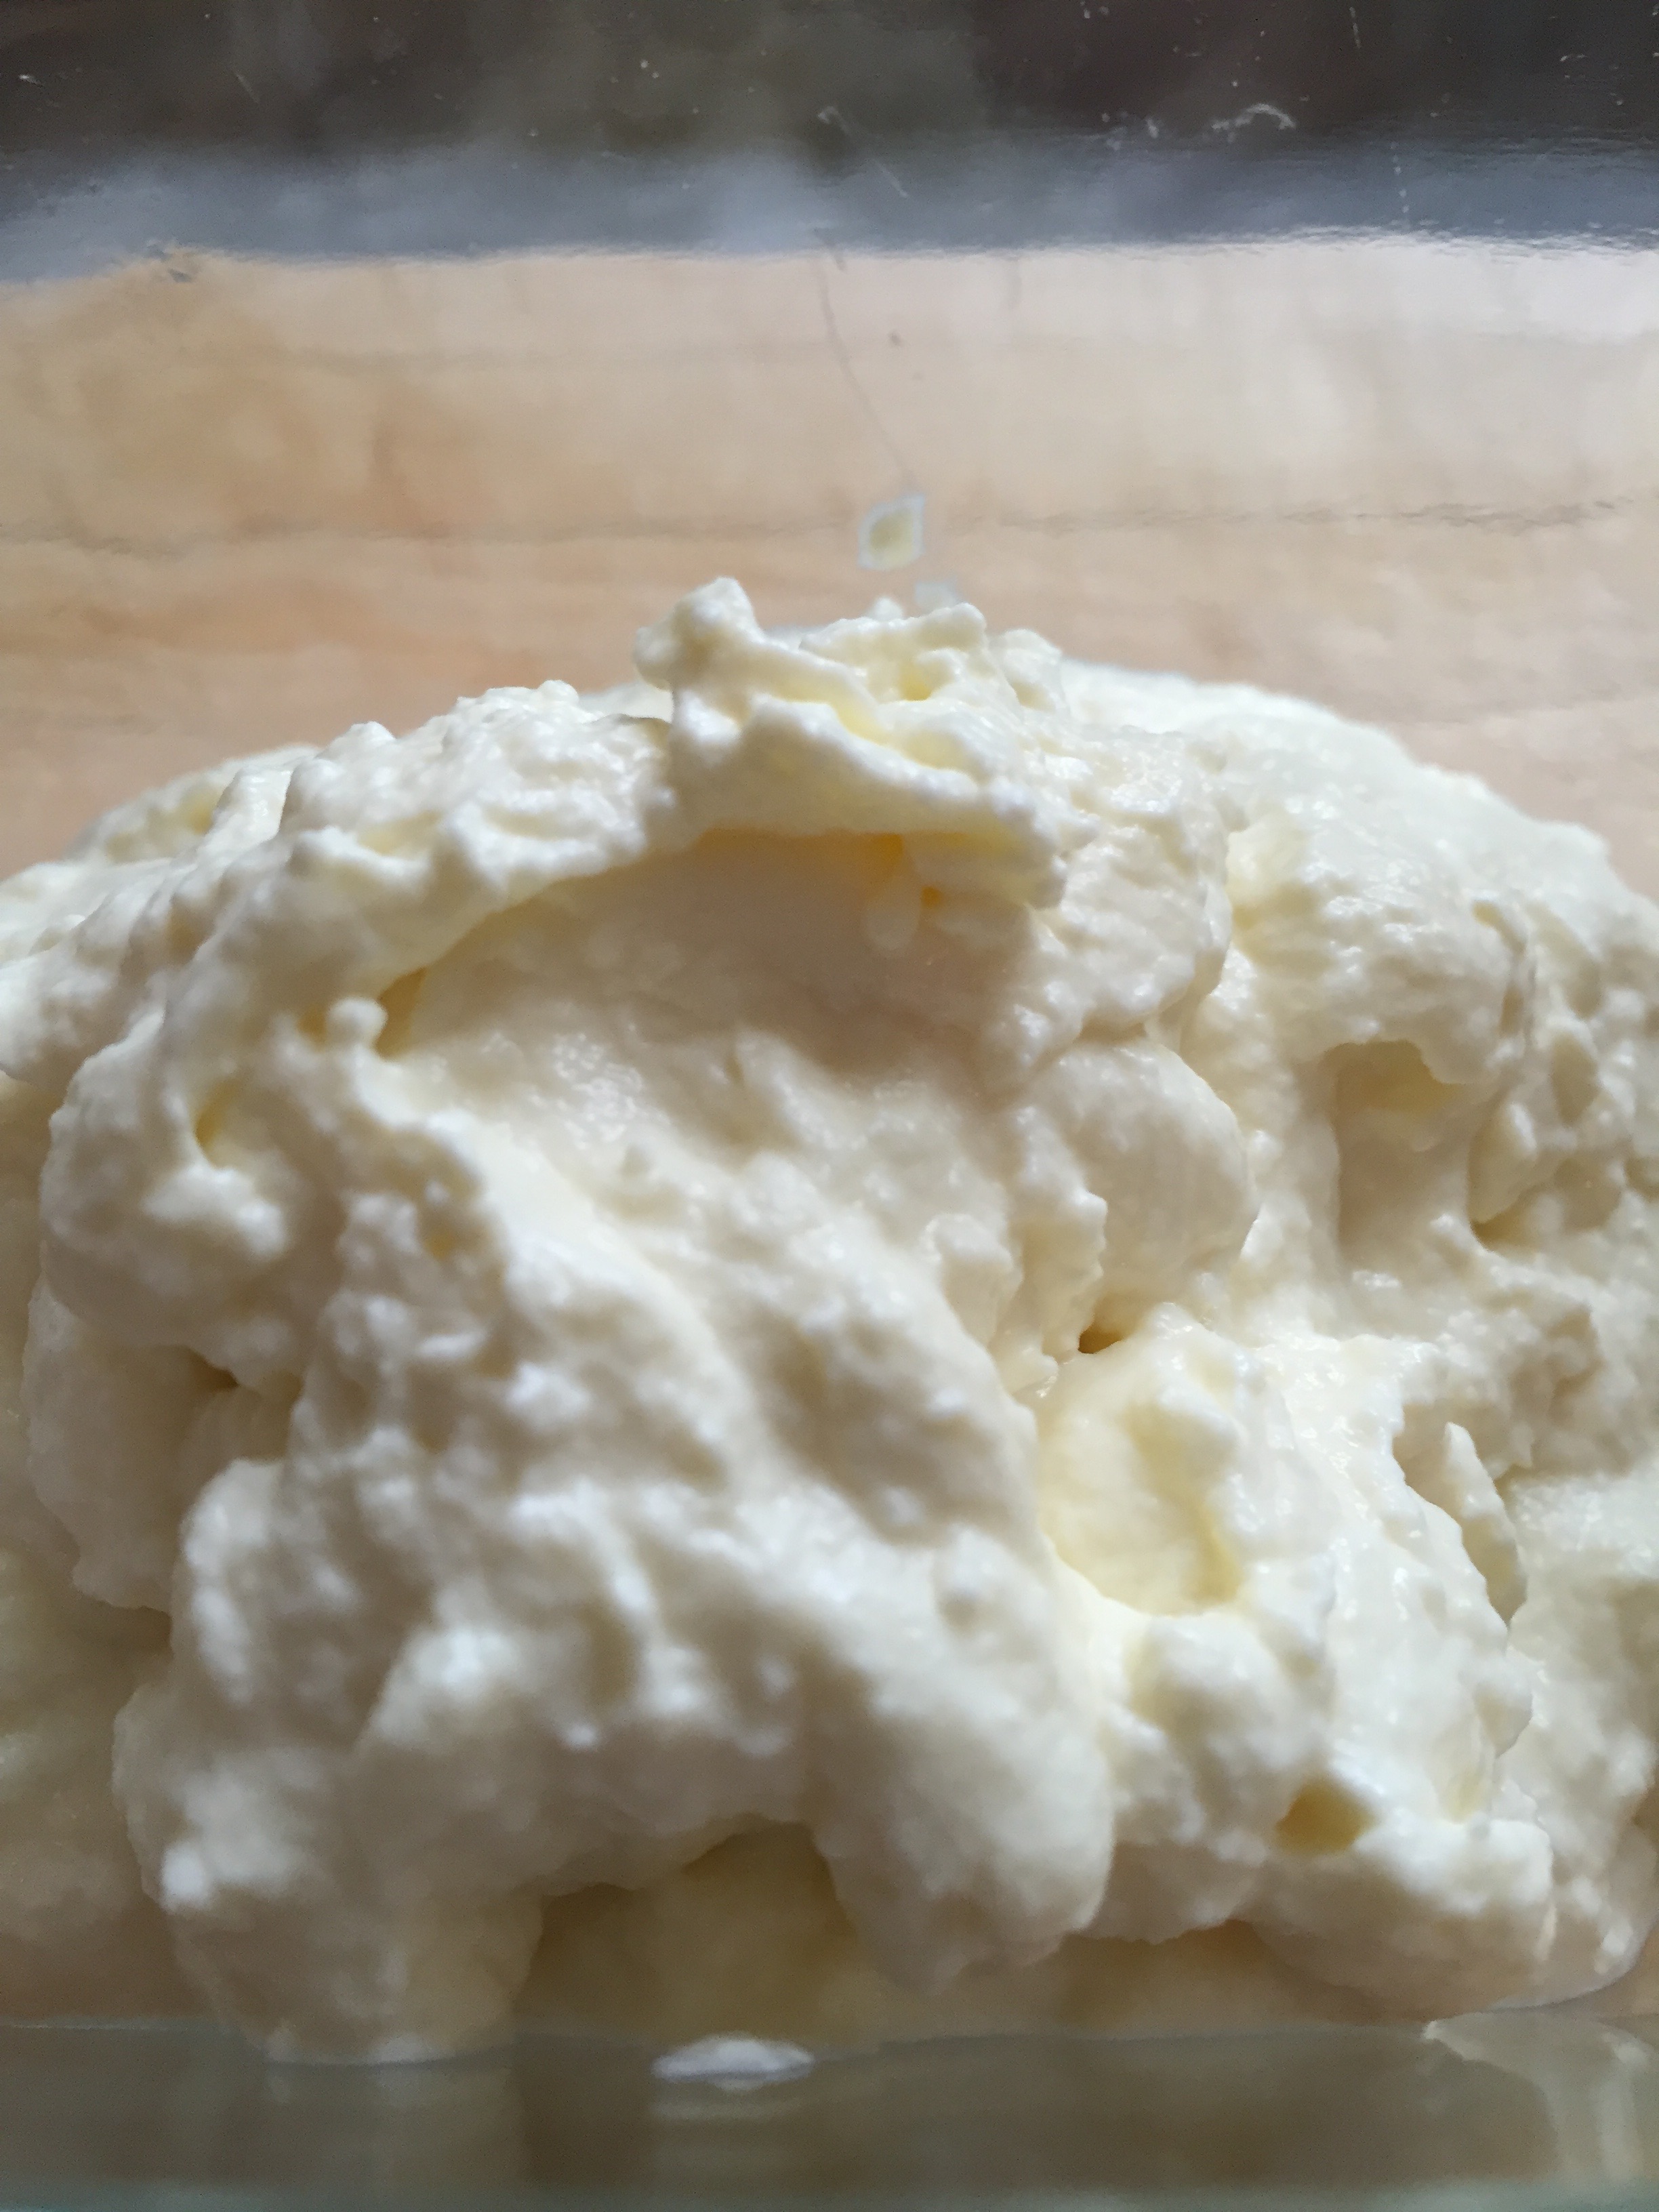
After 10 minutes, use a slotted spoon to transfer the curds to the cheesecloth lined sieve. Once the larger curds have been placed in the sieve, carefully pour the remaining curds/whey into the sieve. Let drain for at least 10 minutes, or until desired consistency is reached. The longer the ricotta drains, the firmer it will be.
Transfer to storage container and keep refrigerated until ready to use.
Enjoy as you would any ricotta, savory or sweet… in lasagna, ziti, cannoli, atop grilled bread, or just by the spoonful from the bowl!
Heat the milk and cream mixture to 180°.After adding the vinegar gently stir once or twice. Leave undisturbed for 10 minutes while the curds develop.After 10 minutes the vinegar has worked its magic. You have curds and whey!Using a slotted spoon, transfer the curds to a fine mesh strainer or cheesecloth lined sieve. Leave to drain for at least 10 minutes. The longer you leave the ricotta, the firmer it will be.20 minutes later…*Completely optional step* You could stop after draining the ricotta and enjoy as is, or for an extra creamy texture, give your freshly strained ricotta a very brief spin in a food processor.Freshly whipped ricottaSnip a few herbs to sprinkle on top of the whipped ricotta. Serve with slices of grilled bread for an easy appetizer or lunch.LunchBreakfast the next day…
I love vegetables, especially those I can cook quickly and simply. Shopping with the seasons in mind makes it easy to enjoy their flavors in their truest form… you don’t have to do much to a perfectly ripe, in season tomato, or green beans, or [insert your favorite vegetable of choice].
A typical July pick up at the farm.
Our town is home to a small organic farm and we are fortunate enough to belong to its CSA (Community Supported Agriculture); in the cold dark months of winter we pre-pay our local farm for a season’s worth of fruits, vegetables, and flowers. Here in our part of the world that means I pick up our weekly share beginning in June and go through October. Each pick up day is a little like Christmas morning… what is in my share this week? How much am I going to get? Since June, this season has brought greens of all sorts, lettuces, scallions, scapes, carrots, cabbage, cucumbers, kohlrabi, onions, garlic, beets, fennel, beans, herbs, and berries. With every pick up comes the happy challenge of how to use each of these gifts before next week’s share demands my attention and refrigerator space.
Part of a weekly pick up in July.
Unfortunately, there is a dark side. Because of the seasonality, the downside is that “you get what you get and you don’t get upset.” Words I’ve often said to my kids and lately, find myself repeating weekly as I pick up an every growing ration of zucchini. It’s the nature of the beast and we are in prime zucchini season. I’m sure you are seeing loads of zucchini too… in your CSA, at the farmer’s market, and at the supermarket.
Zucchini
Despite all my veggie love, zucchini is one that I could do without. It’s my personal kryptonite. I’m not sure why this is… I don’t recall any traumatic childhood dinner table incidents involving zucchini. Maybe it’s because it looks so much like a cucumber- and I love cucumber, so that I’m always disappointed by the false pretense, a poser. Maybe it’s the tendency to quickly turn to mush if left a minute too long on the stove, in a soup, or on the grill. In any case, I must accept that we are at peak zucchini season. Each passing week larger and larger quantities are appearing in my share, stretching my creativity, pushing me out of my zucchini comfort zone. Rising to the challenge, I’ve found a few ways to prepare this green monster so that I actually enjoy eating it. Zucchini season won’t last forever, by the time I’m ready to wave the white flag, or dishtowel in this case, it’s time will be done, replaced by one of my favorites- tomatoes. In the meanwhile, enjoy these easy and delicious takes on zucchini.
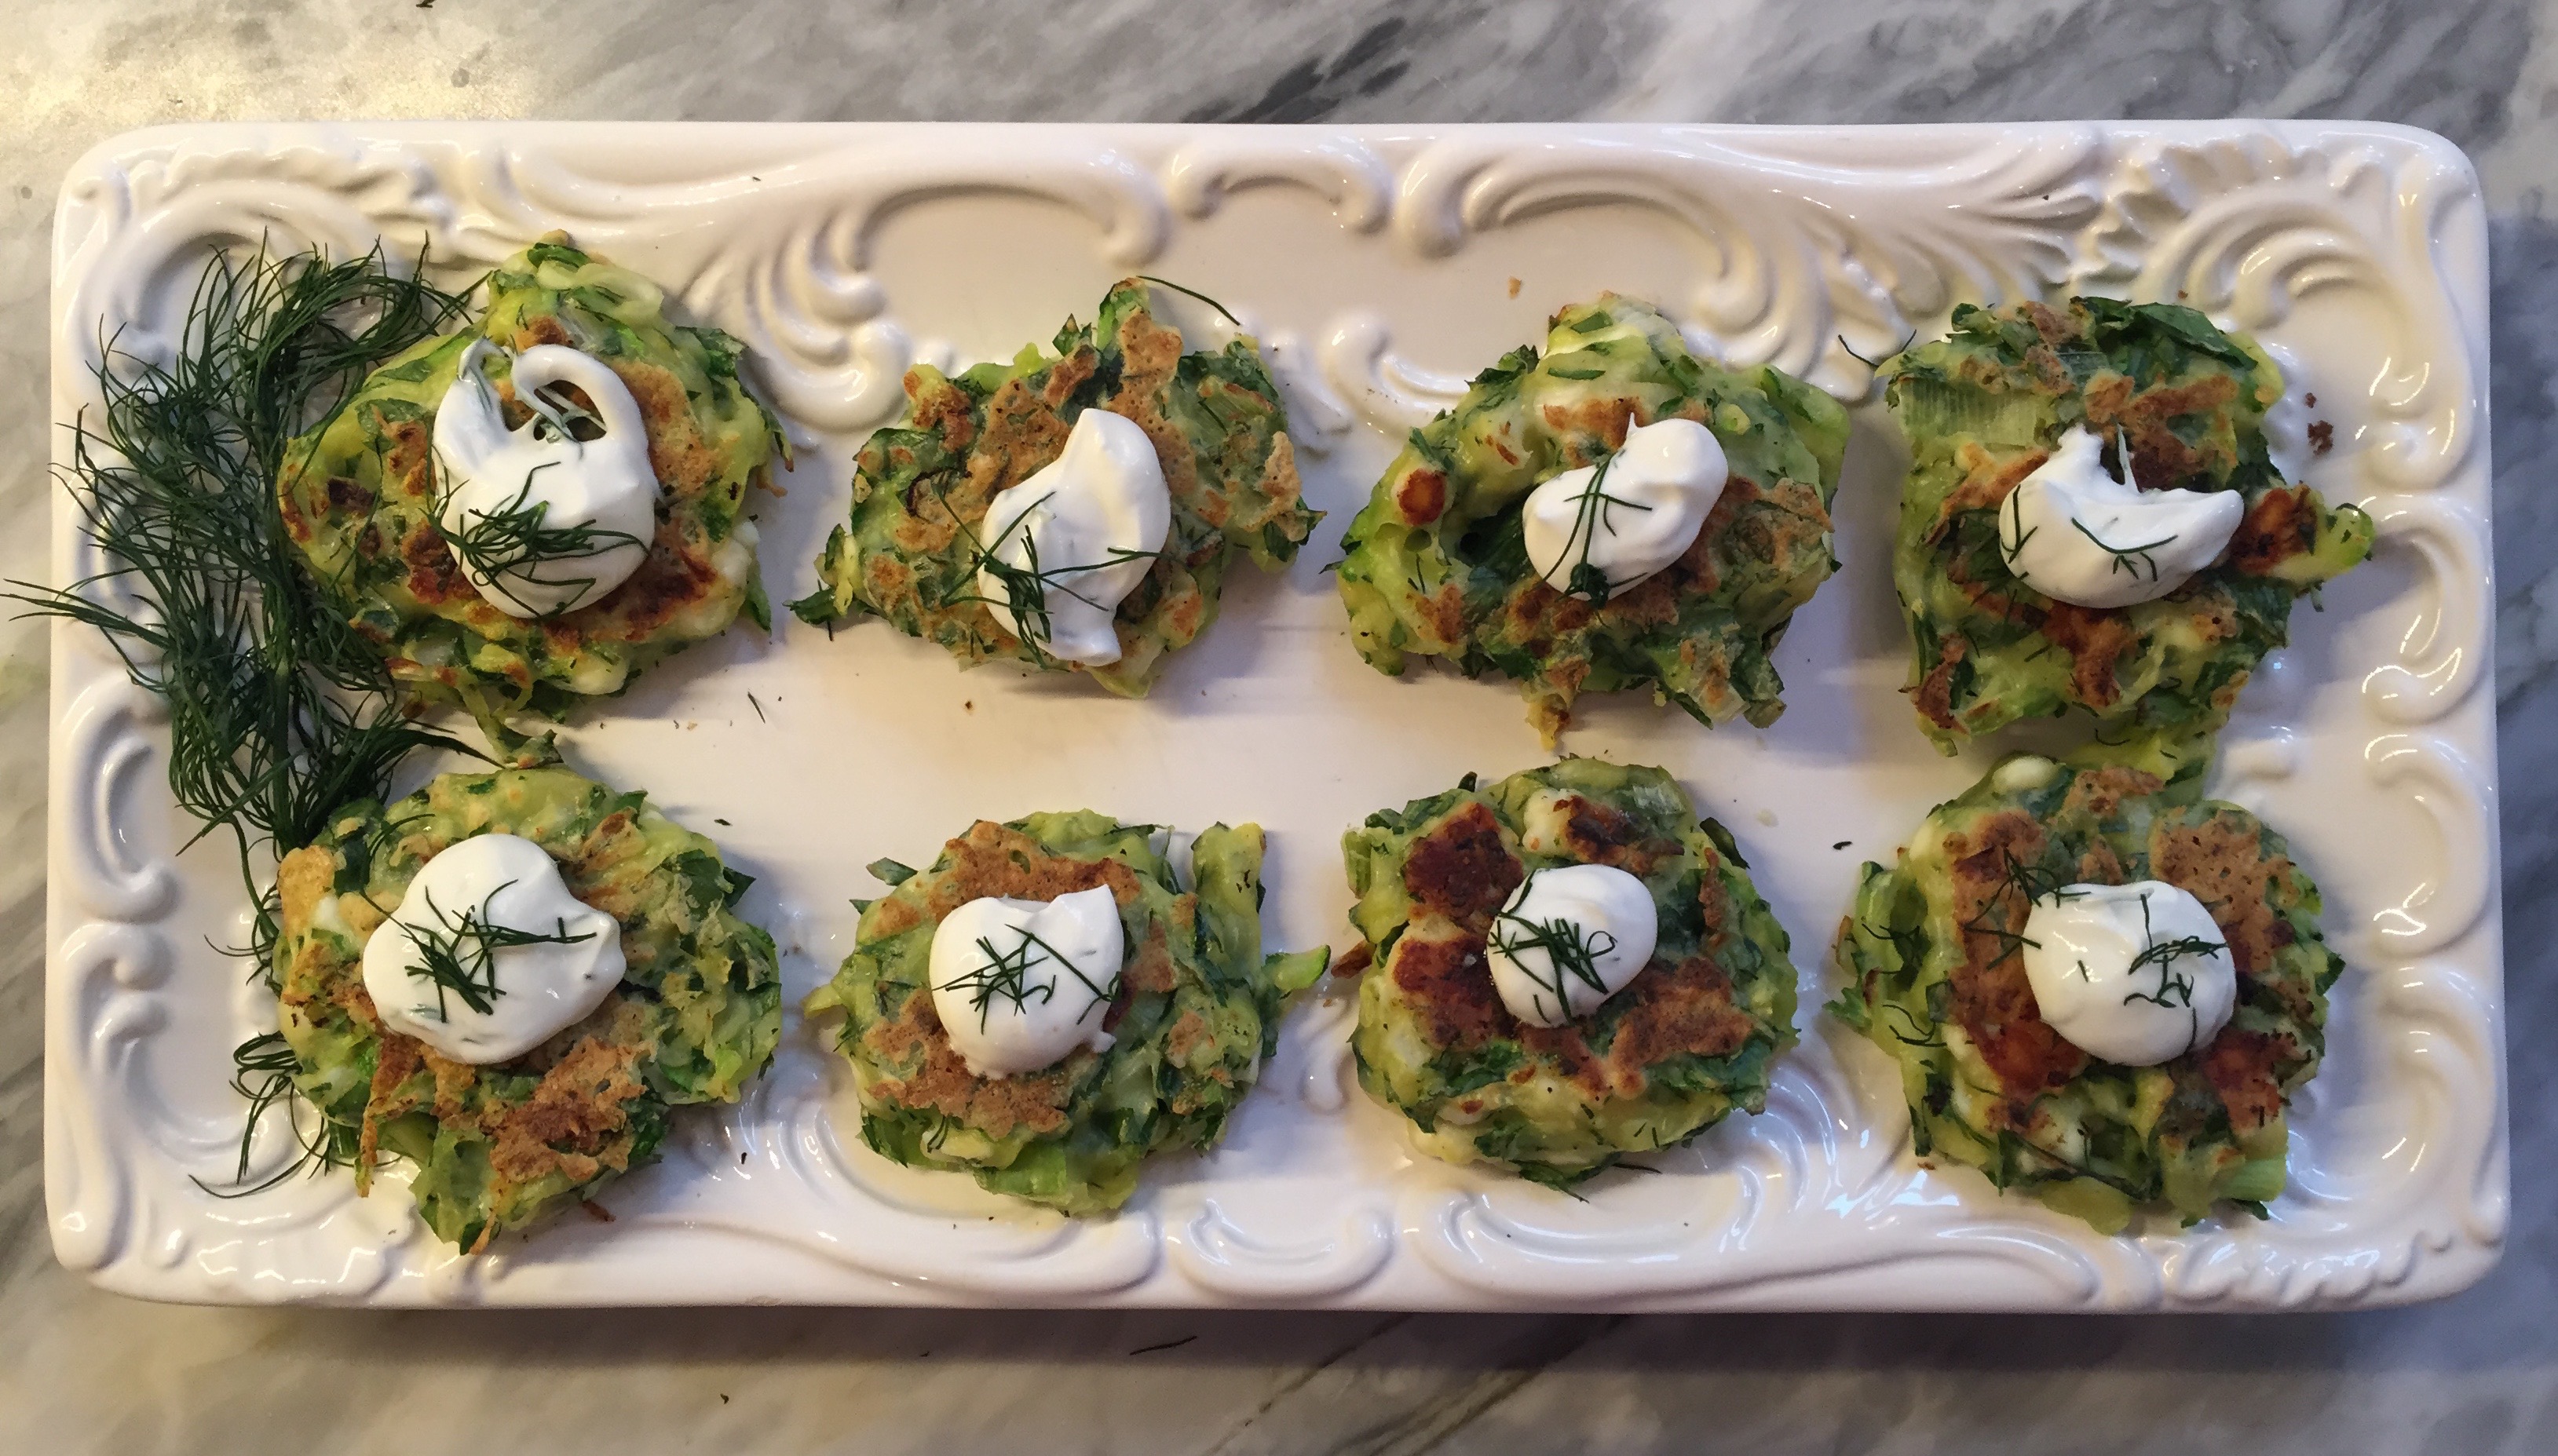
The Zucchini Fritters make excellent appetizers, sides, and stand on their own for lunch (or breakfast- eaten straight from the fridge!). You’ll find plenty of uses for the accompanying Tzatziki Sauce recipe. In addition to serving it with the fritters, I use it as a topping for meat- think lamb burgers and seafood, especially shrimp; use it as a dip for veggies or pita chips; spread it on naan, add the protein of your choice and some crunchy lettuce to build a delicious wrap. The Zucchini Carpaccio recipes are incredibly versatile, and take about 5 minutes to get on the table. I’ve given measurements, but please improvise according to your taste. There is no right or wrong! If you love lemon, use more lemon! Don’t like goat cheese and thyme? Use feta and oregano! Play with your food.
Please feel free to share your favorite ways of preparing zucchini. I’m always on the hunt for more tasty ideas.
Ingredients:
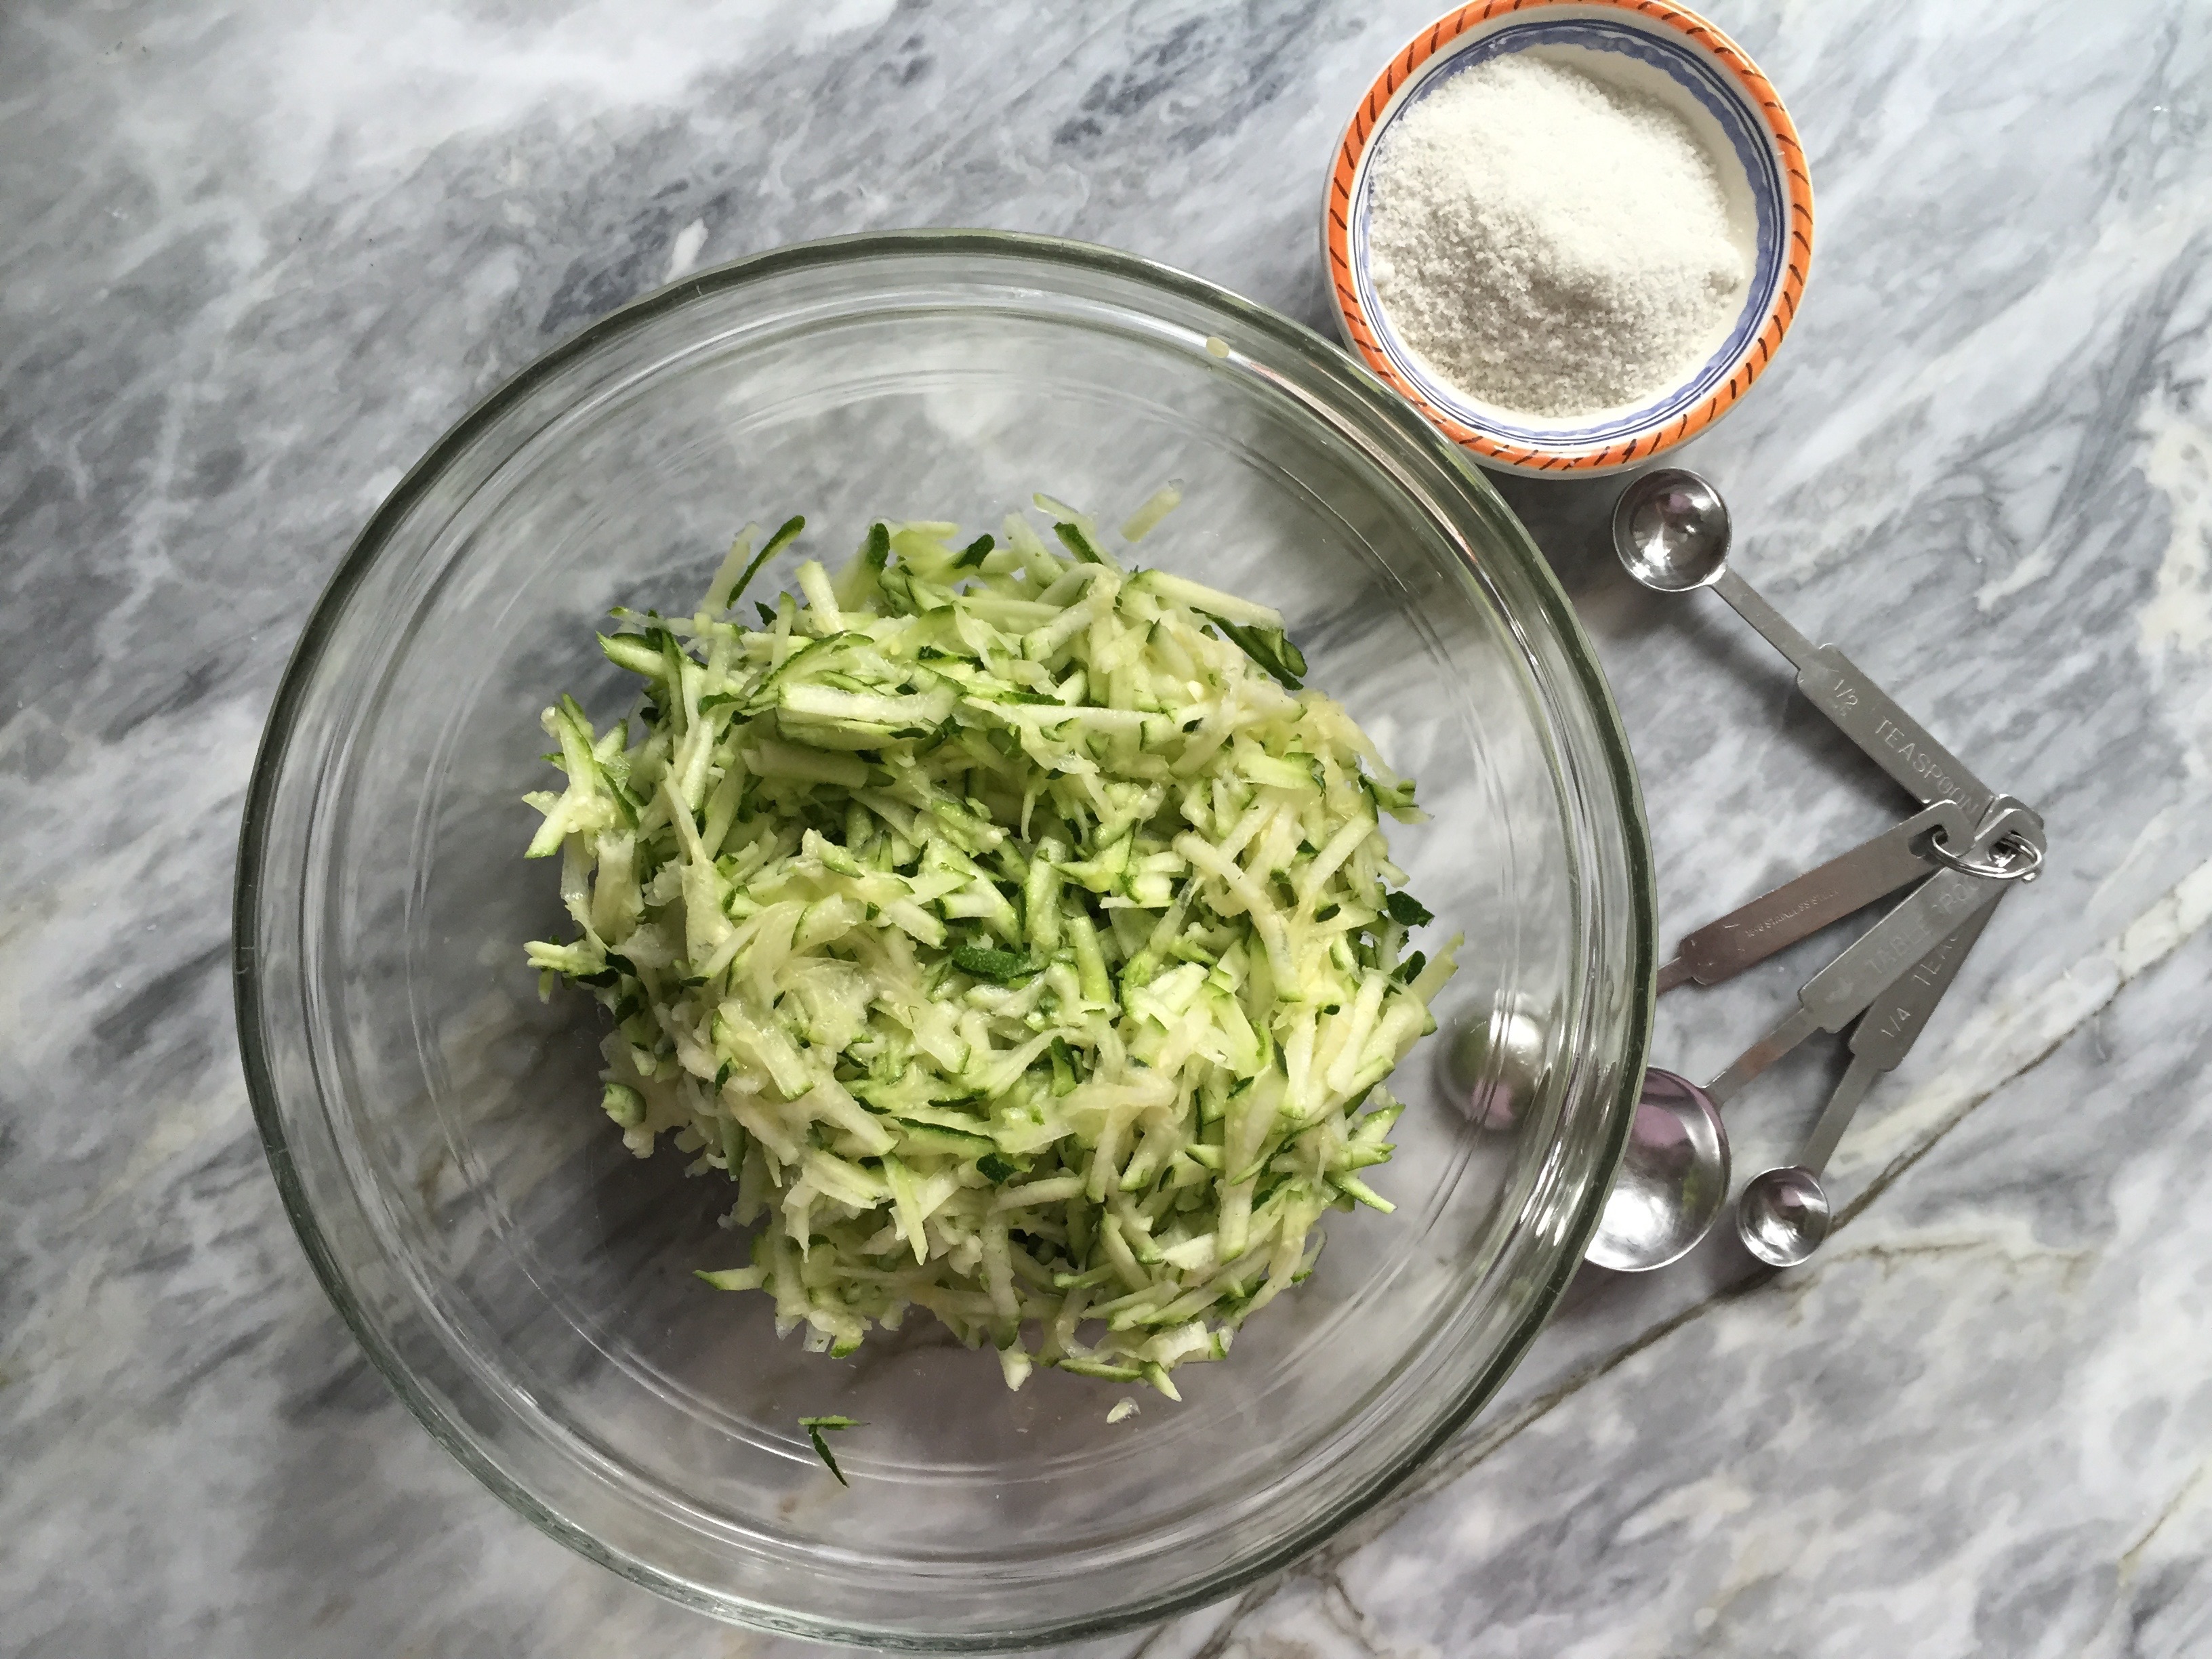
2 ½ cups coarsely grated zucchini (from about 3 medium)
1 teaspoon salt, divided
1 large egg
1 large egg yolk
½ cup (or more) all purpose flour
½ cup crumbled feta
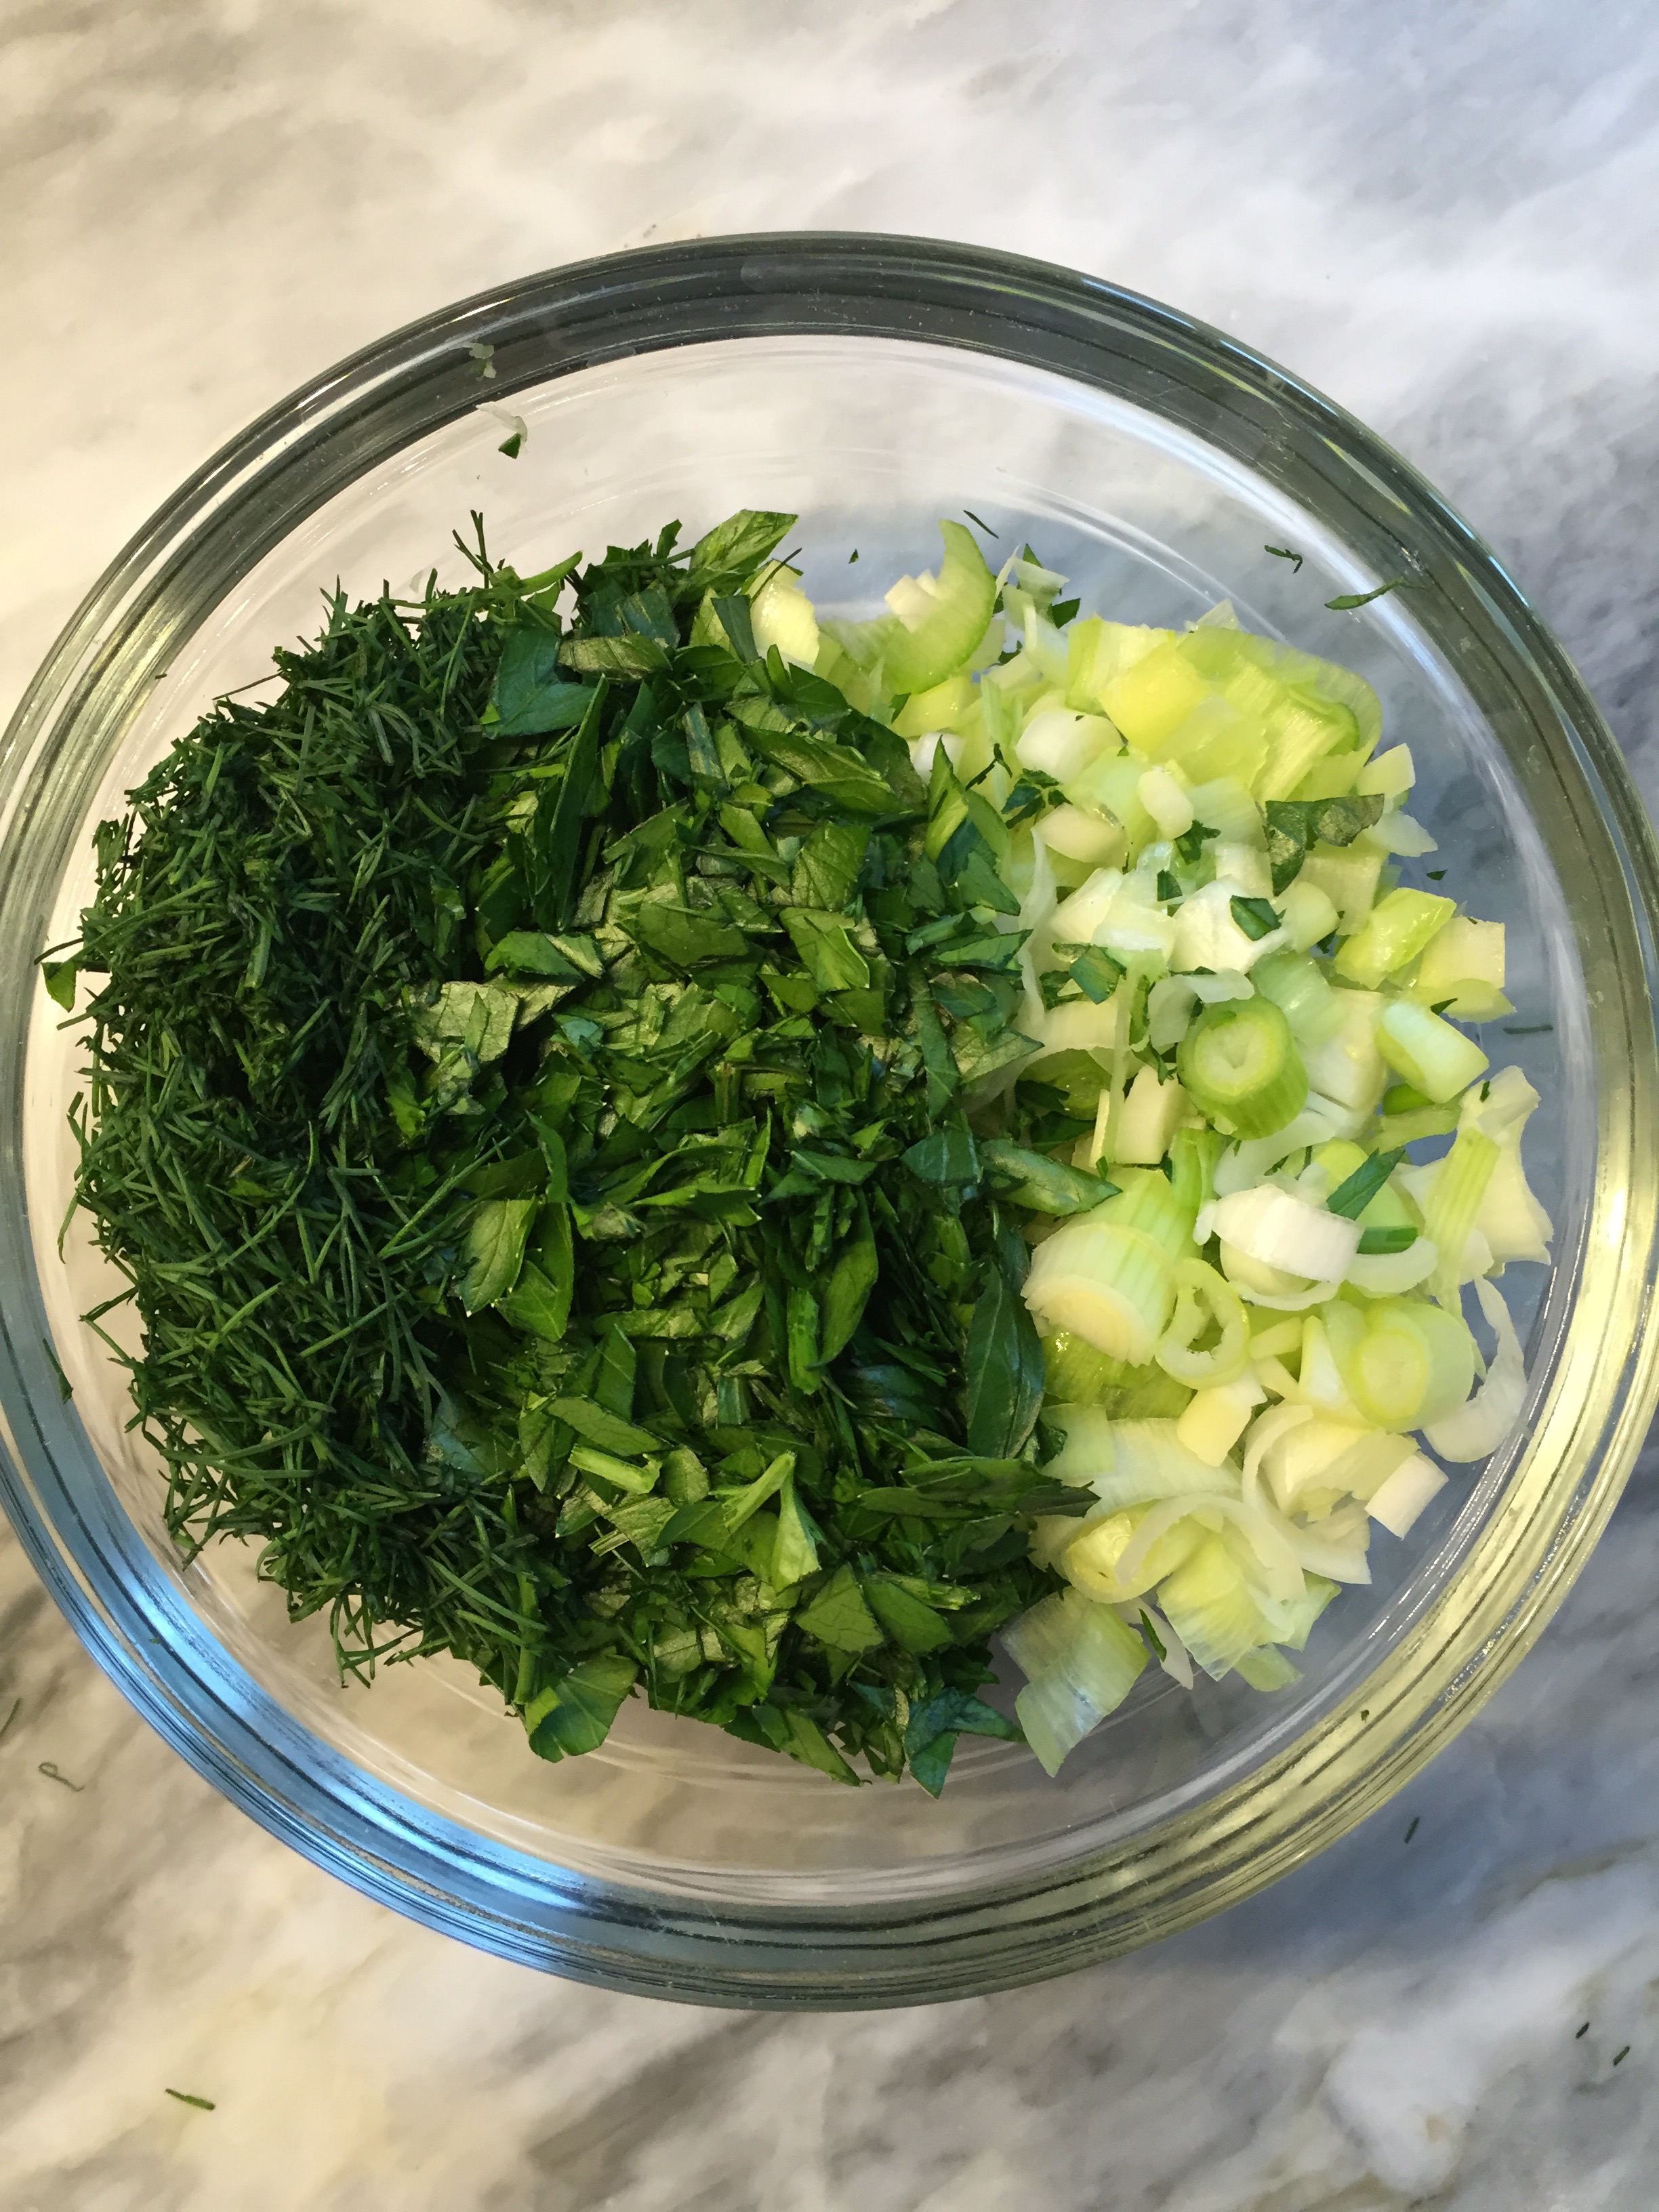
1 cup chopped fresh Italian parsley
½ cup chopped green onion
1 ½ Tablespoons chopped fresh dill
Tzatziki Sauce (recipe follows)
Preparation:
Toss zucchini in ½ teaspoon salt in a colander, place in the sink allowing the zucchini to “sweat.” Let stand for 5 minutes. Press out excess liquid; transfer zucchini to a dry bowl.
Mix in egg, yolk, ½ cup flour, cheese and remaining ½ teaspoon of salt. Mix in parsley, onions, and dill. If batter is very wet, add more flour by the spoonful.
Preheat a cast iron skillet or griddle* over medium high heat. Working in batches, drop batter by rounded tablespoons onto skillet. Cook fritters until golden, about 5 minutes per side.
Serve with tzatziki sauce or plain greek yogurt.
*Because seasoned cast iron is non-stick I didn’t need to use oil. If you are using a regular skillet, you will have to fry the patties in a mixture of 2 tablespoons of olive oil and 2 tablespoons of corn oil, adding more olive and corn oil as needed.
**Can be made 1 day ahead. Place on baking sheet, cover, and chill. Rewarm uncovered in 350° oven for 12 minutes.
After grating the zucchini, toss it with 1/2 tsp of salt. Set in a colander and place in the sink to let it “sweat.”Dill, parsley, and green onion prepped, chopped, and ready to go.Gently combine the grated zucchini, flour, egg, egg yolk, and feta.Add the herbs to the zucchini mixture.After gently incorporating the herbs with the zucchini mixture, the batter is ready.Drop batter by rounded tablespoons onto a preheated cast iron skillet or griddle.When the fritters are golden on one side, flip them. Cooking time is about 5 minutes per side.Serve the zucchini fritters with dollops of tzatziki or plain greek yogurt.
This sauce is a delicious multitasker. Serve it as a dip for vegetables, pita chips or wedges, grilled lamb, and the zucchini fritters.
Ingredients:
8 oz full fat greek yogurt
½ a hot house cucumber, cut lengthwise, seeded, quartered, and finely diced
2 Tablespoons lemon juice
1 Tablespoon chopped fresh dill
2 teaspoons extra-virgin olive oil
3/4 teaspoon minced garlic
1/2 teaspoon salt
Preparation:
Combine all ingredients in a bowl.
Serve immediately, or let it sit in the fridge to really let the flavors come together.
Combine the yogurt, cucumber, dill, lemon juice, extra-virgin olive oil, garlic, and salt. It really is that easy!Tzatziki Sauce with olives and pita wedges. Add the zucchini fritters and a glass of rosé … a perfect way to start a summer evening.
Zucchini Carpaccio with Parmesan, Pine Nuts, and Basil
Ingredients:
½ zucchini, any size
1 Tablespoon toasted pine nuts
1 teaspoon extra-virgin olive oil
½ teaspoon lemon juice
2 teaspoons chopped basil
parmesan shavings
salt and pepper to taste
Preparation:
Using a vegetable peeler, peel zucchini vertically into thin ribbons.
Toss with lemon juice and extra-virgin olive oil.
Top with parmesan curls, toasted pine nuts, and basil. Season to taste with salt and pepper. Serve immediately.
Zucchini ribbons tossed with parmesan, pine nuts, and fresh basil.
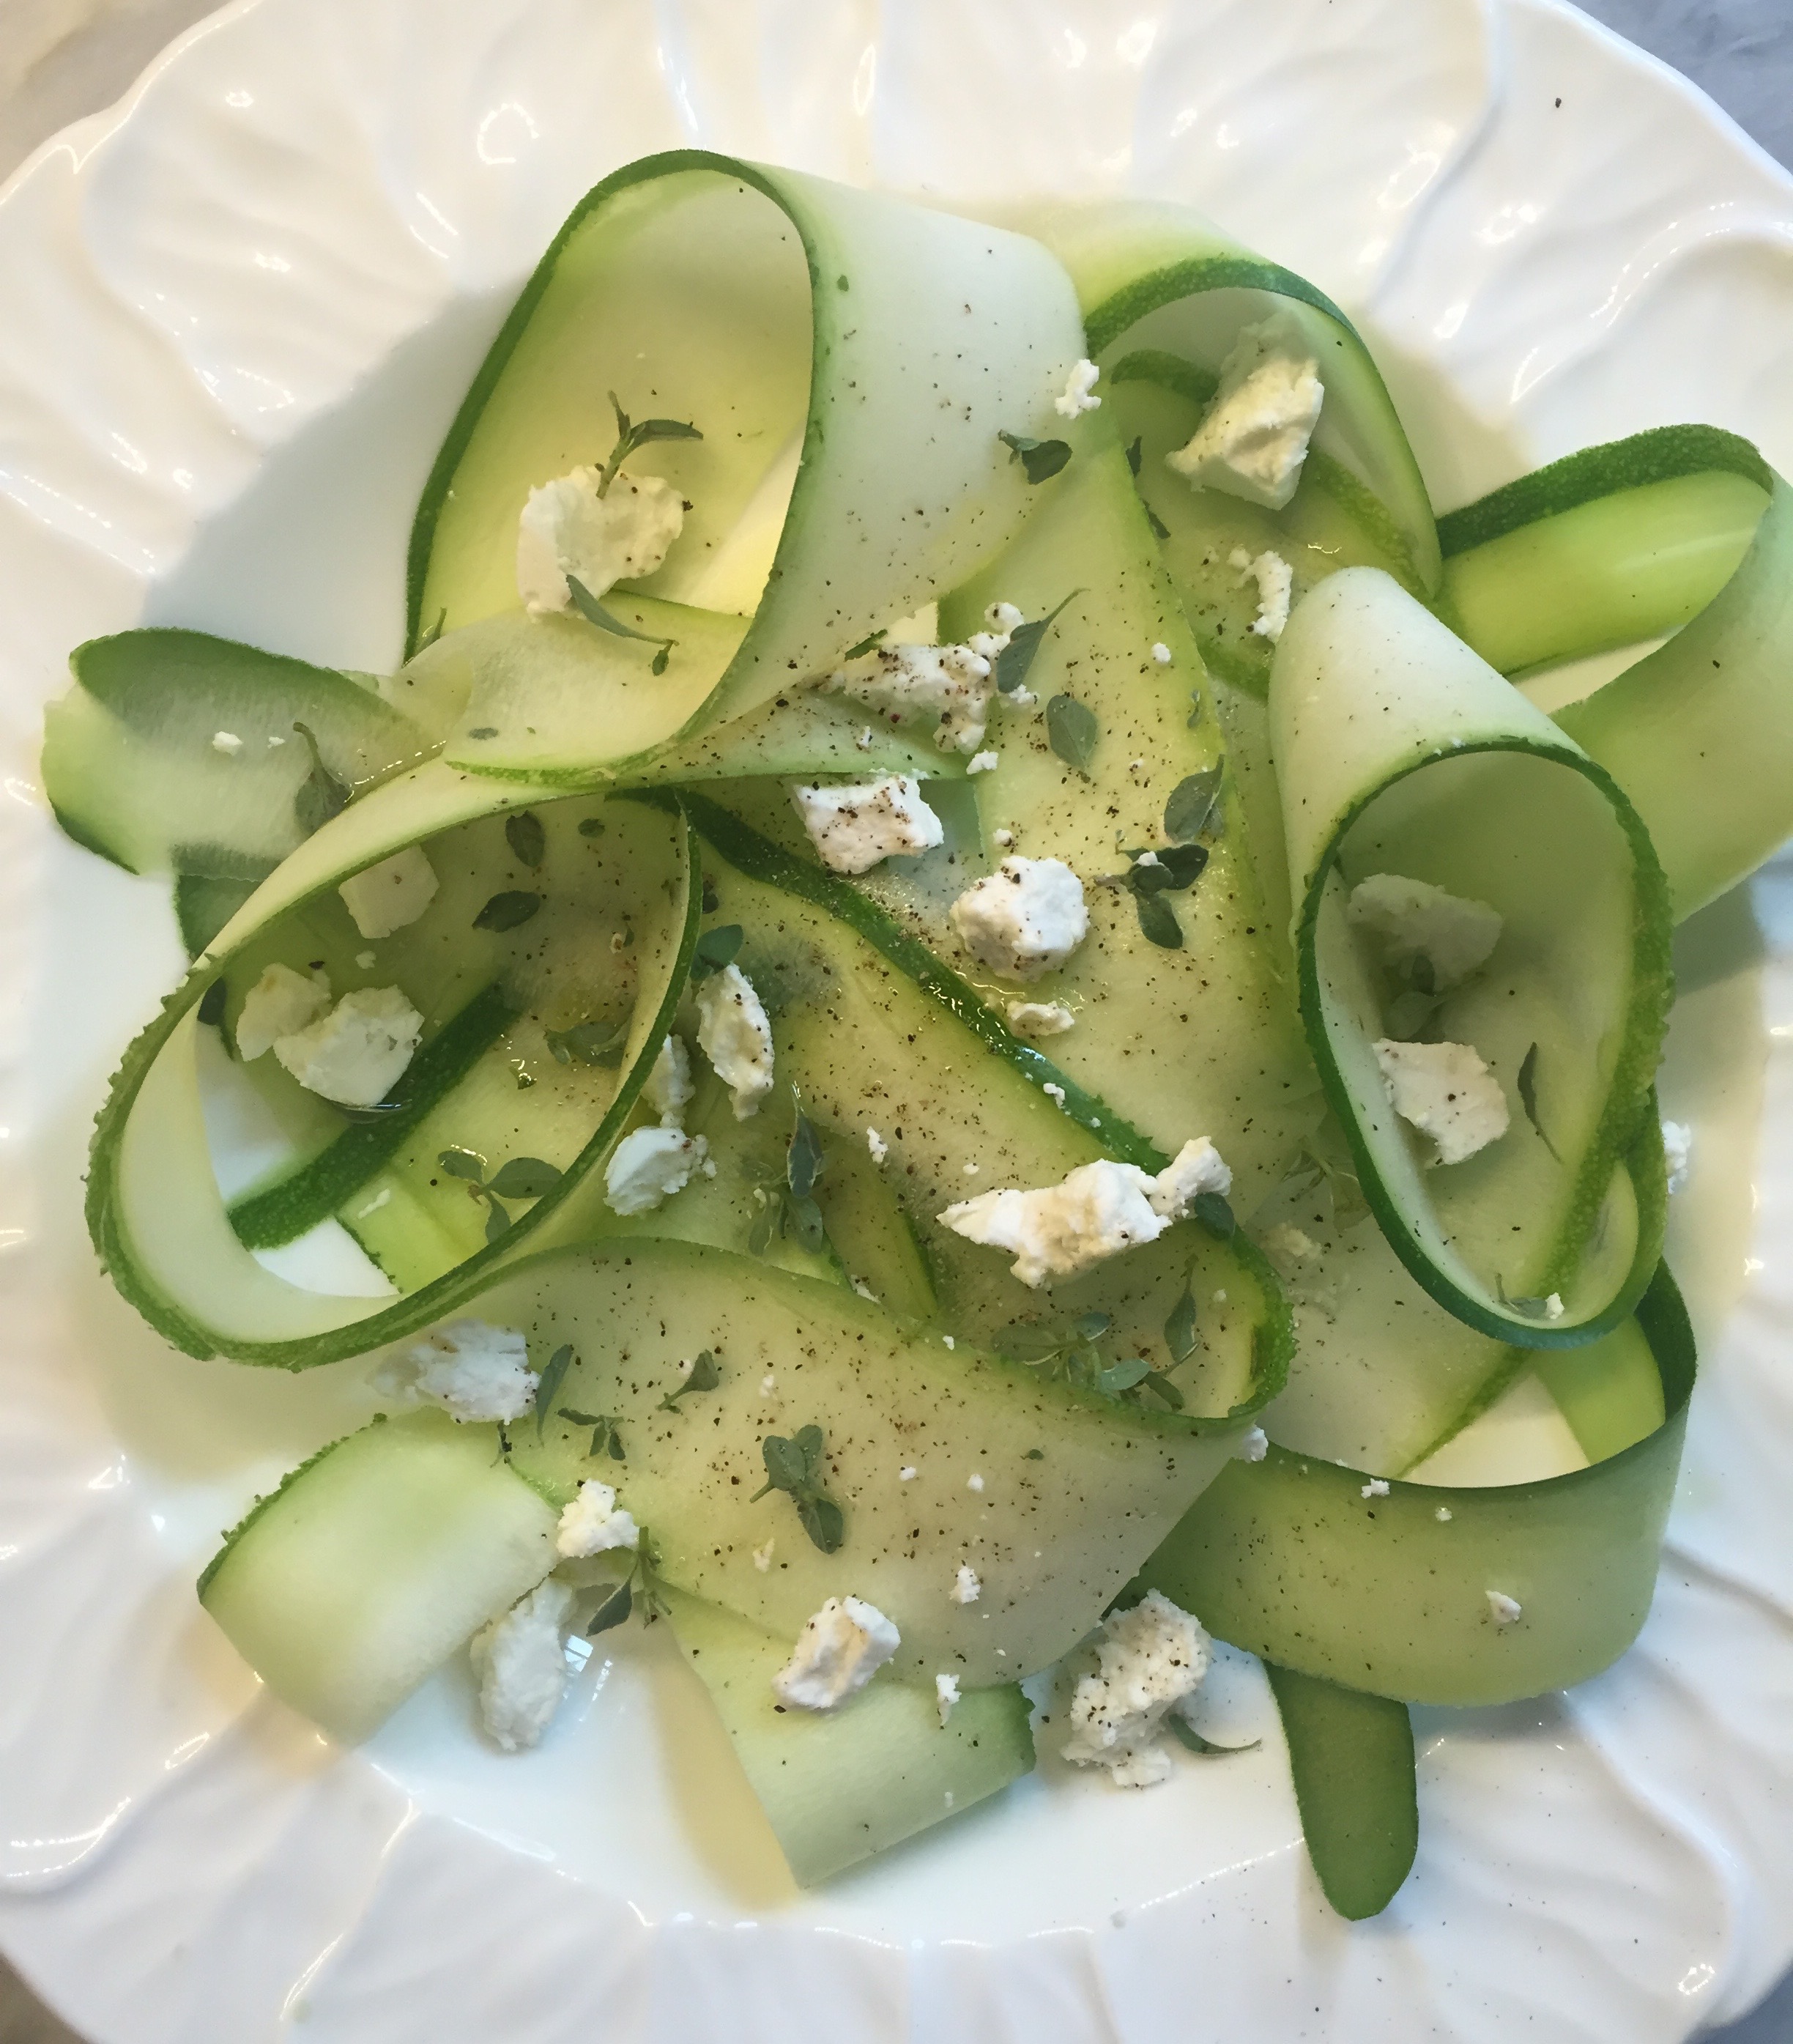
Ingredients:
½ zucchini, any size
2 Tablespoon crumbled goat cheese
1 teaspoon extra-virgin olive oil
½ teaspoon lemon juice
2 teaspoons fresh thyme leaves
salt and pepper to taste
Preparation:
Using a vegetable peeler, peel zucchini vertically into thin ribbons.
Toss with lemon juice and extra-virgin olive oil.
Top with crumbled goat cheese and fresh thyme. Season to taste with salt and pepper. Serve immediately.
Zucchini ribbons tossed with goat cheese and fresh thyme.